简介
使用SpringBoot创建定时任务非常简单,目前主要有以下三种创建方式:
- 一、基于注解(@Scheduled)
- 二、基于接口(SchedulingConfigurer)
前者相信大家都很熟悉,但是实际使用中我们往往想从数据库中读取指定时间来动态执行定时任务,这时候基于接口的定时任务就派上用场了。 - 三、基于注解设定多线程定时任务
一、基于注解(@Scheduled)
使用SpringBoot基于注解来创建定时任务非常简单,只需几行代码便可完成。
@Component@Configuration//主要用于标记配置类,兼备component的效果@EnableScheduling//开启定时任务publicclassStaticScheduleTask{@ResourceRealTimeMonitorServiceImpl realTimeMonitorService;//添加定时任务 4小时/4小时/4小时/@Scheduled(cron="0 0 0/4 * * ?")privatevoidconfigureTasks(){
        log.info("执行静态定时任务时间: "+LocalDateTime.now());}}
cronExpression定义时间规则,Cron表达式由6或7个空格分隔的时间字段组成:秒 分钟 小时 日期 月份 星期 年(可选)
| 字段 | 允许值 | 允许的特殊字符 |
|---|---|---|
| 秒 | 0-59 | , – * / |
| 分 | 0-59 | , – * / |
| 小时 | 0-23 | , – * / |
| 日期 | 1-31 | , – * ? / L W C |
| 月份 | 1-12 | , – * / |
| 星期 | 1-7 | , – * ? / L C # |
| 年 | 1970-2099 | , – * / |
二、基于接口(SchedulingConfigurer)
1.Pom配置
<parent><groupId>org.springframework.boot</groupId><artifactId>spring-boot-starter</artifactId><version>2.0.4.RELEASE</version></parent><dependencies><dependency><!--添加Web依赖 --><groupId>org.springframework.boot</groupId><artifactId>spring-boot-starter-web</artifactId></dependency><dependency><!--添加MySql依赖 --><groupId>mysql</groupId><artifactId>mysql-connector-java</artifactId></dependency><dependency><!--添加Mybatis依赖 配置mybatis的一些初始化的东西--><groupId>org.mybatis.spring.boot</groupId><artifactId>mybatis-spring-boot-starter</artifactId><version>1.3.1</version></dependency><dependency><!-- 添加mybatis依赖 --><groupId>org.mybatis</groupId><artifactId>mybatis</artifactId><version>3.4.5</version><scope>compile</scope></dependency></dependencies>2.添加数据库记录, 开启本地数据库mysql,随便打开查询窗口,然后执行脚本内容,如下
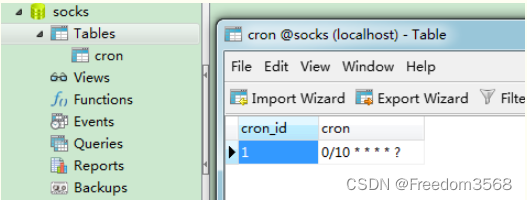
DROPDATABASEIFEXISTS`socks`;CREATEDATABASE`socks`;USE`SOCKS`;DROPTABLEIFEXISTS`cron`;CREATETABLE`cron`(`cron_id`varchar(30)NOTNULLPRIMARYKEY,`cron`varchar(30)NOTNULL);INSERTINTO`cron`VALUES('1','0/5 * * * * ?');数据库截图:
3.Application.yml 配置
spring:datasource:url: jdbc:mysql://localhost:3306/socksusername: rootpassword:1234564.创建定时器
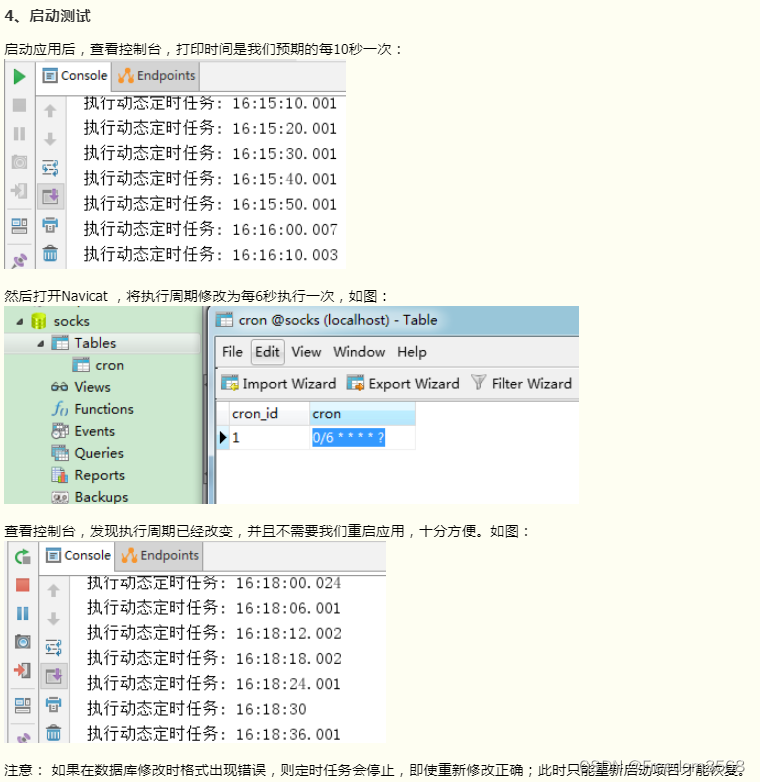
数据库准备好数据之后,我们编写定时任务,注意这里添加的是TriggerTask,目的是循环读取我们在数据库设置好的执行周期,以及执行相关定时任务的内容。
@Component@Configuration//1.主要用于标记配置类,兼备Component的效果。@EnableScheduling// 2.开启定时任务publicclassDynamicScheduleTaskimplementsSchedulingConfigurer{@MapperpublicinterfaceCronMapper{@Select("select cron from cron limit 1")publicStringgetCron();}@Autowired//注入mapper@SuppressWarnings("all")CronMapper cronMapper;/**
     * 执行定时任务.
     */@OverridepublicvoidconfigureTasks(ScheduledTaskRegistrar taskRegistrar){

        taskRegistrar.addTriggerTask(//1.添加任务内容(Runnable)()->System.out.println("执行动态定时任务: "+LocalDateTime.now().toLocalTime()),//2.设置执行周期(Trigger)
                triggerContext->{//2.1 从数据库获取执行周期String cron= cronMapper.getCron();//2.2 合法性校验.if(StringUtils.isEmpty(cron)){// Omitted Code ..}//2.3 返回执行周期(Date)returnnewCronTrigger(cron).nextExecutionTime(triggerContext);});}}
5.测试
多线程定时任务
基于注解设定多线程定时任务
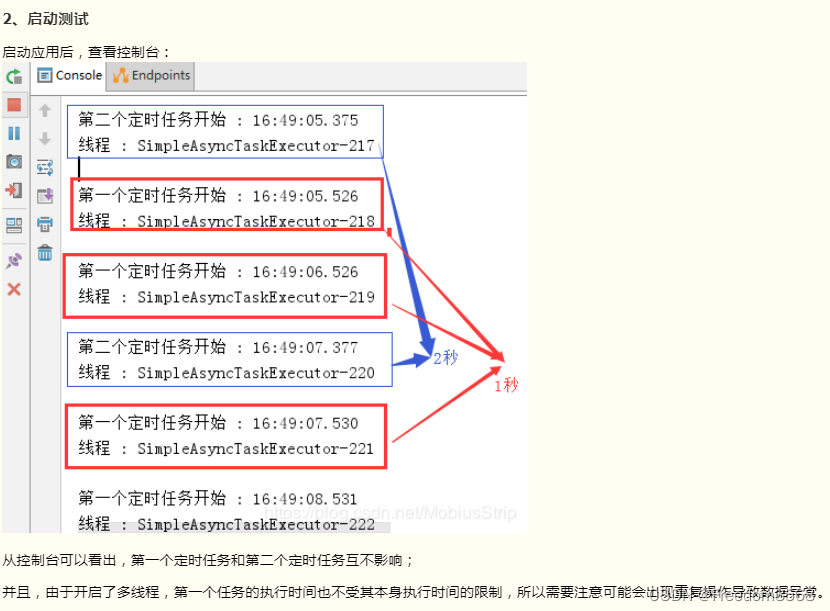
//@Component注解用于对那些比较中立的类进行注释;//相对与在持久层、业务层和控制层分别采用 @Repository、@Service 和 @Controller 对分层中的类进行注释@Component@EnableScheduling// 1.开启定时任务@EnableAsync// 2.开启多线程publicclassMultithreadScheduleTask{@Async@Scheduled(fixedDelay=1000)//间隔1秒publicvoidfirst()throwsInterruptedException{System.out.println("第一个定时任务开始 : "+LocalDateTime.now().toLocalTime()+"\r\n线程 : "+Thread.currentThread().getName());System.out.println();Thread.sleep(1000*10);}@Async@Scheduled(fixedDelay=2000)publicvoidsecond(){System.out.println("第二个定时任务开始 : "+LocalDateTime.now().toLocalTime()+"\r\n线程 : "+Thread.currentThread().getName());System.out.println();}}
总结
其他: https://github.com/mmzsblog/springboot-schedule
正文完