1.介绍
QTimer是一个定时器,设定定时器可以定时调用函数,如果想要调用定时器来定时调用函数,我们需要先了解一下必要的实例方法
2.使用QTimer的简单流程如下
首先先创建一个QTimer对象–>通过QTimer中的start方法让它开始计时(start方法可以设定定时运行的时间)–>每当计时的时间超过了给定的时间后,就会调用一次timeout.connect(xx)中的xx函数–>使用完后调用stop方法关闭计时器
3.详细流程
这里我们设计这样一个项目,通过点击button来开始计时。我们创建一个编辑定义类,来对用Qtdesigner创建好的UI界面进行编辑
- Qtdesigner与底层代码分开实现的模板:pyqt中代码与qtdesigner如何分离编写代码

(1)先建立好一个简单的编辑定义类,继承UI界面
classEdit(Ui_Form, QWidget):# 定义初始化进程def__init__(self):# 继承super().__init__()# 往空QWidget中放置UI内容
        self.setupUi(self)#初始化各种功能
        self.init()# 初始化各种功能definit(self):passif __name__=='__main__':
    app= QApplication(sys.argv)
    myshow= Edit()
    myshow.show()
    sys.exit(app.exec_())
(2)在init方法中创建Qtimer对象
# 初始化各种功能definit(self):# 创建一个QTimer对象
        self.send_time= QTimer(self)
(3)将button事件连接QTimer开始计时事件
# 初始化各种功能definit(self):# 创建一个QTimer对象
        self.send_time= QTimer(self)# QTimer开始计时
        self.pushButton_start.clicked.connect(self.beginShowTime)defbeginShowTime(self):# 设置QTimer开始计时,且设定时间为1000ms
        self.send_time.start(1000)
(3)设置需要周期性运行的内容
# 初始化各种功能definit(self):# 创建一个QTimer对象
        self.send_time= QTimer(self)# QTimer开始计时
        self.pushButton_start.clicked.connect(self.beginShowTime)# 给QTimer设定一个时间,每到达这个时间一次就会调用一次该方法
        self.send_time.timeout.connect(self.showTime)'''方法实现区'''defbeginShowTime(self):# 设置QTimer开始计时,且设定时间为1000ms
        self.send_time.start(1000)# 显示时间的方法defshowTime(self):# 获取系统当前时间
        time= QDateTime.currentDateTime()# 设置系统时间的显示格式
        self.timeDisplay= time.toString('yyyy-MM-dd hh:mm:ss dddd')# 在标签上显示时间
        self.label_nowTime.setText(self.timeDisplay)
(4)用另外一个按键来关闭计时器
# 初始化各种功能definit(self):# 创建一个QTimer对象
        self.send_time= QTimer(self)# QTimer开始计时
        self.pushButton_start.clicked.connect(self.beginShowTime)# 给QTimer设定一个时间,每到达这个时间一次就会调用一次该方法
        self.send_time.timeout.connect(self.showTime)# QTimer关闭计时
        self.pushButton_stop.clicked.connect(self.stop)'''方法实现区'''defbeginShowTime(self):# 设置QTimer开始计时,且设定时间为1000ms
        self.send_time.start(1000)# 显示时间的方法defshowTime(self):# 获取系统当前时间
        time= QDateTime.currentDateTime()# 设置系统时间的显示格式
        self.timeDisplay= time.toString('yyyy-MM-dd hh:mm:ss dddd')# 在标签上显示时间
        self.label_nowTime.setText(self.timeDisplay)defstop(self):
        self.send_time.stop()
整个逻辑实现完之后,整体逻辑实现类的框架就是这样子的
from PyQt5.QtCoreimport QTimer, QDateTimefrom PyQt5import QtCore, QtWidgetsfrom PyQt5.QtWidgetsimport QWidget, QApplicationimport sysclassEdit(Ui_Form, QWidget):# 定义初始化进程def__init__(self):# 继承super().__init__()# 往空QWidget中放置UI内容
        self.setupUi(self)#初始化各种功能
        self.init()# 初始化各种功能definit(self):# 创建一个QTimer对象
        self.send_time= QTimer(self)# QTimer开始计时
        self.pushButton_start.clicked.connect(self.beginShowTime)# 给QTimer设定一个时间,每到达这个时间一次就会调用一次该方法
        self.send_time.timeout.connect(self.showTime)# QTimer关闭计时
        self.pushButton_stop.clicked.connect(self.stop)'''方法实现区'''defbeginShowTime(self):# 设置QTimer开始计时,且设定时间为1000ms
        self.send_time.start(1000)# 显示时间的方法defshowTime(self):# 获取系统当前时间
        time= QDateTime.currentDateTime()# 设置系统时间的显示格式
        self.timeDisplay= time.toString('yyyy-MM-dd hh:mm:ss dddd')# 在标签上显示时间
        self.label_nowTime.setText(self.timeDisplay)defstop(self):
        self.send_time.stop()if __name__=='__main__':
    app= QApplication(sys.argv)
    myshow= Edit()
    myshow.show()
    sys.exit(app.exec_())
在加上Qtdesigner生成的代码
classUi_Form(object):defsetupUi(self, Form):
        Form.setObjectName("Form")
        Form.resize(400,300)
        self.pushButton_start= QtWidgets.QPushButton(Form)
        self.pushButton_start.setGeometry(QtCore.QRect(50,100,131,28))
        self.pushButton_start.setObjectName("pushButton_start")
        self.label= QtWidgets.QLabel(Form)
        self.label.setGeometry(QtCore.QRect(50,180,72,15))
        self.label.setObjectName("label")
        self.label_nowTime= QtWidgets.QLabel(Form)
        self.label_nowTime.setGeometry(QtCore.QRect(130,180,251,16))
        self.label_nowTime.setText("")
        self.label_nowTime.setObjectName("label_nowTime")
        self.pushButton_stop= QtWidgets.QPushButton(Form)
        self.pushButton_stop.setGeometry(QtCore.QRect(220,100,121,28))
        self.pushButton_stop.setObjectName("pushButton_stop")

        self.retranslateUi(Form)
        QtCore.QMetaObject.connectSlotsByName(Form)defretranslateUi(self, Form):
        _translate= QtCore.QCoreApplication.translate
        Form.setWindowTitle(_translate("Form","Form"))
        self.pushButton_start.setText(_translate("Form","开启定时调用"))
        self.label.setText(_translate("Form","显示时间:"))
        self.pushButton_stop.setText(_translate("Form","关闭定时调用"))from PyQt5.QtCoreimport QTimer, QDateTimefrom PyQt5import QtCore, QtWidgetsfrom PyQt5.QtWidgetsimport QWidget, QApplicationimport sysclassEdit(Ui_Form, QWidget):# 定义初始化进程def__init__(self):# 继承super().__init__()# 往空QWidget中放置UI内容
        self.setupUi(self)#初始化各种功能
        self.init()# 初始化各种功能definit(self):# 创建一个QTimer对象
        self.send_time= QTimer(self)# QTimer开始计时
        self.pushButton_start.clicked.connect(self.beginShowTime)# 给QTimer设定一个时间,每到达这个时间一次就会调用一次该方法
        self.send_time.timeout.connect(self.showTime)# QTimer关闭计时
        self.pushButton_stop.clicked.connect(self.stop)'''方法实现区'''defbeginShowTime(self):# 设置QTimer开始计时,且设定时间为1000ms
        self.send_time.start(1000)# 显示时间的方法defshowTime(self):# 获取系统当前时间
        time= QDateTime.currentDateTime()# 设置系统时间的显示格式
        self.timeDisplay= time.toString('yyyy-MM-dd hh:mm:ss dddd')# 在标签上显示时间
        self.label_nowTime.setText(self.timeDisplay)defstop(self):
        self.send_time.stop()if __name__=='__main__':
    app= QApplication(sys.argv)
    myshow= Edit()
    myshow.show()
    sys.exit(app.exec_())
现在就可以定时的查看时间了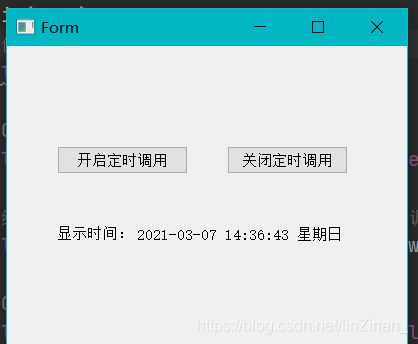
注意事项
1.在用Qtdesigner编辑代码的时候,控件的名称需要见名知意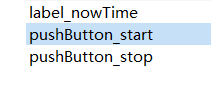
4.QTimer的替代解决方案
起始,如果不使用QTimer,也可以直接只用一个死循环加上定时time.sleep来实现的,只需要多开一个线程给它就ok