项目中我们对于不易改动的信息没必要每次都去数据库查询,可以将查询结果放入缓存中,第二次调用时,直接在缓存中获取,不再经过数据库
1:配置cacheManager类
@EnableCaching
@Configuration
public class CacheConfig {

    @Bean
    public ConcurrentMapCacheManager cacheManager() {
        ConcurrentMapCacheManager cacheManager = new ConcurrentMapCacheManager();
        //cacheManager.setStoreByValue(true); //true表示缓存一份副本,否则缓存引用
        return cacheManager;
    }

}
2:controller层代码:
@Cacheable(cacheNames = "studentCache", key = "#id")
@GetMapping("/get/one")
@ApiOperation(value="查询单条记录",notes = "查询")
//@ApiImplicitParam(name="id",defaultValue ="", value = "主键id",required = true,dataType ="Integer" )
public Student getOneInfo(@RequestParam(value = "id",defaultValue = "")@ApiParam(value="主键id") Integer id){
    Student student=null;
    try {
        //int i=1/0;
        Date date=new Date();
        System.out.println("进行了查询---》"+ date.getTime());
        student= studentService.selectOne(id);
    } catch (Exception e) {
        throw ServiceException.zero_exception;
    }
    return student;
}
分析:
@Cacheable---------》开启缓存注解
studentCache---------》缓存名称
key---------》缓存的key值
方法的返回值---------》缓存的value值
通过查看缓存的信息可知,缓存放入成功:
@GetMapping("/get/cache")
@ApiOperation(value="查看缓存信息")
public String getCache(){
    Cache demoCache = cacheManager.getCache("studentCache");
    System.out.println(demoCache.getName());
    System.out.println(demoCache.get(1, Student.class));
    return demoCache.getName();
}
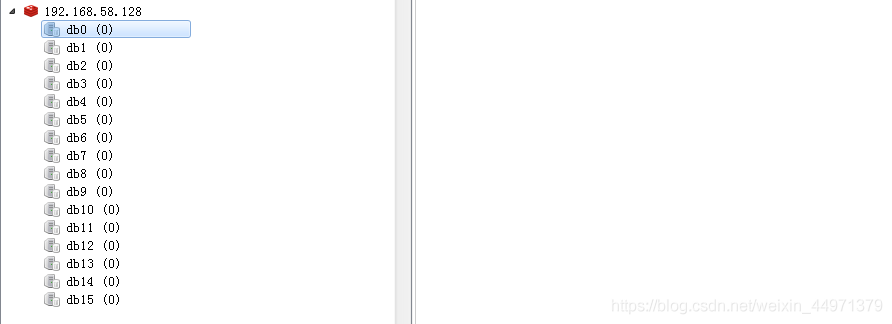
接下来,我们将缓存替换成redis缓存:
import com.fasterxml.jackson.annotation.JsonAutoDetect;
import com.fasterxml.jackson.annotation.PropertyAccessor;
import com.fasterxml.jackson.databind.ObjectMapper;
import org.springframework.cache.annotation.EnableCaching;
import org.springframework.context.annotation.Bean;
import org.springframework.context.annotation.Configuration;
import org.springframework.data.redis.cache.RedisCacheConfiguration;
import org.springframework.data.redis.cache.RedisCacheManager;
import org.springframework.data.redis.cache.RedisCacheWriter;
import org.springframework.data.redis.connection.RedisConnectionFactory;
import org.springframework.data.redis.serializer.Jackson2JsonRedisSerializer;
import org.springframework.data.redis.serializer.RedisSerializationContext;

import java.time.Duration;
import java.util.HashMap;
import java.util.Map;

@EnableCaching
@Configuration
public class CacheConfig {

    /*@Bean
    public ConcurrentMapCacheManager cacheManager() {
        ConcurrentMapCacheManager cacheManager = new ConcurrentMapCacheManager();
        //cacheManager.setStoreByValue(true); //true表示缓存一份副本,否则缓存引用
        return cacheManager;
    }*/

    /**
     * 最新版,设置redis缓存过期时间
     */

    @Bean
    public RedisCacheManager cacheManager(RedisConnectionFactory redisConnectionFactory) {
        return new RedisCacheManager(
                RedisCacheWriter.nonLockingRedisCacheWriter(redisConnectionFactory),
                this.getRedisCacheConfigurationWithTtl( 60), // 默认策略,未配置的 key 会使用这个
                this.getRedisCacheConfigurationMap() // 指定 key 策略
        );
    }

    private Map<String, RedisCacheConfiguration> getRedisCacheConfigurationMap() {
        Map<String, RedisCacheConfiguration> redisCacheConfigurationMap = new HashMap<>();
        //SsoCache和BasicDataCache进行过期时间配置
        redisCacheConfigurationMap.put("messagCache", this.getRedisCacheConfigurationWithTtl(30 * 60));

        //自定义设置缓存时间
        redisCacheConfigurationMap.put("studentCache", this.getRedisCacheConfigurationWithTtl(60 ));

        return redisCacheConfigurationMap;
    }

    private RedisCacheConfiguration getRedisCacheConfigurationWithTtl(Integer seconds) {
        Jackson2JsonRedisSerializer<Object> jackson2JsonRedisSerializer = new Jackson2JsonRedisSerializer<>(Object.class);
        ObjectMapper om = new ObjectMapper();
        om.setVisibility(PropertyAccessor.ALL, JsonAutoDetect.Visibility.ANY);
        om.enableDefaultTyping(ObjectMapper.DefaultTyping.NON_FINAL);
        jackson2JsonRedisSerializer.setObjectMapper(om);
        RedisCacheConfiguration redisCacheConfiguration = RedisCacheConfiguration.defaultCacheConfig();
        redisCacheConfiguration = redisCacheConfiguration.serializeValuesWith(
                RedisSerializationContext
                        .SerializationPair
                        .fromSerializer(jackson2JsonRedisSerializer)
        ).entryTtl(Duration.ofSeconds(seconds));

        return redisCacheConfiguration;
    }

}
使用RedisConnectionFactory 生成 cacheManager 对象,其余保持一致
controller:
@Cacheable(cacheNames = "studentCache", key = "#id")
@GetMapping("/get/one")
@ApiOperation(value="查询单条记录",notes = "查询")
//@ApiImplicitParam(name="id",defaultValue ="", value = "主键id",required = true,dataType ="Integer" )
public Student getOneInfo(@RequestParam(value = "id",defaultValue = "")@ApiParam(value="主键id") Integer id){
    Student student=null;
    try {
        //int i=1/0;
        Date date=new Date();
        System.out.println("进行了查询---》"+ date.getTime());
        student= studentService.selectOne(id);
    } catch (Exception e) {
        throw ServiceException.zero_exception;
    }
    return student;
}
查看缓存信息:
@GetMapping("/get/redis/cache")
@ApiOperation(value="查看redis缓存信息")
public String getRedisCache(){
    Cache demoCache = redisCacheManager.getCache("studentCache");
    System.out.println(demoCache.getName());
    System.out.println(demoCache.get(1, Student.class));
    return demoCache.getName();
}
调用查看缓存: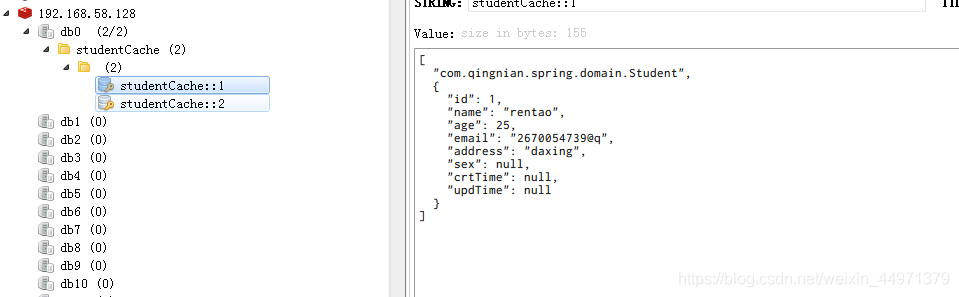
一分钟缓存时间到后,缓存清空: