动图
很多时候我们绘图不仅仅是绘制最终的统计结果图,而是想看看在不同参数不同时刻下的连续图形,这个在仿真模拟的时候相当有用。比如机器学习中,参数的变化导致的变化,比如我最近做的库存水平变化模拟等。如果我们绘制静态图像,只能看到某一时刻的直观图形,如果加入时间线,那么就能直观感受变量的变化过程。
其实原理也挺简单的,就是创建一幅图,定义图形中曲线,散点,标注等各个对象,然后在不同时刻,更新这些对象的数据,matplotlib会自动根据新的数据刷新图形。
动图的核心函数是matplotlib.animation.FuncAnimation,基本用法是:
anim = animation.funcanimation(fig, animate, init_func=init, frames=100, interval=20, blit=true)
# fig: 是我们创建的画布
# animat: 是重点,是我们每个时刻要更新图形对象的函数,返回值和init_func相同
# init_func: 初始化函数,其返回值就是每次都要更新的对象,
#    告诉FuncAnimation在不同时刻要更新哪些图形对象
# frames: 相当于时刻t,要模拟多少帧图画,不同时刻的t相当于animat的参数
# interval: 刷新频率,毫秒
# blit: blit是一个非常重要的关键字,它告诉动画只重绘修改的部分,结合上面保存的时间,
#    blit=true会使动画显示得会非常非常快
下面通过几个例子来说明使用方法。
例子1
第一个例子参考:
http://codingpy.com/article/drawing-gifs-with-matplotlib/?utm_source=tuicool&utm_medium=referral
该文绘制不同参数状态下的图形,很有意思,这里简化一些代码,顺便增加更多注释。
import numpy as np
import matplotlib.pyplot as plt
from matplotlib.animation import FuncAnimation  # 动图的核心函数
import seaborn as sns  # 美化图形的一个绘图包

sns.set_style("whitegrid")  # 设置图形主图

# 创建画布
fig, ax = plt.subplots()
fig.set_tight_layout(True)

# 画出一个维持不变(不会被重画)的散点图和一开始的那条直线。
x = np.arange(0, 20, 0.1)
ax.scatter(x, x + np.random.normal(0, 3.0, len(x)))
line, = ax.plot(x, x - 5, 'r-', linewidth=2)

def update(i):
    label = 'timestep {0}'.format(i)
    print(label)
    # 更新直线和x轴(用一个新的x轴的标签)。
    # 用元组(Tuple)的形式返回在这一帧要被重新绘图的物体
    line.set_ydata(x - 5 + i)  # 这里是重点,更新y轴的数据
    ax.set_xlabel(label)    # 这里是重点,更新x轴的标签
    return line, ax

# FuncAnimation 会在每一帧都调用“update” 函数。
# 在这里设置一个10帧的动画,每帧之间间隔200毫秒
anim = FuncAnimation(fig, update, frames=np.arange(0, 10), interval=200)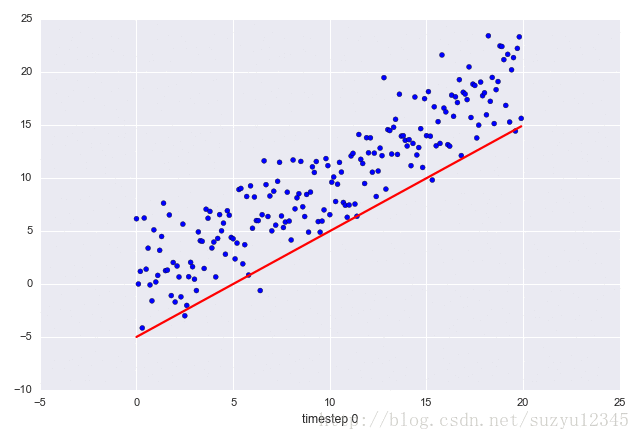
例子2
为了代码更加通用,我们绘制上下两个子图,每个子图绘制正弦波和散点图的组合。
重点是散点图的绘制,线图和例子1一样,都是更新x,y轴数据即可。
散点图用 set_offsets(data)函数,而且data的数据格式是[[x1,y1],[x2,y2]...],而不像直线,其数据格式是x轴的放在一起,y轴的放在一起。
from matplotlib import pyplot as plt
from matplotlib import animation
import numpy as np
import seaborn as sns
sns.set_style("whitegrid")


def randn_point():
    # 产生随机散点图的x和y数据
    x=np.random.randint(1,100,3)
    y=np.random.randint(1,2,3)
    return x,y

# 创建画布,包含2个子图
fig = plt.figure(figsize=(15, 10))
ax1 = fig.add_subplot(2, 1, 1)
ax2 = fig.add_subplot(2, 1, 2)

# 先绘制初始图形,每个子图包含1个正弦波和三个点的散点图
x = np.arange(0, 2*np.pi, 0.01)

line1, = ax1.plot(x, np.sin(x)) # 正弦波
x1,y1=randn_point()
sca1 = ax1.scatter(x1,y1)   # 散点图

line2, = ax2.plot(x, np.cos(x))  # 余弦波
x2,y2=randn_point()
sca2 = ax2.scatter(x2,y2)   # 散点图

def init():
    # 构造开始帧函数init
    # 改变y轴数据,x轴不需要改
    line1.set_ydata(np.sin(x))
    line1.set_ydata(np.cos(x))
    # 改变散点图数据
    x1, y1 = randn_point()
    x2, y2 = randn_point()
    data1 = [[x,y] for x,y in zip(x1,y1)]
    data2 = [[x, y] for x, y in zip(x2, y2)]
    sca1.set_offsets(data1)  # 散点图
    sca2.set_offsets(data2)  # 散点图
    label = 'timestep {0}'.format(0)
    ax1.set_xlabel(label)
    return line1,line2,sca1,sca2,ax1  # 注意返回值,我们要更新的就是这些数据

def animate(i):
    # 接着,构造自定义动画函数animate,用来更新每一帧上各个x对应的y坐标值,参数表示第i帧
    # plt.cla() 这个函数很有用,先记着它
    line1.set_ydata(np.sin(x + i/10.0))
    line2.set_ydata(np.cos(x + i / 10.0))
    x1, y1 = randn_point()
    x2, y2 = randn_point()
    data1 = [[x,y] for x,y in zip(x1,y1)]
    data2 = [[x, y] for x, y in zip(x2, y2)]
    sca1.set_offsets(data1)  # 散点图
    sca2.set_offsets(data2)  # 散点图
    label = 'timestep {0}'.format(i)
    ax1.set_xlabel(label)
    return line1,line2,sca1,sca2,ax1


# 接下来,我们调用FuncAnimation函数生成动画。参数说明:
# fig 进行动画绘制的figure
# func 自定义动画函数,即传入刚定义的函数animate
# frames 动画长度,一次循环包含的帧数
# init_func 自定义开始帧,即传入刚定义的函数init
# interval 更新频率,以ms计
# blit 选择更新所有点,还是仅更新产生变化的点。应选择True,但mac用户请选择False,否则无法显示动画

ani = animation.FuncAnimation(fig=fig,
                              func=animate,
                              frames=100,
                              init_func=init,
                              interval=20,
                              blit=False)
plt.show()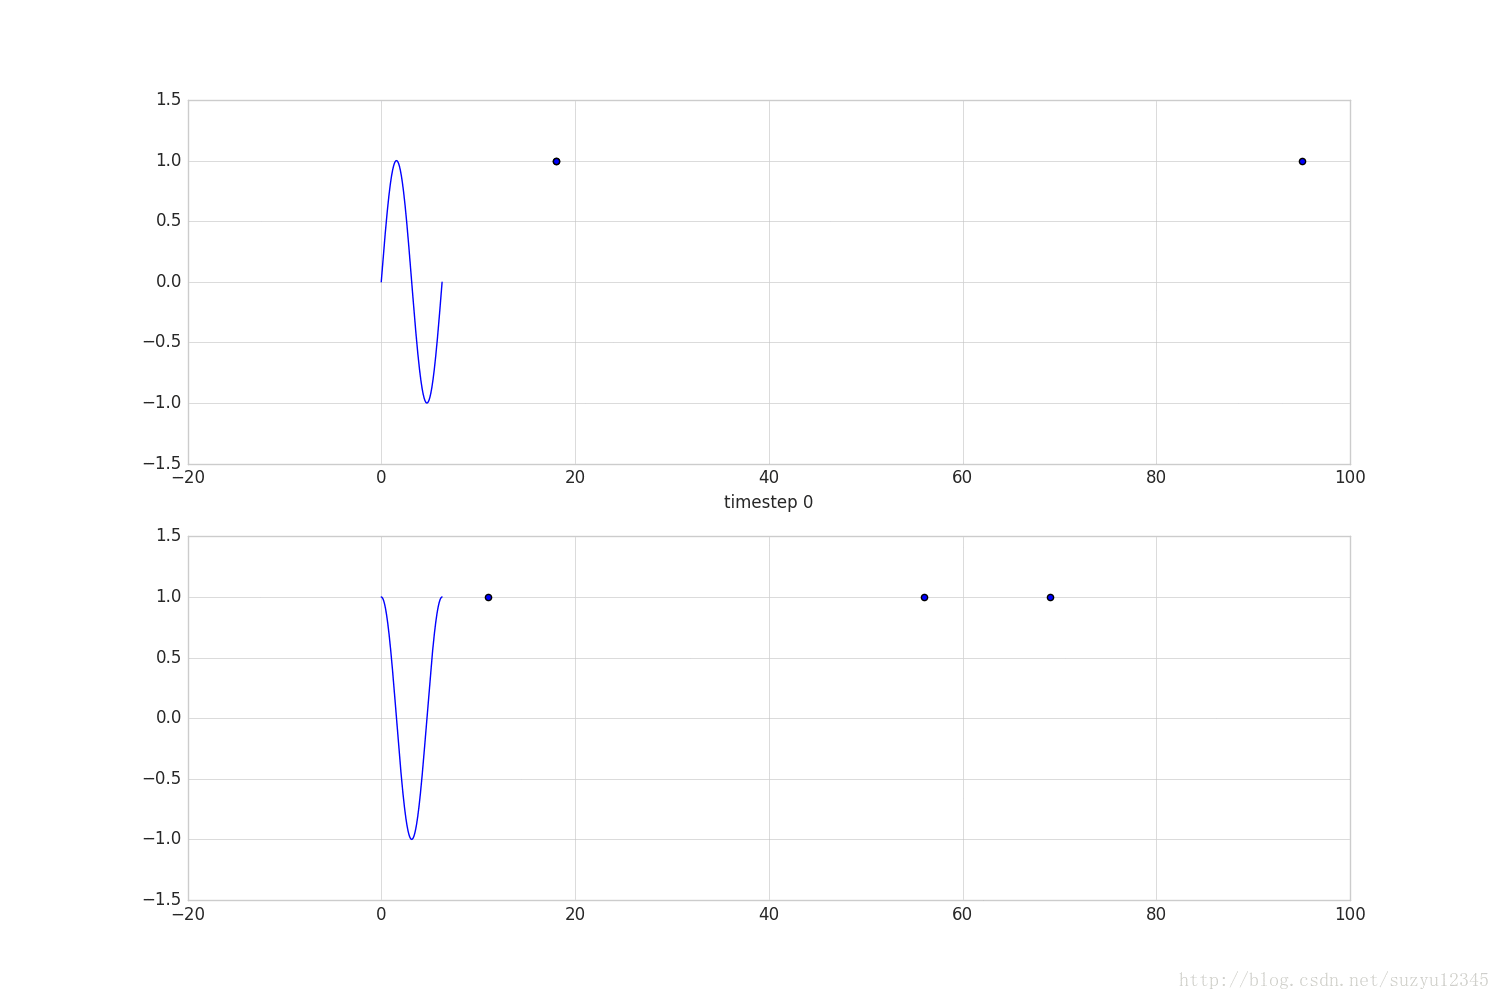
保存图形
保存图形要用到一个叫ImageMagick的工具,按照网上的参考文章,都是使用ImageMagick 6.9版本,第一次下载最新版,怎么都没找到convert模块,好坑啊。
步骤:
1。下载安装ImageMagick 6.9,安装过程中选择默认选项即可。
2。找到 "python_home\Lib\site-packages\matplotlib\mpl-data\matplotlibrc",
修改convert路径 #animation.convert_path: 'convert'
–> #animation.convert_path: 'C:\Program Files (x86)\ImageMagick-6.9.2-Q16\convert.exe'
在绘图后增加一个save操作:
ani = animation.FuncAnimation(fig=fig,
                              func=animate,
                              frames=100,
                              init_func=init,
                              interval=20,
                              blit=False)
plt.show()
ani.save(r'D:\demoanimation.gif', writer='imagemagick', fps=2)
参考
使用Matplotlib制作动图
http://blog.csdn.net/theonegis/article/details/51037850
如何用 Matplotlib 画 GIF 动图
https://www.tuicool.com/articles/Z7BzY3V
使用Matplotlib和Imagemagick实现算法可视化与GIF导出
http://www.hankcs.com/ml/using-matplotlib-and-imagemagick-to-realize-the-algorithm-visualization-and-gif-export.html
利用Matplotlib和ImageMagick制作gif动画
http://blog.csdn.net/stereohomology/article/details/35845399
matplotlib里的动画
http://blog.csdn.net/riverflowrand/article/details/51189573
官方动画教程
http://matplotlib.org/api/animation_api.html