【Vue3】element ui plus面包屑与vue-route结合使用
前言
在做一个后台管理系统的时候,发现了element ui plus文档中的面包屑的使用方式,觉得还挺不错的,准备拿来用,发现可以与vue的route结合使用。
1、观察结构
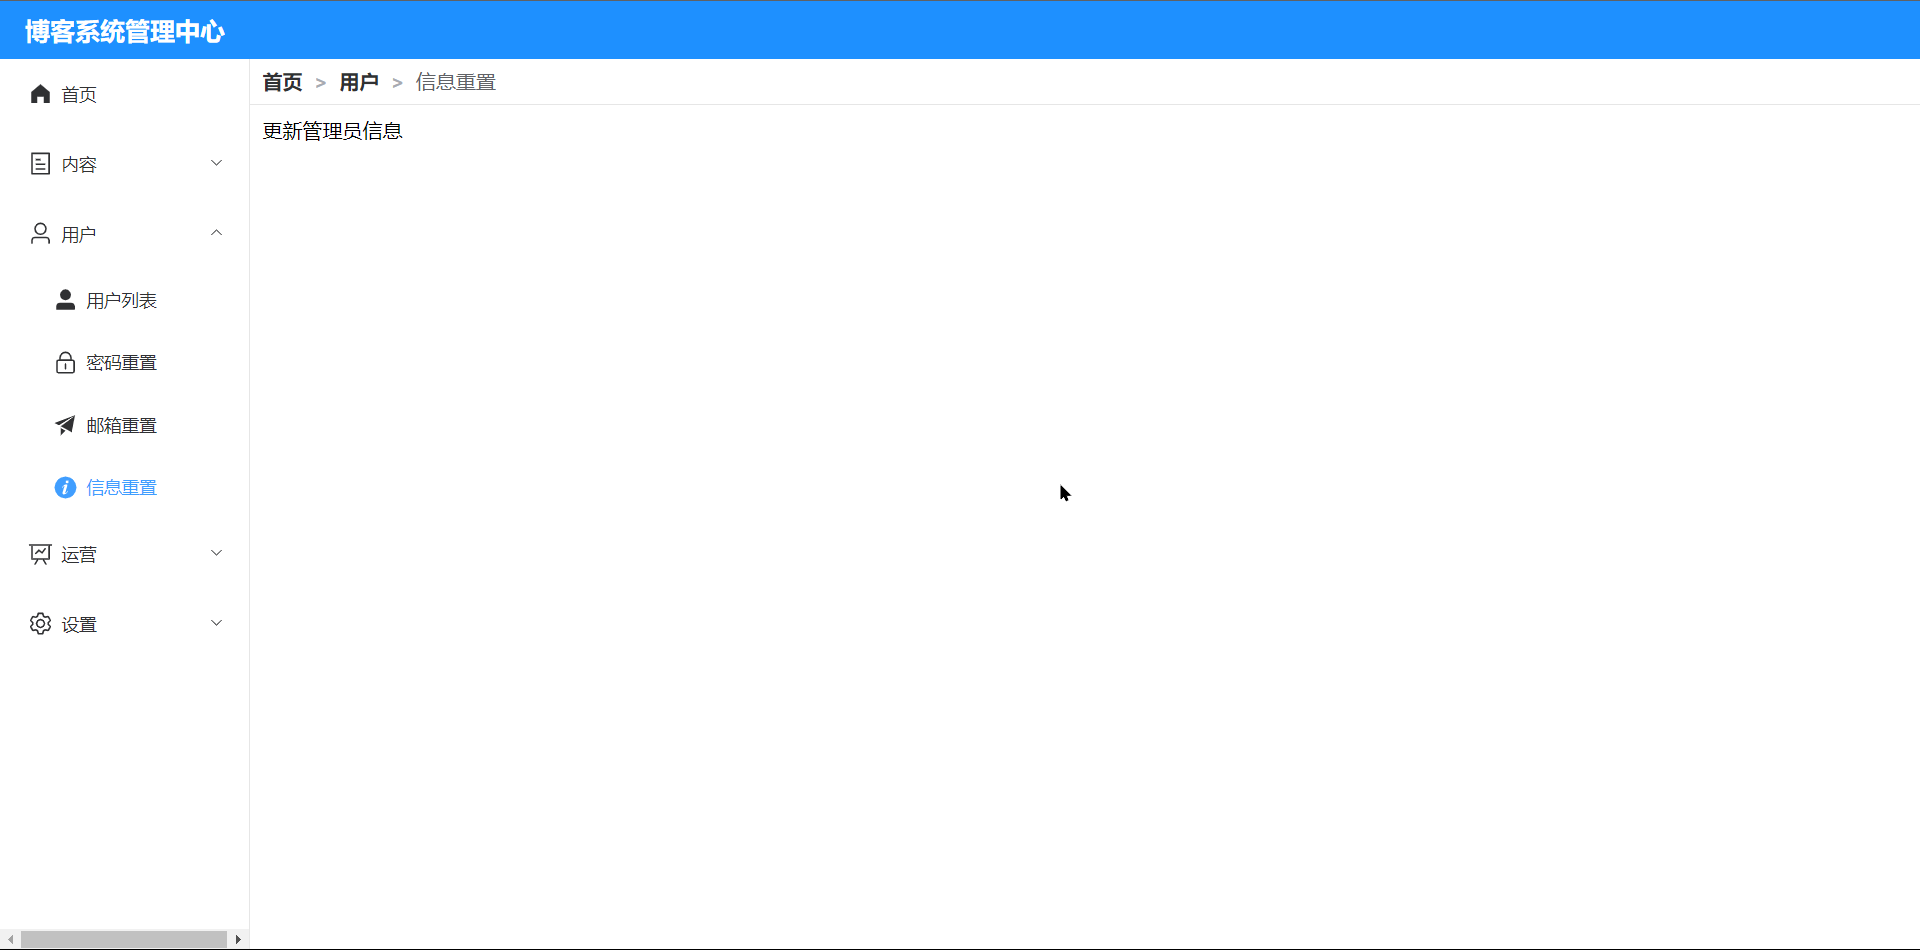
我的后台的布局如下:

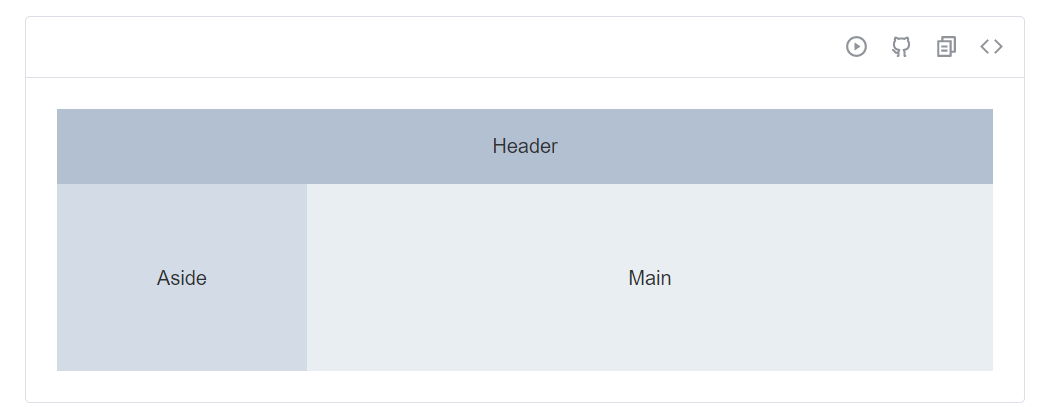
使用的是element ui中的如下的格式:

于是我们可以在main这个模块中写入两个部分,第一个就是最上面的面包屑,第二个就是下面的内容部分,这个可以自由发挥。
2、编写面包屑
因为我们的路由不是固定的,所以面包屑肯定是要使用v-for、v-if这类的逻辑判断
我的代码如下:
<template>
  <div>
    <div class="content-title-box">
      <el-breadcrumb separator=">">
        <el-breadcrumb-item :to="{ path: '/' }">首页</el-breadcrumb-item>
        <template v-for="(item, index) in breadList">
          <el-breadcrumb-item
            v-if="item.name"
            :key="index"
            :to="item.path"
          >{{ item.name }}</el-breadcrumb-item>
        </template>
      </el-breadcrumb>
    </div>
    <div class="content-container-box">
      <div class="content">
        <router-view></router-view>
      </div>
    </div>
  </div>
</template>
可以看到分类了两部分
- content-title-box
- content-container-box
我们在content-title-box中写入el-breadcrumb组件
这里的breadList我们在js中绑定一下,同时编写的方法也很简单,代码如下
<script>
export default {
  data() {
    return {
      breadList: [],
    }
  },
  methods: {
    getMatched() {
      this.breadList = this.$route.matched;
    },
  },
  created() {
    this.getMatched()
  },
  watch: {
    $route(to,from) {
      this.breadList = this.$route.matched;
    }
  }
}
</script>
watch是用来路由改变的监听器,通过动态改变breadList来改变每个页面的面包屑显示
3、适配路由
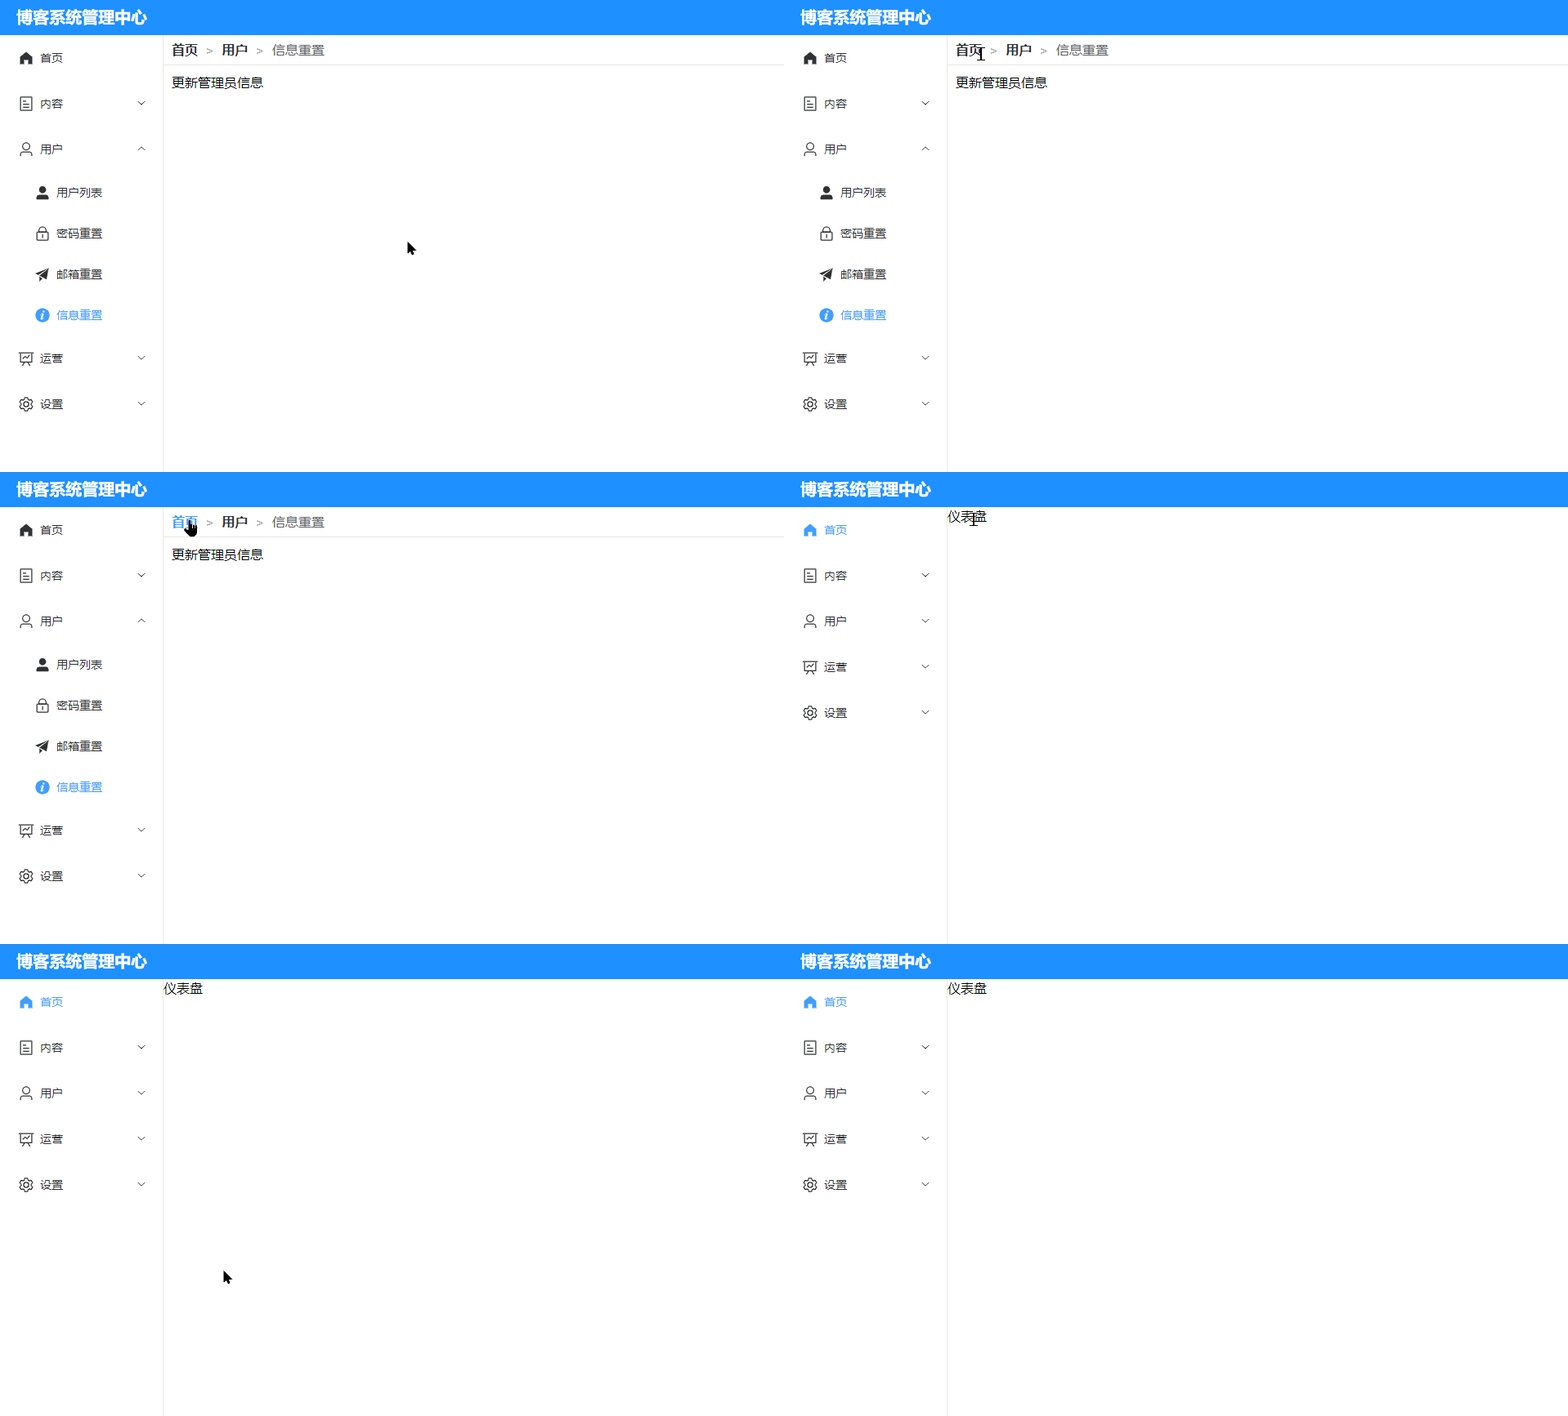
我们需要实现的是,点击面包屑,路由会跳转到相应页面,我们通过绑定的:to已经完成了,但是我们还需要左侧的菜单栏跳转到相应的位置
效果如下:

我的左侧菜单路由单独写了一个vue,这里直接给出代码,核心逻辑就是使用onBeforeRouteUpdate方法在每次路由改变的时候进行监听,将el-menu的default-active更改成我们面包屑点击的目标url
<template>
    <div class="nav">
        <el-menu :default-active="curPath" :unique-opened="true" class="el-menu-vertical">
            <template v-for="(item, mainIndex) in menuList" :key="mainIndex + ''">
                <router-link :to="item.path" v-if="!item.children">
                    <el-menu-item :index="item.path">
                        <el-icon :size="20">
                            <component :is="item.icon" />
                        </el-icon>
                        <span>{{ item.name }}</span>
                    </el-menu-item>
                </router-link>
                <el-sub-menu :index="item.path" v-else>
                    <template #title>
                        <el-icon :size="20">
                            <component :is="item.icon" />
                        </el-icon>
                        <span>{{ item.name }}</span>
                    </template>
                    <router-link
                        :to="item.path + '/' + subItem.path"
                        v-for="(subItem, subIndex) in item.children"
                        :key="subIndex + ''"
                    >
                        <el-menu-item :index="item.path + '/' + subItem.path">
                            <el-icon :size="20">
                                <component :is="subItem.icon" />
                            </el-icon>
                            <span>{{ subItem.name }}</span>
                        </el-menu-item>
                    </router-link>
                </el-sub-menu>
            </template>
        </el-menu>
    </div>
</template>


<script>
import { onBeforeRouteUpdate } from "vue-router";
import { routes } from "../route";

export default {
    data() {
        return {
            curPath: '',
            menuList: '',
        }
    },
    methods: {
        init() {
            this.curPath = this.$route.fullPath
            this.menuList = routes[0].children
        }
    },
    mounted() {
        this.init()
        onBeforeRouteUpdate(to => {
            this.curPath = to.path
        });
    }
}
</script>

<style>
.el-menu-vertical a {
    text-decoration: none;
}
</style>
因为需要使用路由中的数据,所以我这里也把我的路由部分的js给出来
import { createRouter,createWebHashHistory} from "vue-router"

// 布局
const baseView = () => import("../layout/BaseView.vue")
const rightView = () => import("../layout/RightConent.vue")
// 登录页面
const login = () => import("../pages/login/login.vue")
// 内容部分
const postArticle = () => import("../pages/content/PostArticle.vue")
const articleManage = () => import("../pages/content/ManageArticle.vue")
const imageManage = () => import("../pages/content/ManageImage.vue")
const commentManage = () => import("../pages/content/ManageComment.vue")
// 仪表盘主页
const index = () => import("../pages/dashboard/Index.vue")
// 运营部分
const categoryManage = () => import("../pages/operation/ManageCategory.vue")
const loopManage = () => import("../pages/operation/ManagerLoop.vue")
// 设置
const friendLink = () => import("../pages/settings/FriendLink.vue")
const websiteInfo = () => import("../pages/settings/WebSiteInfo.vue")
// 用户
const userList = () => import("../pages/user/ListUser.vue")
const adminInfo = () => import("../pages/user/UpdateAdminInfo.vue")
const adminResetPwd = () => import("../pages/user/UpdatePassword.vue")
const adminEmail = () => import("../pages/user/UpdateAdminEmail.vue")

// 路由器
export const routes = [
    {
        path: "",
        component: baseView,
        redirect: "/index",
        children: [
            {
                path: "/index",
                name: "首页",
                icon: "HomeFilled",
                component: index
            },
            {
                path: "/content",
                name: "内容",
                icon: "Tickets",
                component: rightView,
                children: [
                    {
                        path: "post-article",
                        name: "发表文章",
                        icon: "EditPen",
                        component: postArticle
                    },
                    {
                        path: "manage-article",
                        name: "文章管理",
                        icon: "Document",
                        component: articleManage
                    },
                    {
                        path: "manage-comment",
                        name: "评论管理",
                        icon: "ChatDotRound",
                        component: commentManage
                    },
                    {
                        path: "manage-image",
                        name: "图片管理",
                        icon: "Picture",
                        component: imageManage
                    }
                ]
            },
            {
                path: "/user",
                name: "用户",
                icon: "User",
                component: rightView,
                children: [
                    {
                        path: "list",
                        name: "用户列表",
                        icon: "UserFilled",
                        component: userList
                    },
                    {
                        path: "reset-password",
                        name: "密码重置",
                        icon: "Lock",
                        component: adminResetPwd
                    },
                    {
                        path: "email",
                        name: "邮箱重置",
                        icon: "Promotion",
                        component: adminEmail
                    },
                    {
                        path: "info",
                        name: "信息重置",
                        icon: "InfoFilled",
                        component: adminInfo
                    }
                ]
            },
            {
                path: "/operation",
                name: "运营",
                icon: "DataLine",
                component: rightView,
                children: [
                    {
                        path: "category",
                        name: "分类设置",
                        icon: "Menu",
                        component: categoryManage
                    },
                    {
                        path: "loop",
                        name: "轮播图设置",
                        icon: "PictureRounded",
                        component: loopManage
                    }
                ]
            },
            {
                path: "/settings",
                name: "设置",
                icon: "Setting",
                component: rightView,
                children: [
                    {
                        path: "website-info",
                        name: "站点信息",
                        icon: "CreditCard",
                        component: websiteInfo
                    },
                    {
                        path: "friend-link",
                        name: "友情链接",
                        icon: "Link",
                        component: friendLink
                    }
                ]
            }
        ]
    },
    {
        path: "/login",
        name: "登录",
        component: login,
    }
]

export const router = createRouter({
    history: createWebHashHistory(),
    routes
})
后话
虽然vue3非常的简单便捷,但是我发现一个问题,每一个后端人员都有一颗前端的心,如果前端写的不满意,往往花费修改的时间比后端写逻辑代码还来的多…