docker+Jenkins
结合Jenkins大体思路:将springboot应用打包并发布成docker镜像,然后再运行。Jenkins主要执行的步骤是:拉取代码--->打包--->发布镜像---->运行镜像
spring boot 应用配置
添加下面maven插件:
dockerfile 位置根据具体情况修改!!!
<plugins>
            <plugin>
                <groupId>org.springframework.boot</groupId>
                <artifactId>spring-boot-maven-plugin</artifactId>
            </plugin>
            <plugin>
                <groupId>com.spotify</groupId>
                <artifactId>dockerfile-maven-plugin</artifactId>
                <version>1.4.13</version>
                <executions>
                    <execution>
                        <id>default</id>
                        <goals>
                            <goal>build</goal>
                            <goal>push</goal>
                        </goals>
                    </execution>
                </executions>
                <configuration>
                    <repository>${project.name}</repository>
                    <tag>${project.version}</tag>
                    <buildArgs>
                        <JAR_FILE>${project.build.finalName}.jar</JAR_FILE>
                    </buildArgs>
                    <dockerfile>./Dockerfile</dockerfile>
                </configuration>
            </plugin>
        </plugins>
编写docker file
FROM openjdk:8-jre-slim
MAINTAINER xuxueli

ENV PARAMS=""

ENV TZ=PRC
RUN ln -snf /usr/share/zoneinfo/$TZ /etc/localtime && echo $TZ > /etc/timezone

COPY target/xxl-job-executor-0.0.1-SNAPSHOT.jar /app.jar

ENTRYPOINT ["sh","-c","java -jar $JAVA_OPTS /app.jar $PARAMS"]
只需要改变下target(打包完之后的包名)
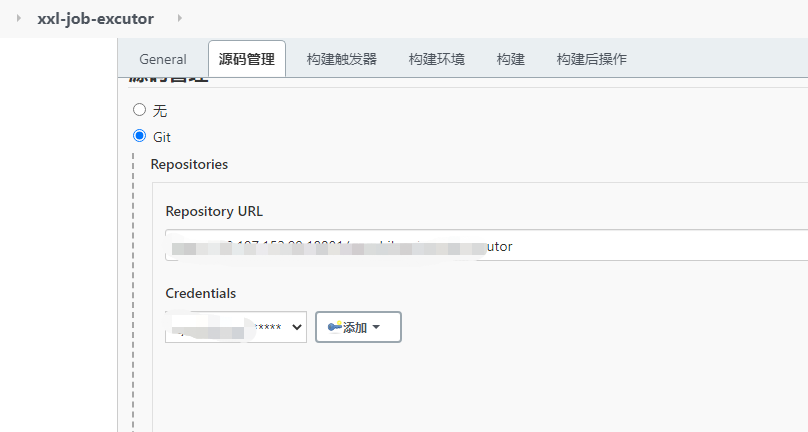
新建Jenkins应用,并配置好git信息。仓库地址和验证信息和分支等
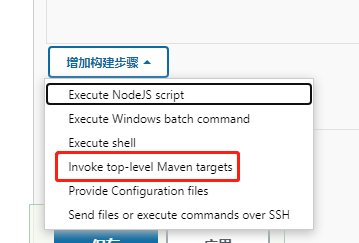
- 加入maven构建
[图片上传中...(image-20210312095914050.png-98c522-1615859185694-0)]
设置maven的setting文件【非必须】
因为默认的setting下载会很慢,所以需要更改setting文件
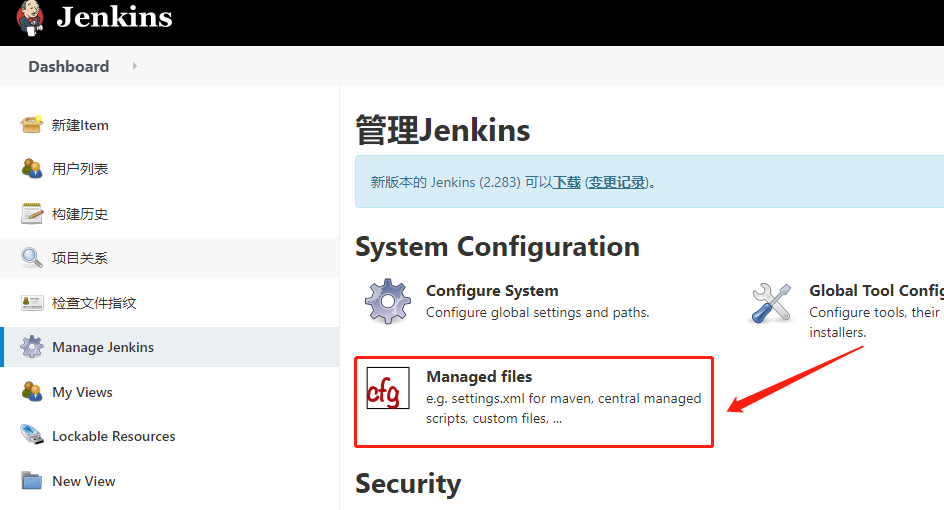
a. 进入manage jenkins----> manage files
b. 新增config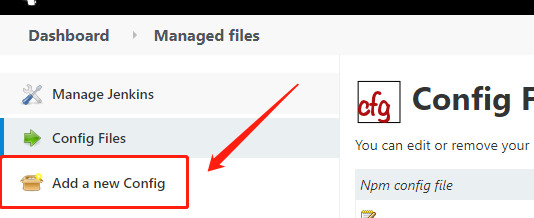
c. 选择mave setting.xml,并提交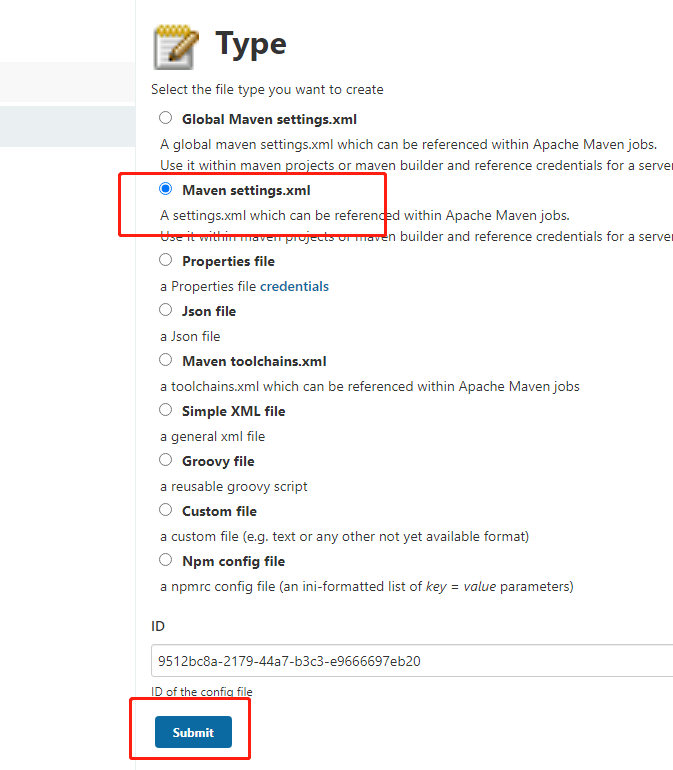
d. settting 复制进去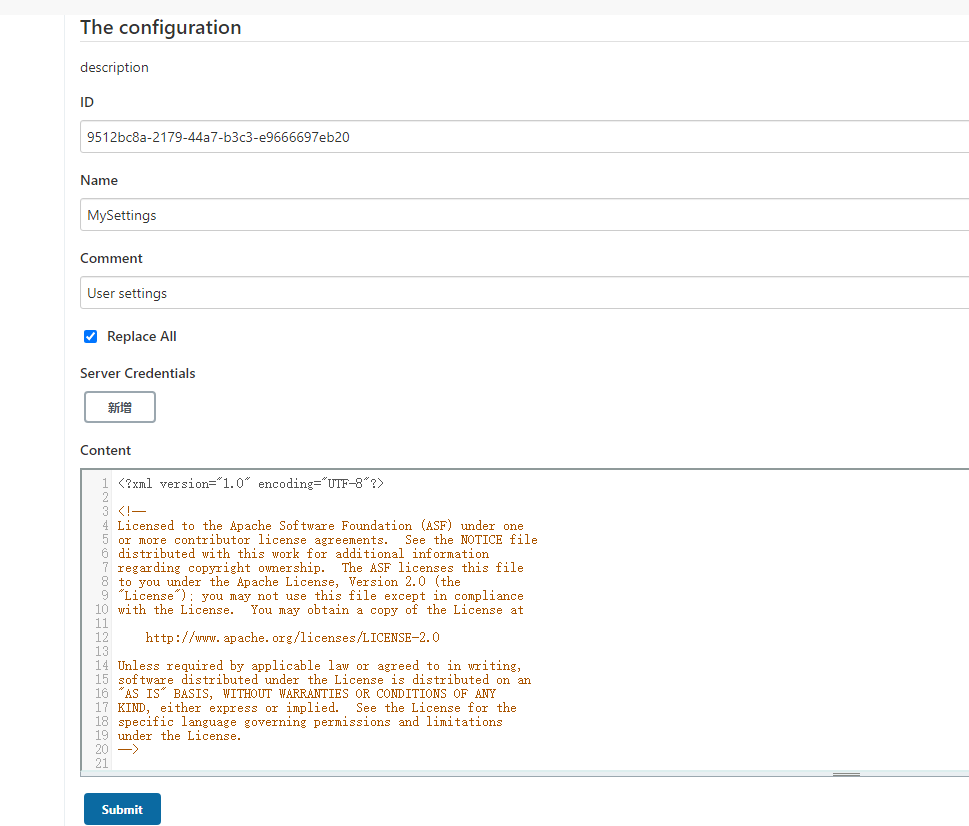
选择刚刚设置好的maven setting.xml,打开maven的高级设置
maven 目标:
clean -U -Dmaven.skip.test=true package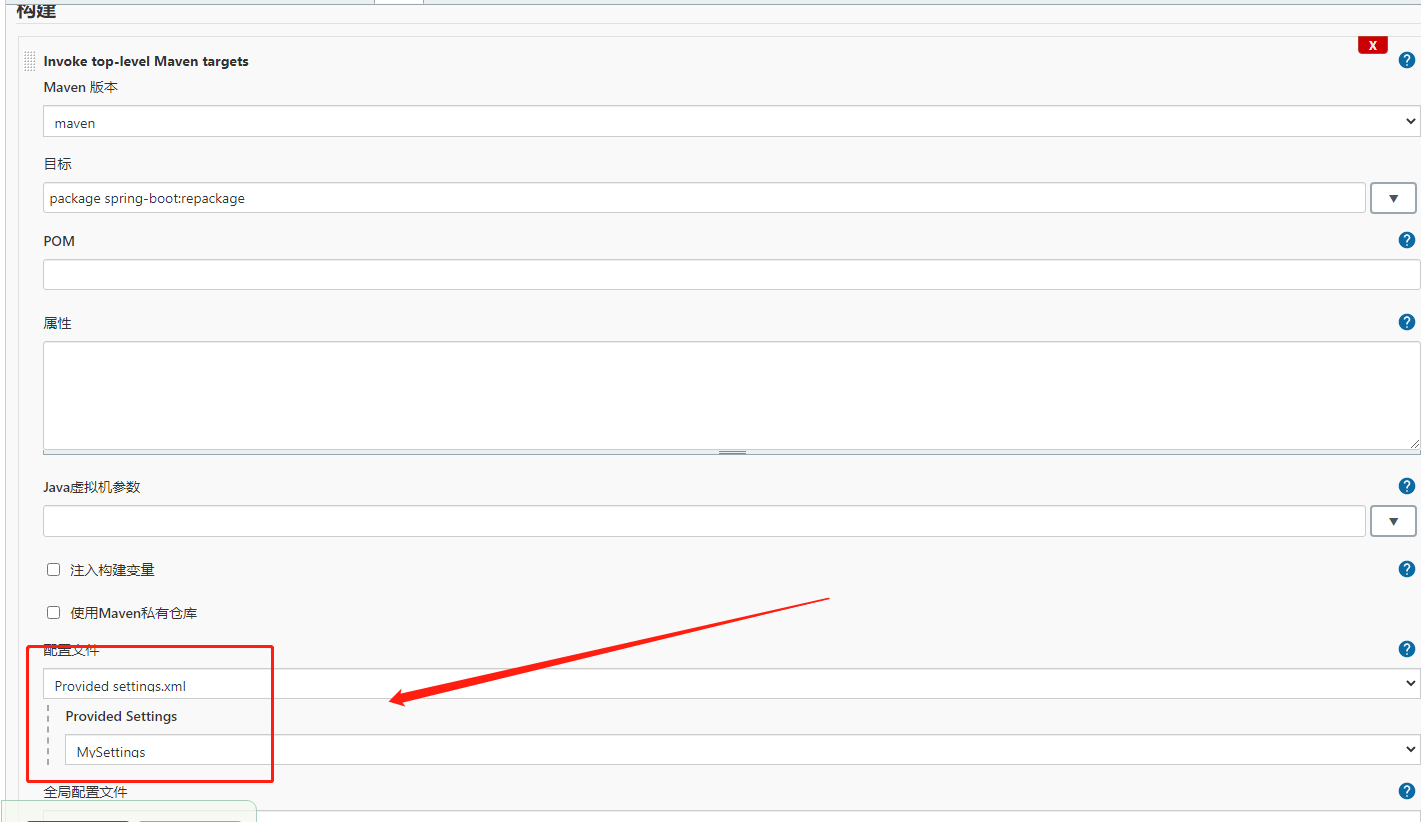 image-20210312101451622.png
添加脚本:
docker stop xxl-job-executor
docker start xxl-job-executor
- 测试脚本,直接build,一步一个脚印,一行一行脚本调试
问题记录:
docker运行提示:
Exception in thread "main" java.lang.NoClassDefFoundError: org/springframework/boot/SpringApplication原因:包没有引入
解决方案:精简maven插件:
no main manifest attribute
原因:
plugins 中是按顺序执行的,顺序反了必然会出现问题。
springboot结构不完整。需要有完整的父依赖(https://stackoverflow.com/questions/54867295/springboot-no-main-manifest-attribute-maven)
maven执行springboot的repackge目标:mvn package spring-boot:repackage
或者maven添加插件:
<plugin>
        <groupId>org.springframework.boot</groupId>
        <artifactId>spring-boot-maven-plugin</artifactId>
        <configuration>
            <mainClass>com.places.Main</mainClass>
        </configuration>

        <executions>
            <execution>
                <goals>
                    <goal>repackage</goal>
                </goals>
            </execution>
       </executions>

</plugin>
springboot 打包运行成功要素
3 things:
- You have the parent entry in your pom.
- Verify that your plugin is in the build portion of the pom.
- You have a class with the @SpringBootApplicaion annotation.

pom.xml:

...
  <parent>
    <groupId>org.springframework.boot</groupId>
    <artifactId>spring-boot-starter-parent</artifactId>
    <version>2.1.8.RELEASE</version>
  </parent>

   <build>
    <plugins>
      <plugin>
        <groupId>org.springframework.boot</groupId>
        <artifactId>spring-boot-maven-plugin</artifactId>
      </plugin>
    </plugins>
  </build>
...
And a class that looks something like this:

@SpringBootApplication
public class Application {

    public static void main(String[] args) {
        SpringApplication.run(Application.class, args);
    }

}