在vue项目中通常会给style标签加上scope属性,以此来实现样式的私有化,避免全局污染。
但有的时候这个属性又会带来麻烦:当引入第三方组件且需要修改其样式时,通常出现没有修改成功的情况
一、scope实现私有化样式的原理
通过给DOM元素结构上以及css样式上添加一个不重复的标记,来保证其唯一性,以此达到样式的私有化例如:当使用第三方插件elementui的button、dialog组件,并在style标签上加上scoped的属性
<template><div class="login-page"><h1>{{ msg}}</h1><div><el-button type="success" @click="login">登录</el-button><el-button type="success" @click="dialogVisible = true">弹框</el-button></div><el-input></el-input><div><el-dialog
        title="提示1111"
        :visible.sync="dialogVisible">
        这是一个弹框</el-dialog></div></div></template><style lang="less" scoped>
  @import"../less/login.less";</style>
login.less文件
.login-page{
h1{
cursor: pointer;
background:#f00;}
.el-button{
width: 200px;}
.el-input{
width: 100px;}
.el-dialog{
width:200px;
height: 300px;
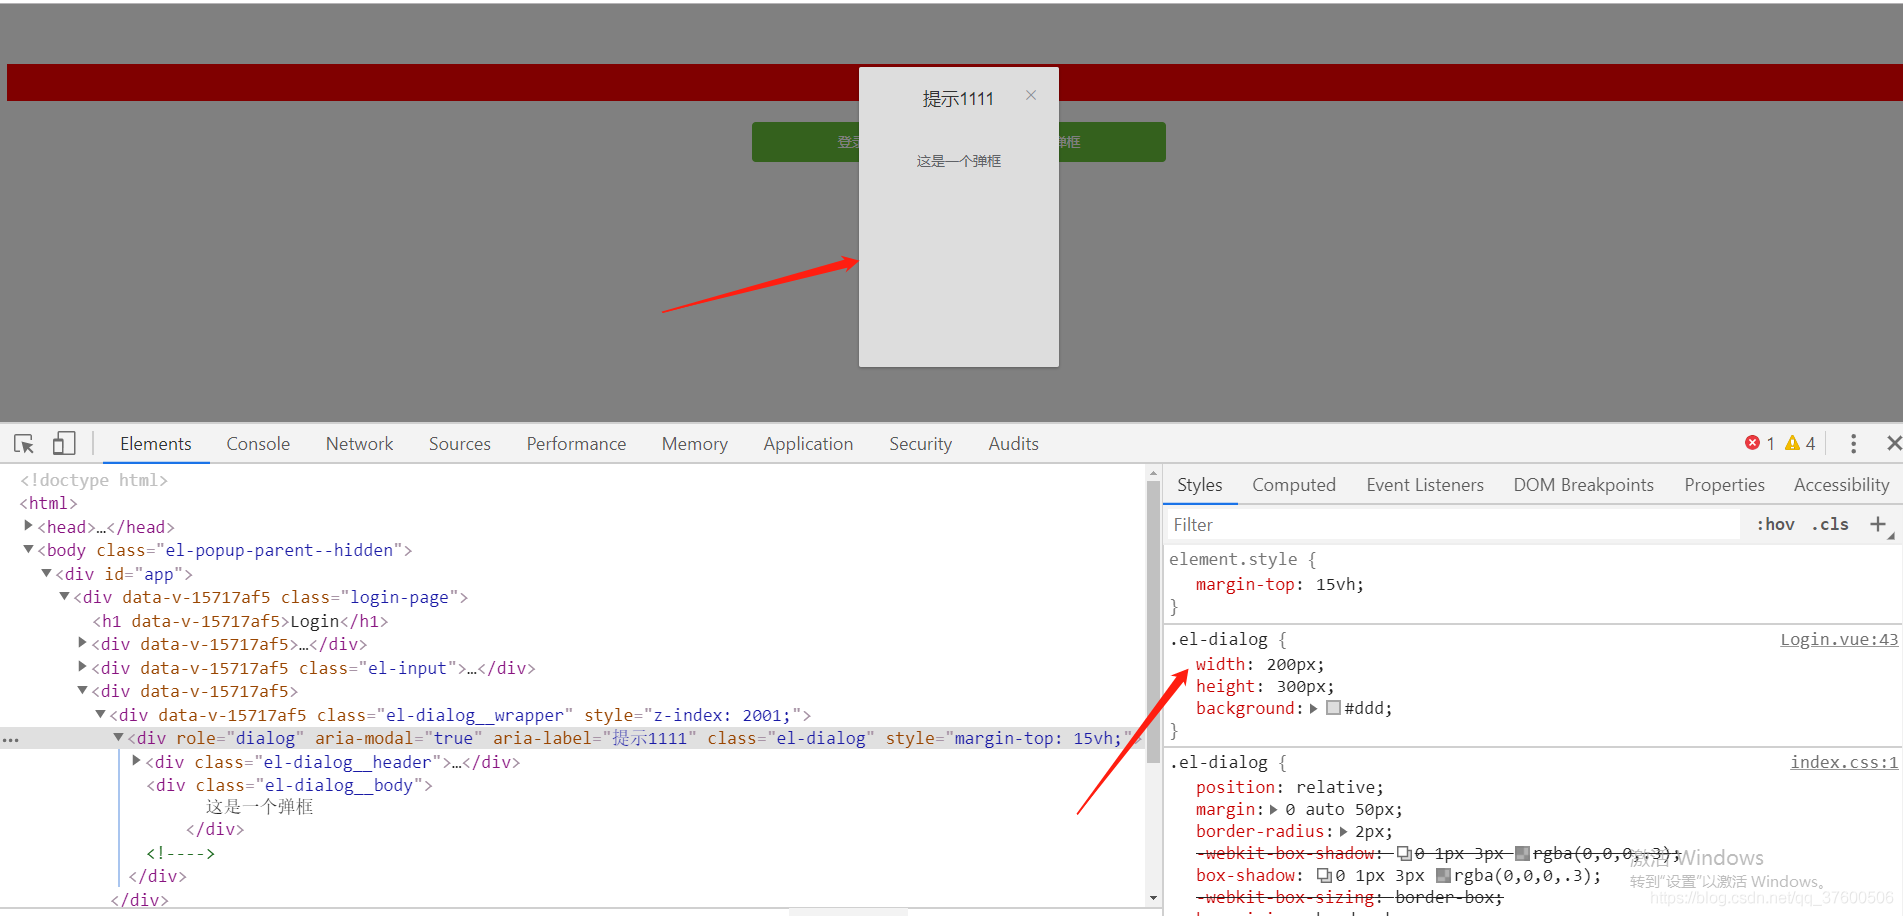
background:#ddd;}}在浏览器运行后的DOM显示结果为:
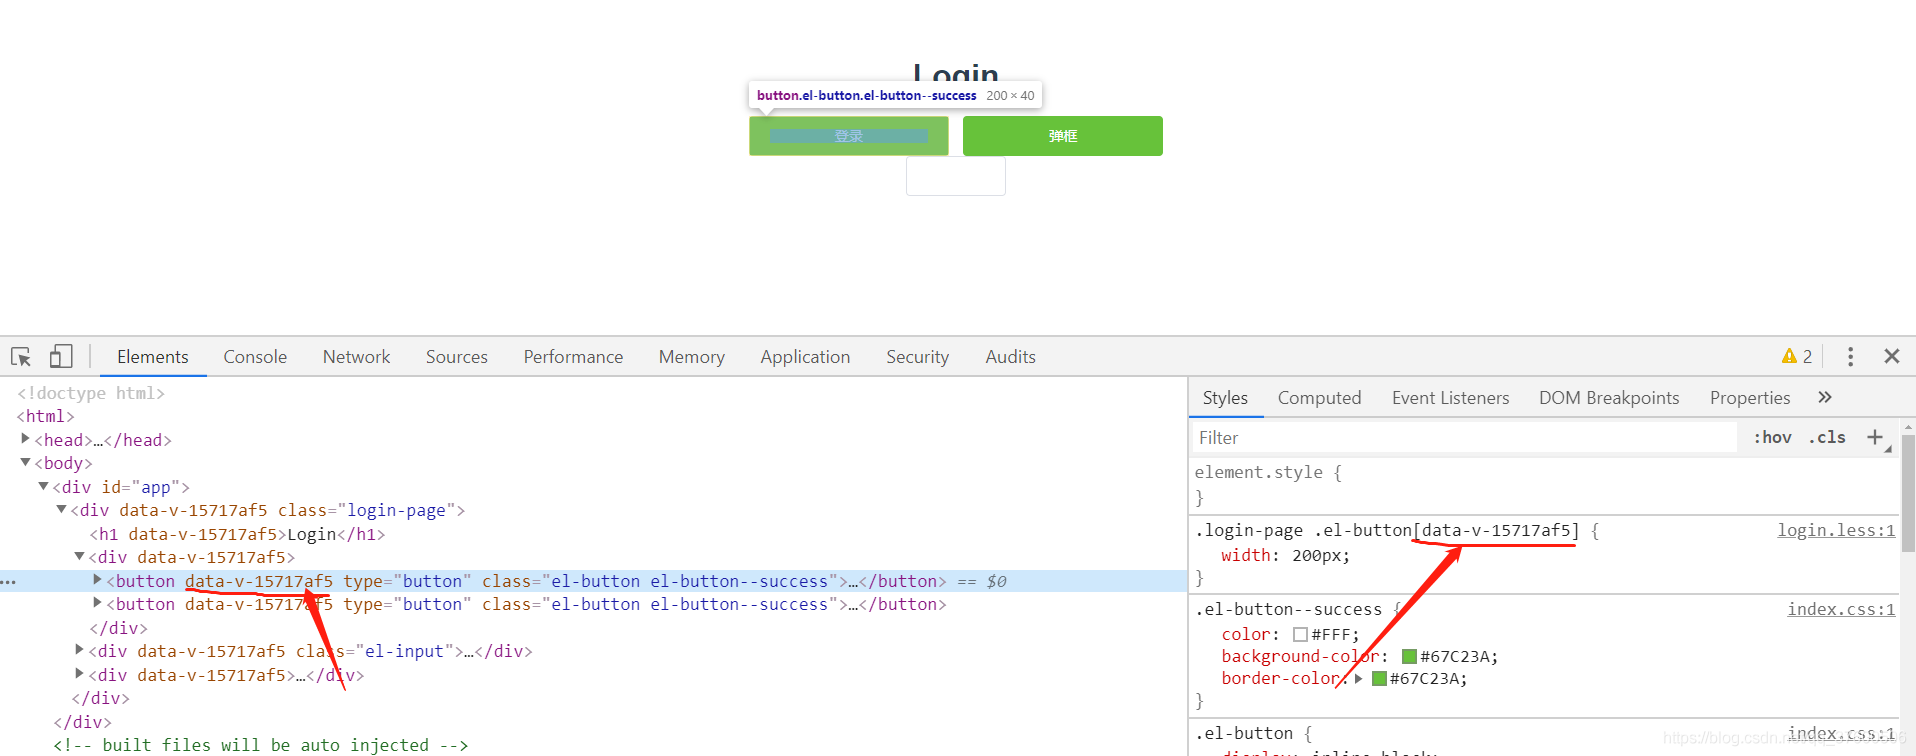
1、el-button元素加上了data属性,且其css也加上了data属性选择器
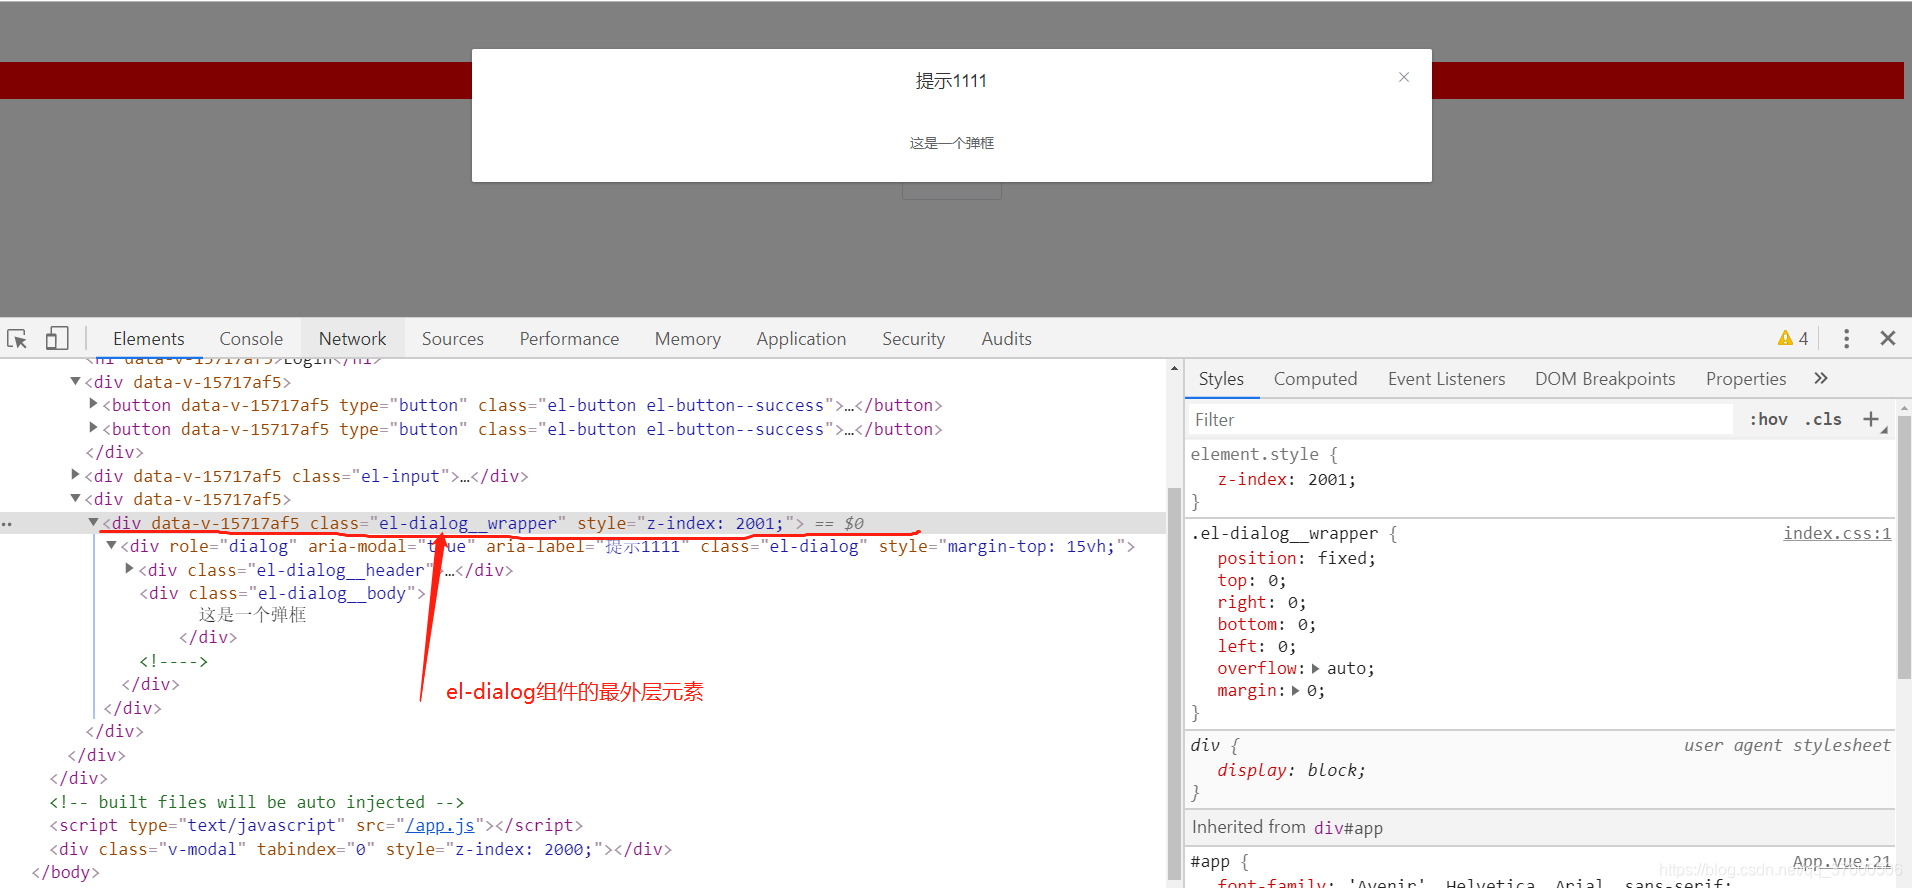
2、el-dialog组件元素只有最外层元素有data属性,从第二层元素起就没有,且虽然在login.less文件中改变其样式,但是没有效果
由此可以看出:
1、添加scoped属性之后,DOM节点添加了一个不重复的data属性来表示其唯一性
2、添加scoped属性之后,DOM节点的css选择器末尾添加了data属性选择器来私有化该元素的样式
3、添加scoped属性之后,会给组件的最外部添加data属性,如果组件里面还有包含其他组件,那么其他组件是作用不到的
二、解决引入第三方组件并修改其样式不生效的问题
1、解决方案一:因为vue文件中可以出现多个style,所以可以使用两个style,一个style加上scoped属性,一个style不加scoped属性,
且将第三方组件中嵌套的元素样式放置在不带scoped的style元素内,这样子第三方组件中的嵌套元素中样式就可以生效了
<template><div class="login-page"><h1>{{ msg}}</h1><div><el-button type="success" @click="login">登录</el-button><el-button type="success" @click="dialogVisible = true">弹框</el-button></div><el-input></el-input><div><el-dialog
        title="提示1111"
        :visible.sync="dialogVisible">
        这是一个弹框</el-dialog></div></div></template><style lang="less" scoped>
  @import"../less/login.less";</style><style lang="less">
   .el-dialog{//将第三方组件中嵌套的元素样式放置在不带scoped的style元素内,这样子第三方组件中的嵌套元素中样式就可以生效了
      width:200px;
      height: 300px;
      background:#ddd;}</style>
login.less文件
.login-page{
  h1{
    cursor: pointer;
    background:#f00;}
  .el-button{
    width: 200px;}
  .el-input{
    width: 100px;}}
2、解决方案二:使用深度选择器: <<< 或者 /deep/
穿透性的改变第三方组件的样式需要加上deep,如果是stylus使用 >>> ,如果是less 或者sass就使用 /deep/
<template><div class="login-page"><h1>{{ msg}}</h1><div><el-button type="success" @click="login">登录</el-button><el-button type="success" @click="dialogVisible = true">弹框</el-button></div><el-input></el-input><div><el-dialog
        title="提示1111"
        :visible.sync="dialogVisible">
        这是一个弹框</el-dialog></div></div></template><style lang="less" scoped>
  @import"../less/login.less";</style>
login.less文件
.login-page{
  h1{
    cursor: pointer;
    background:#f00;}
  .el-button{
    width: 200px;}
  .el-input{
    width: 100px;}
  //穿透性的改变第三方组件的样式需要加上deep,如果是stylus使用>>>  ,如果是less 或者sass就使用  /deep/
  /deep/.el-dialog{
        width:200px;
        height: 300px;
        background:#ddd;}}
el-dialog成功产生效果为所自定义的样式: