在前后端实际开发中,我们会大量使用注解来控制权限。在每一次执行认证或授权的操作时,Shiro都会去DB中查询身份或者权限信息。已知,身份信息和权限信息是不会经常变动的,且十分繁杂。如果同时有很多用户对系统做操作,每一次操作Shiro都需要去DB中查询身份或权限,无疑增加了数据库的压力,耗费了大量的计算资源。
为了避免上述问题,我们在设计身份和权限时,都会添加缓存。
所谓缓存,就是如果系统对该用户已经认证或授权过一次,就把该用户的身份信息或权限信息给缓存起来,当改用户再次做认证或者授权时,Shiro直接去缓存中获取给用户的身份信息和权限信息。
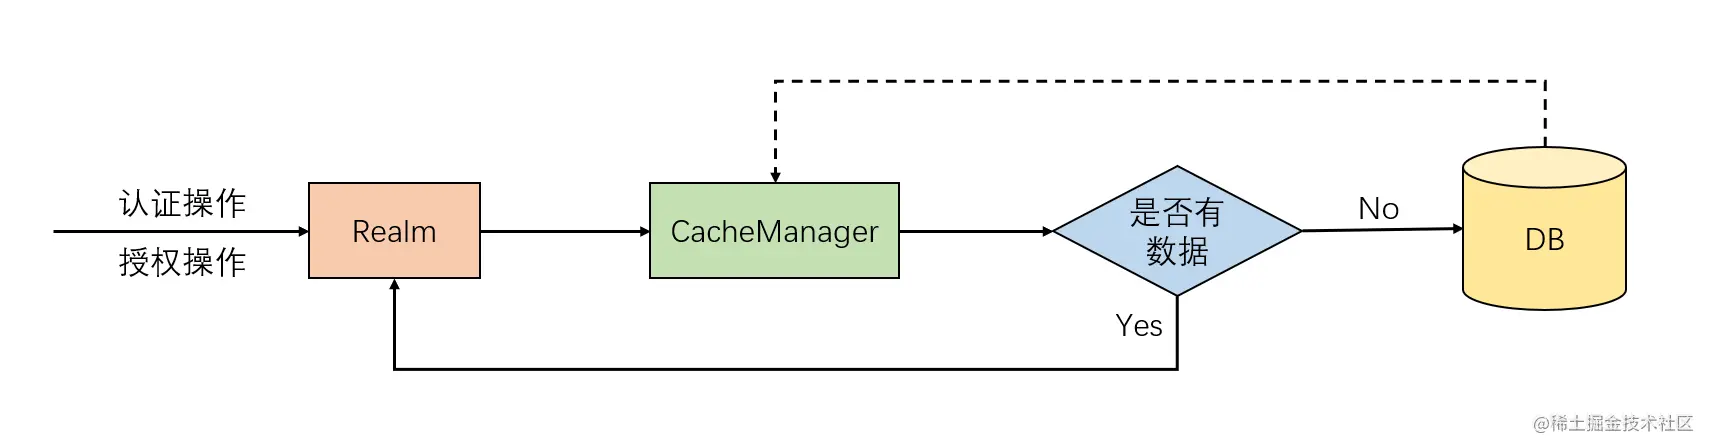
1. 实现流程
Shiro中提供了CacheManager作为缓存管理器,具体实现流程如下
2. 具体实现
Shiro默认的缓存为EhCache,只能实现本地缓存,如果应用服务器宕机,则缓存数据丢失。在实际生产实践中,一般都配合Redis实现分布式缓存,缓存数据独立于应用服务器之外,提高数据的安全性。
pom.xml中引入依赖<dependency> <groupId>org.springframework.boot</groupId> <artifactId>spring-boot-starter-data-redis</artifactId> </dependency>- 在
application.yml中配置RedisSpring: ... # Redis配置 redis: port: 6379 host: localhost database: 0 - 在shiro包中创建cache包
- 在cache包中创建Redis缓存管理器
public class RedisCacheManager implements CacheManager {

    // 每次执行缓存时,都会调用该方法,自动注入s
    // 参数s为在ShiroConfig中设置的认证缓存或授权缓存的名字
    @Override
    public <K, V> Cache<K, V> getCache(String s) throws CacheException {
        // 自动去RedisCahce中找具体实现
        return new RedisCache<K, V>(s);
    }

}
Shiro中提供了一个全局缓存管理器接口CacheManager,如果要实现自定义缓存管理器,必须要让自定义缓存管理器实现CacheManager接口。
- 在cache包中创建Reids缓存
public class RedisCache<K, V> implements Cache<K, V> {

    // 认证缓存或者授权缓存名名字
    private String cacheName;

    public RedisCache() {

    }

    public RedisCache(String cacheName) {
        this.cacheName = cacheName;
    }

    // 获取RedisTemplate实例
    private RedisTemplate getRedisTemplate() {
        // 从工厂中取出RedisTemplate实例
        RedisTemplate redisTemplate = (RedisTemplate) ApplicationContextUtils.getBean("redisTemplate");
        // 将Key的序列化规则设置为字符串
        redisTemplate.setKeySerializer(new StringRedisSerializer());
        // 将Hash中field的序列化规则设置为字符串
        redisTemplate.setHashKeySerializer(new StringRedisSerializer());

        return redisTemplate;
    }

    // 获取缓存
    @Override
    public V get(K k) throws CacheException {
        return (V) getRedisTemplate().opsForHash().get(this.cacheName, k.toString())
    }

    // 存入缓存
    @Override
    public V put(K k, V v) throws CacheException {
        getRedisTemplate().opsForHash().put(this.cacheName, k.toString(), v);

        return null;
    }

    // 删除缓存
    @Override
    public V remove(K k) throws CacheException {
        return (V) getRedisTemplate().opsForHash().delete(this.cacheName, k.toString());;
    }

    // 清空所有缓存
    @Override
    public void clear() throws CacheException {
        getRedisTemplate().delete(this.cacheName);
    }

    // 缓存数量
    @Override
    public int size() {
        return getRedisTemplate().opsForHash().size(this.cacheName).intValue();
    }

    // 获取所有Key
    @Override
    public Set<K> keys() {
        return getRedisTemplate().opsForHash().keys(this.cacheName);
    }

    // 获取所有Value
    @Override
    public Collection<V> values() {
        return getRedisTemplate().opsForHash().values(this.cacheName);
    }

}
CacheManager底层真正实现缓存的是Cache<K,V>,因此还需要创建一个RedisCache才能真正实现自定义缓存,RedisCache同样要实现Cache接口。
RedisCache中所有接口全部使用Redis来实现,从而实现Shiro与Redis的整合,至于什么时候调用RedisCache中的什么接口,由Shiro来决定,我们只需定义即可。
Redis对于Shiro身份和权限的管理使用的数据结构是Hash,Key对应cacheName,field对应k,value对应v。
- 在ShiroConfig中配置缓存管理器
@Configuration public class ShiroConfig { // 创建ShiroFilter @Bean public ShiroFilterFactoryBean getShiroFilterFactoryBean(DefaultWebSecurityManager defaultWebSecurityManager) { ... } // 创建具有Web特性的SecurityManager @Bean public DefaultWebSecurityManager getDefaultWebSecurityManager(@Qualifier("getRealm") Realm realm) { ... } // 创建自定义Realm @Bean public Realm getRealm() { ... // 注入缓存管理器 userRealm.setCacheManager(new RedisCacheManager()); // 开启全局缓存 userRealm.setCachingEnabled(true); // 开启认证缓存,并命名(真实的认证缓存名为cacheName) userRealm.setAuthenticationCachingEnabled(true); userRealm.setAuthenticationCacheName("authenticationCache"); // 开启授权缓存,并命名(真实的授权缓存名为完整包名+cacheName) userRealm.setAuthorizationCachingEnabled(true); userRealm.setAuthorizationCacheName("authorizationCache"); return userRealm; } } - 序列化和反序列化Salt
按照上文的配置方式,Salt是直接被ByteSource存储,没有被序列化的。
// 获取加密的密码和Salt,Shiro自动进行认证
if (user != null) {
    return new SimpleAuthenticationInfo(username, user.getPassword(), ByteSource.Util.bytes(user.getSalt()), this.getName());
}
在Shiro认证过程中,Salt也要随着Username和Password一起被存入缓存。Username和Password被String序列化和反序列化,而Salt(ByteSource)也需要进行序列化和反序列化。
在shiro包中创建salt包,在salt包中创建能够被Redis序列化和反序列化ByteSourcepublic class MyByteSource implements ByteSource, Serializable { private byte[] bytes; private String cachedHex; private String cachedBase64; public MyByteSource() { } public MyByteSource(byte[] bytes) { this.bytes = bytes; } public MyByteSource(char[] chars) { this.bytes = CodecSupport.toBytes(chars); } public MyByteSource(String string) { this.bytes = CodecSupport.toBytes(string); } public MyByteSource(ByteSource source) { this.bytes = source.getBytes(); } public MyByteSource(File file) { this.bytes = (new MyByteSource.BytesHelper()).getBytes(file); } public MyByteSource(InputStream stream) { this.bytes = (new MyByteSource.BytesHelper()).getBytes(stream); } public static boolean isCompatible(Object o) { return o instanceof byte[] || o instanceof char[] || o instanceof String || o instanceof ByteSource || o instanceof File || o instanceof InputStream; } @Override public byte[] getBytes() { return this.bytes; } @Override public boolean isEmpty() { return this.bytes == null || this.bytes.length == 0; } @Override public String toHex() { if (this.cachedHex == null) { this.cachedHex = Hex.encodeToString(this.getBytes()); } return this.cachedHex; } @Override public String toBase64() { if (this.cachedBase64 == null) { this.cachedBase64 = Base64.encodeToString(this.getBytes()); } return this.cachedBase64; } @Override public String toString() { return this.toBase64(); } @Override public int hashCode() { return this.bytes != null && this.bytes.length != 0 ? Arrays.hashCode(this.bytes) : 0; } @Override public boolean equals(Object o) { if (o == this) { return true; } else if (o instanceof ByteSource) { ByteSource bs = (ByteSource)o; return Arrays.equals(this.getBytes(), bs.getBytes()); } else { return false; } } private static final class BytesHelper extends CodecSupport { private BytesHelper() { } public byte[] getBytes(File file) { return this.toBytes(file); } public byte[] getBytes(InputStream stream) { return this.toBytes(stream); } } }注意,不能将MyByteSource继承SimpleByteSource,因为SimpleByteSource没有无参构造,因此只能实现序列化而不能实现反序列化,因为Salt被Redis反序列化时,需要调用MyByteSource的无参构造,因此MyByteSource只能实现ByteSource。
// 获取加密的密码和Salt,Shiro自动进行认证
if (user != null) {
    return new SimpleAuthenticationInfo(username, user.getPassword(), new MyByteSource(user.getSalt()), this.getName());
}
测试
账号登录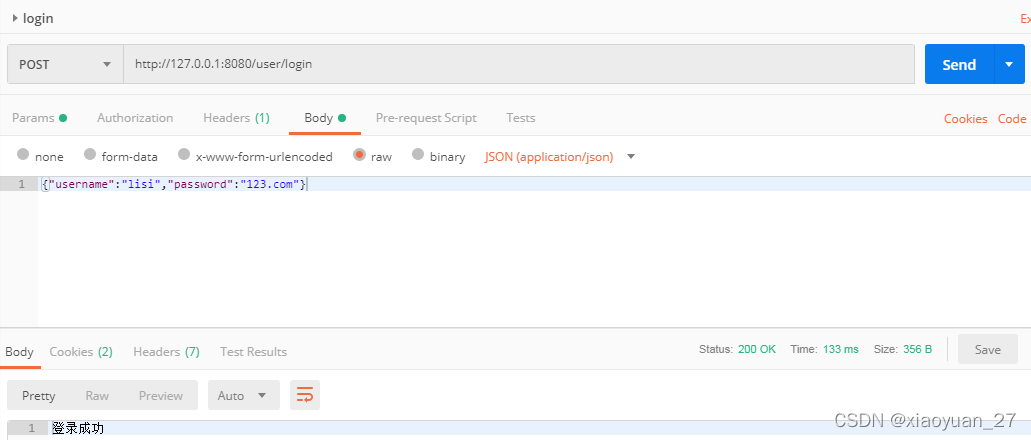
登录成功,将lisi的信息存到Redis中
测试使用admin角色访问接口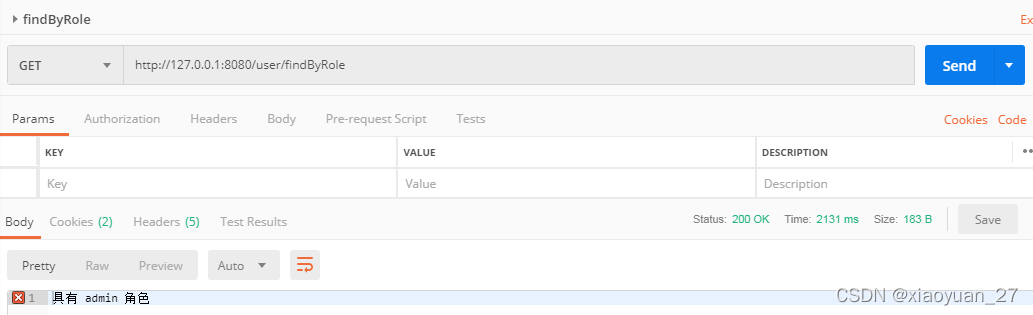
lisi账号的角色、权限信息会存储到Redis中