基本介绍
博客最基本的功能就是让作者能够自由发布自己的文章,分享自己观点,记录学习的过程。Halo 为用户提供了发布文章和展示自定义页面的功能,下面我们分析一下这些功能的实现过程。
管理员发布文章
Halo 项目中,文章和页面的实体类分别为 Post 和 Sheet,二者都是 BasePost 的子类。BasePost 对应数据库中的 posts 表,posts 表既存储了文章的数据,又存储了页面的数据,那么项目中是如何区分文章和页面的呢?下面是 BasePost 类的源码(仅展示部分代码):
@Data
@Entity(name = "BasePost")
@Table(name = "posts", indexes = {
    @Index(name = "posts_type_status", columnList = "type, status"),
    @Index(name = "posts_create_time", columnList = "create_time")})
@DiscriminatorColumn(name = "type", discriminatorType = DiscriminatorType.INTEGER,
    columnDefinition = "int default 0")
@ToString(callSuper = true)
@EqualsAndHashCode(callSuper = true)
public class BasePost extends BaseEntity {

    @Id
    @GeneratedValue(strategy = GenerationType.IDENTITY, generator = "custom-id")
    @GenericGenerator(name = "custom-id", strategy = "run.halo.app.model.entity.support"
        + ".CustomIdGenerator")
    private Integer id;

    /**
     * Post title.
     */
    @Column(name = "title", nullable = false)
    private String title;

    /**
     * Post status.
     */
    @Column(name = "status")
    @ColumnDefault("1")
    private PostStatus status;
    // 此处省略部分代码
}
我们知道,Halo 使用 JPA 来创建数据表、存储和获取表中的信息。上述代码中,注解 @DiscriminatorColumn 是之前文章中没有介绍过的,@DiscriminatorColumn 属于 JPA 注解,它的作用是当多个实体类对应同一个数据表时,可使用一个字段进行区分。name 指定该字段的名称,discriminatorType 是该字段的类型,columnDefinition 设置该字段的默认值。由此可知,字段 type 是区分文章和页面的依据,下面是 Post 类和 Sheet 类的源码:
// Post
@Entity(name = "Post")
@DiscriminatorValue(value = "0")
public class Post extends BasePost {

}

// Sheet
@Entity(name = "Sheet")
@DiscriminatorValue("1")
public class Sheet extends BasePost {

}
Post 和 Sheet 都没有定义额外的属性,二者的区别仅在于注解 @DiscriminatorValue 设置的 value 不同。上文提到,@DiscriminatorColumn 指明了用作区分的字段,而 @DiscriminatorValue 的作用就是指明该字段的具体值。也就是说,type 为 0 时表示文章,为 1 时表示页面。另外,这里也简单介绍一下 @Index 注解,该注解用于声明表中的索引,例如 @Index(name = "posts_type_status", columnList = "type, status") 表示在 posts 表中创建 type 和 status 的复合索引,索引名称为 posts_type_status。
下面我们继续分析文章是如何发布的,首先进入到管理员界面,然后点击 "文章" -> "写文章",之后就可以填写内容了:

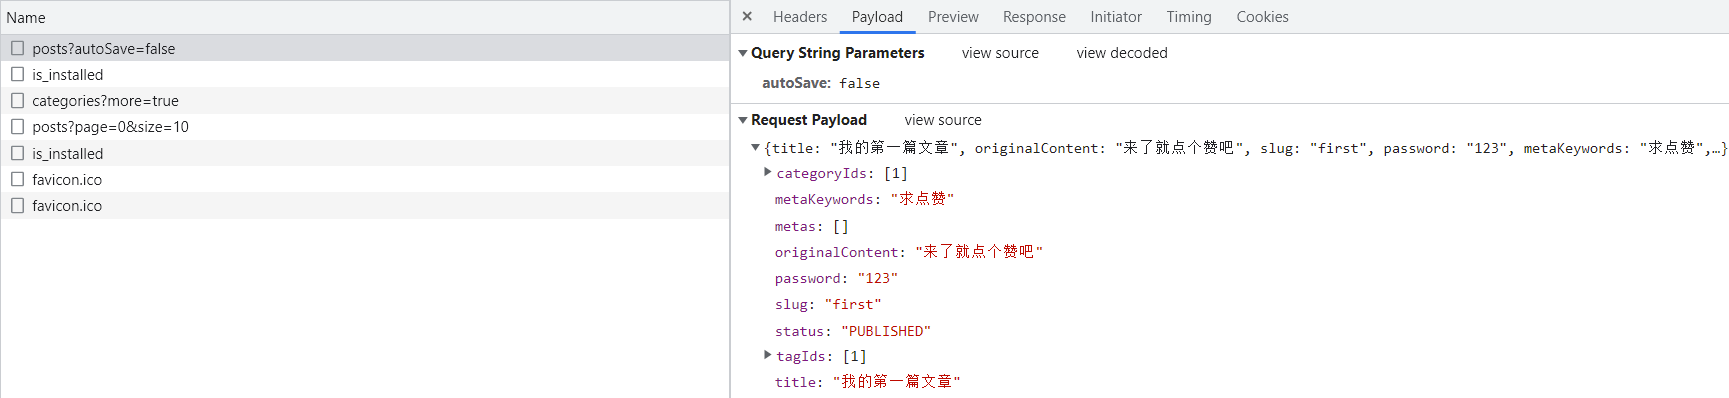
为了全面了解文章发布的过程,我们尽量将能填的信息都填上。点击 "发布",触发/api/admin/posts 请求:
api/admin/posts 请求在 PostController 中定义:
@PostMapping
@ApiOperation("Creates a post")
public PostDetailVO createBy(@Valid @RequestBody PostParam postParam,
    @RequestParam(value = "autoSave", required = false, defaultValue = "false") Boolean autoSave
) {
    // 将 PostParam 对象转化为 Post 对象
    // Convert to
    Post post = postParam.convertTo();
    // 根据参数创建文章
    return postService.createBy(post, postParam.getTagIds(), postParam.getCategoryIds(),
        postParam.getPostMetas(), autoSave);
}
该请求接收两个参数,即 postParam 和 autoSave。postParam 存储我们填写的文章信息,autoSave 是与系统日志有关的参数,默认为 false。服务器收到请求后,首先将接收到的 PostParam 对象转化为 Post 对象,然后从 PostParam 中提取出文章标签、分类、元数据等,接着调用 createBy 方法创建文章,createBy 方法的处理逻辑为:
public PostDetailVO createBy(Post postToCreate, Set<Integer> tagIds, Set<Integer> categoryIds,
    Set<PostMeta> metas, boolean autoSave) {
    // 创建或更新文章
    PostDetailVO createdPost = createOrUpdate(postToCreate, tagIds, categoryIds, metas);
    if (!autoSave) {
        // 记录系统日志
        // Log the creation
        LogEvent logEvent = new LogEvent(this, createdPost.getId().toString(),
            LogType.POST_PUBLISHED, createdPost.getTitle());
        eventPublisher.publishEvent(logEvent);
    }
    return createdPost;
}
该方法会调用 createOrUpdate 方法创建文章,由于 autoSave 为 false,所以文章创建完成后会记录一条关于文章发布的系统日志。继续进入 createOrUpdate 方法,查看创建文章的具体过程:
private PostDetailVO createOrUpdate(@NonNull Post post, Set<Integer> tagIds,
        Set<Integer> categoryIds, Set<PostMeta> metas) {
    Assert.notNull(post, "Post param must not be null");

    // 查看创建或更新的文章是否为私密文章
    // Create or update post
    Boolean needEncrypt = Optional.ofNullable(categoryIds)
        .filter(HaloUtils::isNotEmpty)
        .map(categoryIdSet -> {
            for (Integer categoryId : categoryIdSet) {
                // 文章分类是否设有密码
                if (categoryService.categoryHasEncrypt(categoryId)) {
                    return true;
                }
            }
            return false;
        }).orElse(Boolean.FALSE);

    // 如果文章的密码不为空或者所属分类设有密码, 那么该文章就属于私密文章
    // if password is not empty or parent category has encrypt, change status to intimate
    if (post.getStatus() != PostStatus.DRAFT
        && (StringUtils.isNotEmpty(post.getPassword()) || needEncrypt)
    ) {
        post.setStatus(PostStatus.INTIMATE);
    }

    // 格式化文章的内容, 检查文章的别名是否有重复, 都没问题就创建文章
    post = super.createOrUpdateBy(post);

    // 移除文章原先绑定的标签
    postTagService.removeByPostId(post.getId());

    // 移除文章原先绑定的分类
    postCategoryService.removeByPostId(post.getId());

    // 新设置的标签
    // List all tags
    List<Tag> tags = tagService.listAllByIds(tagIds);

    // 新设置的分类
    // List all categories
    List<Category> categories = categoryService.listAllByIds(categoryIds, true);

    // Create post tags
    List<PostTag> postTags = postTagService.mergeOrCreateByIfAbsent(post.getId(),
        ServiceUtils.fetchProperty(tags, Tag::getId));

    log.debug("Created post tags: [{}]", postTags);

    // Create post categories
    List<PostCategory> postCategories =
        postCategoryService.mergeOrCreateByIfAbsent(post.getId(),
            ServiceUtils.fetchProperty(categories, Category::getId));

    log.debug("Created post categories: [{}]", postCategories);

    // 移除文章原有的元数据并将新设置的元数据绑定到该文章
    // Create post meta data
    List<PostMeta> postMetaList = postMetaService
        .createOrUpdateByPostId(post.getId(), metas);
    log.debug("Created post metas: [{}]", postMetaList);

    // 当文章创建或更新时清除对所有客户端的授权
    // Remove authorization every time an post is created or updated.
    authorizationService.deletePostAuthorization(post.getId());

    // 返回文章的信息, 便于管理员界面展示
    // Convert to post detail vo
    return convertTo(post, tags, categories, postMetaList);
}-
检查当前创建或更新的文章是否为私密文章,如果文章设有密码,或者文章所属的分类设有密码,那么就将文章的状态改为 INTIMATE,表示该文章属于私密文章。
-
对文章的内容进行格式化,也就是将原始内容转化为能够在前端展示的带有 HTML 标签的内容。然后检查文章的别名是否有重复,检查无误后在 posts 表中创建该文章。
-
移除文章原先绑定的所有标签和分类。
-
为文章重新绑定标签和分类,以标签为例,绑定的逻辑为:首先查询出文章原先绑定的标签,记为集合 A,然后将新设置的标签记为集合 B,之后在 post_tags 表中删除集合 A 中存在但集合 B 中不存在的记录,并创建集合 B 中不存在而集合 A 中存在的记录。步骤 4 其实和步骤 3 是有冲突的,因为步骤 3 将文章原先绑定的标签删除了,所以集合 A 中的元素总是为 0,实际上步骤 3 中的操作是多余的,可以将其注释掉。
-
移除文章原有的元数据,将新设置的元数据绑定到该文章。
-
删除对所有客户端的文章授权,文章授权是针对私密文章设置的,在下节中我们会分析一下文章授权的作用。
-
返回文章的具体信息,供管理员页面展示。
执行完以上步骤,一篇文章就创建或更新完成了:

用户端访问文章
本节介绍用户(普通用户,非管理员)访问文章的具体过程,上文中,我们在创建文章时为文章设置了密码,因此该文章属于私密文章。Halo 为私密文章设置了的 "授权" 机制,授权指的是当用户首次访问私密文章时,需要填写访问密码,服务器收到请求后,会检查用户的密码是否正确。如果正确,那么服务端会对客户端进行授权,这样当用户在短时间内再次访问该文章时可以不用重复输入密码。
默认情况下私密文章是不会在博客首页展示的,为了测试,我们修改 PostModel 中的 list 方法,首先将下面的代码注释掉:
Page<Post> postPage = postService.pageBy(PostStatus.PUBLISHED, pageable);然后新增如下代码:
PostQuery query = new PostQuery();
query.setStatuses(new HashSet<>(Arrays.asList(PostStatus.PUBLISHED, PostStatus.INTIMATE)));
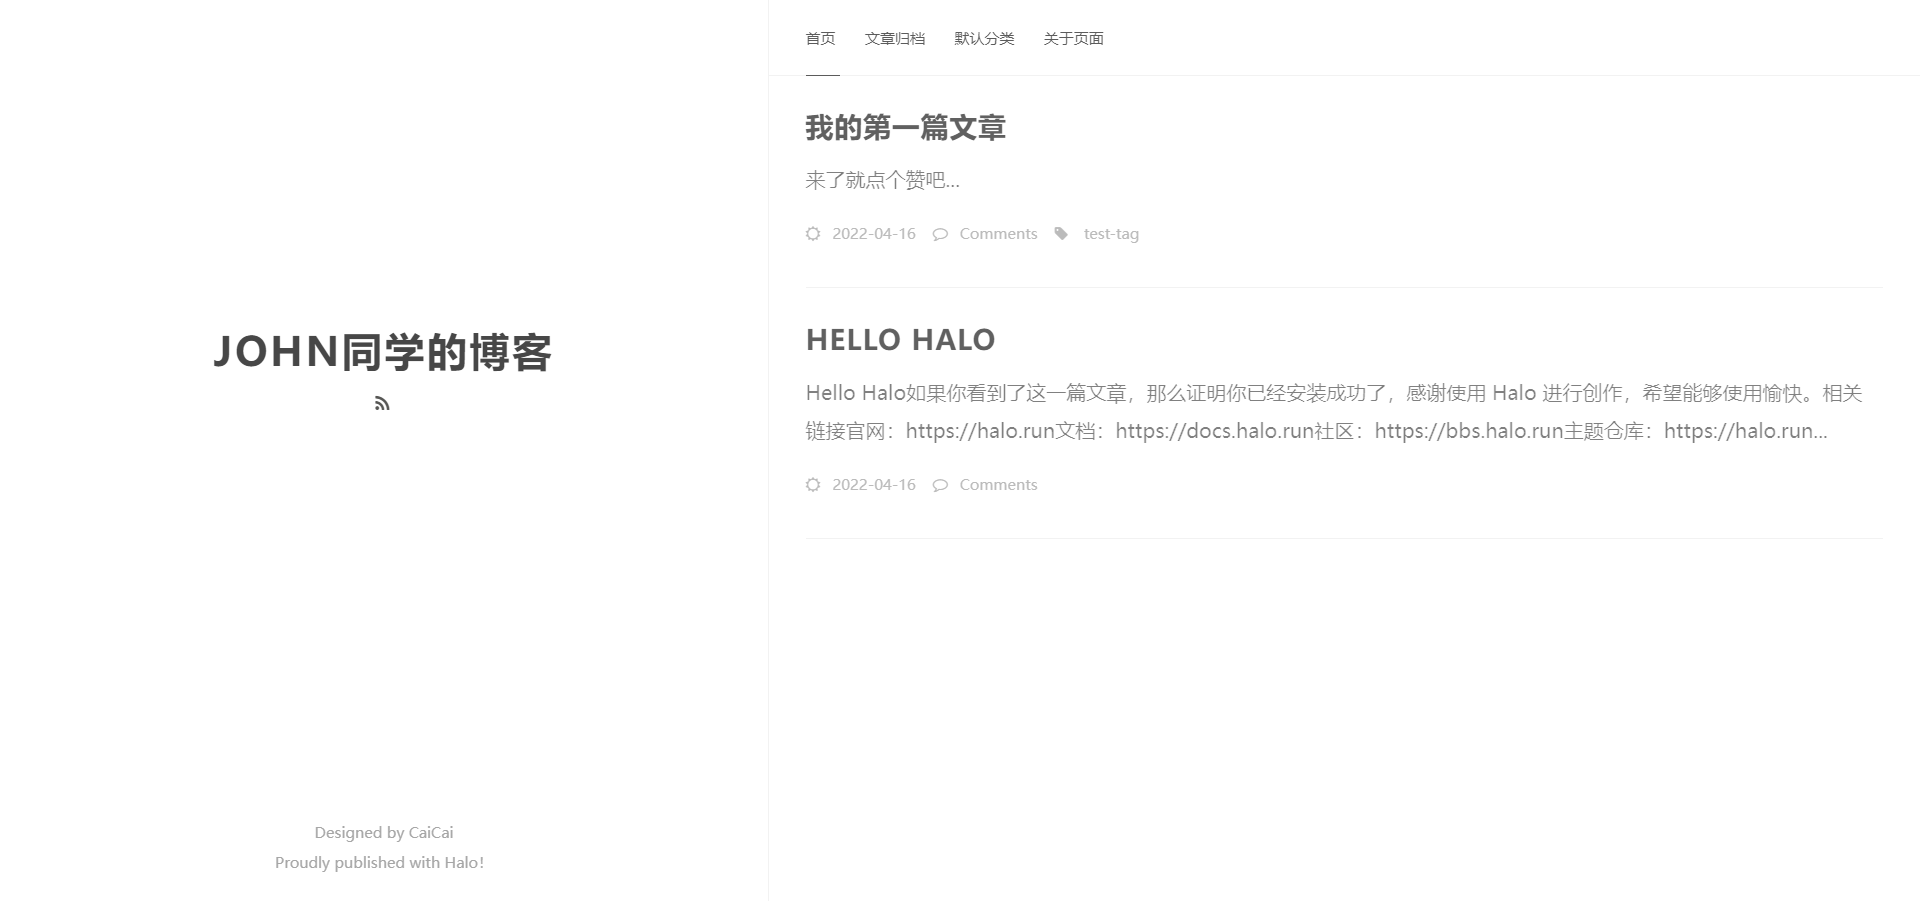
Page<Post> postPage = postService.pageBy(query, pageable);这样,博客主页就可以展示状态为 "已发布" 和 "私密" 的文章了:
点击 "我的第一篇文章",触发/archives/first 请求,first 为文章的别名 slug,该请求由 ContentContentController 的 content 方法处理(仅展示部分代码):
@GetMapping("{prefix}/{slug}")
public String content(@PathVariable("prefix") String prefix,
    @PathVariable("slug") String slug,
    @RequestParam(value = "token", required = false) String token,
    Model model) {
    PostPermalinkType postPermalinkType = optionService.getPostPermalinkType();
    if (optionService.getArchivesPrefix().equals(prefix)) {
        if (postPermalinkType.equals(PostPermalinkType.DEFAULT)) {
            // 根据 slug 查询出文章的
            Post post = postService.getBySlug(slug);
            return postModel.content(post, token, model);
        }
        // 省略部分代码
    }
}
上述方法首先根据 slug 查询出 title 为 "我的第一篇文章" 的文章,然后调用 postModel.content 方法封装文章的信息,postModel.content 方法的处理逻辑如下:
public String content(Post post, String token, Model model) {
    // 文章在回收站
    if (PostStatus.RECYCLE.equals(post.getStatus())) {
        // Articles in the recycle bin are not allowed to be accessed.
        throw new NotFoundException("查询不到该文章的信息");
    } else if (StringUtils.isNotBlank(token)) {
        // If the token is not empty, it means it is an admin request,
        // then verify the token.

        // verify token
        String cachedToken = cacheStore.getAny(token, String.class)
            .orElseThrow(() -> new ForbiddenException("您没有该文章的访问权限"));
        if (!cachedToken.equals(token)) {
            throw new ForbiddenException("您没有该文章的访问权限");
        }
        // 手稿
    } else if (PostStatus.DRAFT.equals(post.getStatus())) {
        // Drafts are not allowed bo be accessed by outsiders.
        throw new NotFoundException("查询不到该文章的信息");
        //
    } else if (PostStatus.INTIMATE.equals(post.getStatus())
        && !authenticationService.postAuthentication(post, null)
    ) {
        // Encrypted articles must has the correct password before they can be accessed.

        model.addAttribute("slug", post.getSlug());
        model.addAttribute("type", EncryptTypeEnum.POST.getName());
        // 如果激活的主题定义了输入密码页面
        if (themeService.templateExists(POST_PASSWORD_TEMPLATE + SUFFIX_FTL)) {
            return themeService.render(POST_PASSWORD_TEMPLATE);
        }
        // 进入输入密码页面
        return "common/template/" + POST_PASSWORD_TEMPLATE;
    }

    post = postService.getById(post.getId());

    if (post.getEditorType().equals(PostEditorType.MARKDOWN)) {
        post.setFormatContent(MarkdownUtils.renderHtml(post.getOriginalContent()));
    } else {
        post.setFormatContent(post.getOriginalContent());
    }

    postService.publishVisitEvent(post.getId());

    postService.getPrevPost(post).ifPresent(
        prevPost -> model.addAttribute("prevPost", postService.convertToDetailVo(prevPost)));
    postService.getNextPost(post).ifPresent(
        nextPost -> model.addAttribute("nextPost", postService.convertToDetailVo(nextPost)));

    List<Category> categories = postCategoryService.listCategoriesBy(post.getId(), false);
    List<Tag> tags = postTagService.listTagsBy(post.getId());
    List<PostMeta> metas = postMetaService.listBy(post.getId());

    // Generate meta keywords.
    if (StringUtils.isNotEmpty(post.getMetaKeywords())) {
        model.addAttribute("meta_keywords", post.getMetaKeywords());
    } else {
        model.addAttribute("meta_keywords",
            tags.stream().map(Tag::getName).collect(Collectors.joining(",")));
    }

    // Generate meta description.
    if (StringUtils.isNotEmpty(post.getMetaDescription())) {
        model.addAttribute("meta_description", post.getMetaDescription());
    } else {
        model.addAttribute("meta_description",
            postService.generateDescription(post.getFormatContent()));
    }

    model.addAttribute("is_post", true);
    model.addAttribute("post", postService.convertToDetailVo(post));
    model.addAttribute("categories", categoryService.convertTo(categories));
    model.addAttribute("tags", tagService.convertTo(tags));
    model.addAttribute("metas", postMetaService.convertToMap(metas));

    if (themeService.templateExists(
        ThemeService.CUSTOM_POST_PREFIX + post.getTemplate() + SUFFIX_FTL)) {
        return themeService.render(ThemeService.CUSTOM_POST_PREFIX + post.getTemplate());
    }

    return themeService.render("post");
}-
如果文章状态为 "草稿" 或 "位于回收站",那么向前端反馈无文章信息。如果请求的 Query 中存在 token,那么该请求为一个 admin 请求(与管理员在后台浏览文章时发送的请求是类似的,只不过在管理员界面访问文章时 token 存储在请求的 Header 中,这里的 token 存储在请求的 Query 参数中),此时检查 token 是否有效。如果文章状态为 "私密" 且客户端并未获得 "授权",那么重定向到密码输入页面,否则执行如下步骤。
-
对文章内容进行格式化,记录文章被访问的系统日志。
-
在 model 中封装文章的内容、标签、分类、元数据、前一篇文章、后一篇文章等信息,然后利用 FreeMaker 基于 post.ftl 文件(已激活主题的)生成 HTML 页面。
对于 "已发布" 和 "已获得授权" 的文章,请求处理完成后用户可直接看到文章的内容。由于 "我的第一篇文章" 属于私密文章且并未对用户进行授权,因此页面发生了重定向:
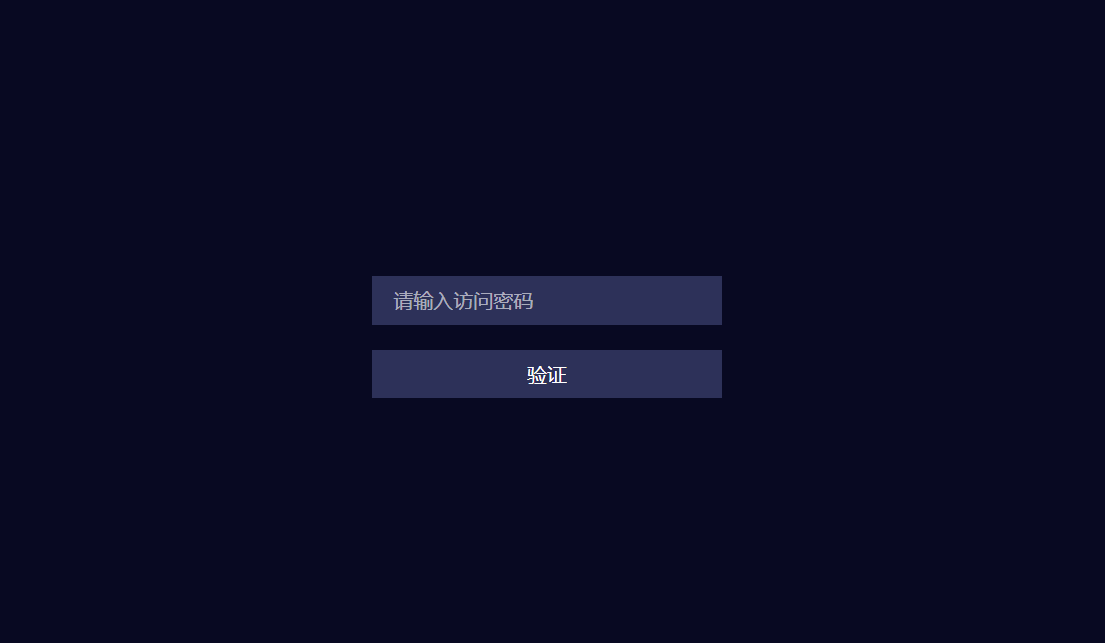
输入密码后,点击 "验证",触发content/post/first/authentication 请求,该请求由 ContentContentController 的 password 方法处理:
@PostMapping(value = "content/{type}/{slug:.*}/authentication")
@CacheLock(traceRequest = true, expired = 2)
public String password(@PathVariable("type") String type,
    @PathVariable("slug") String slug,
    @RequestParam(value = "password") String password) throws UnsupportedEncodingException {

    String redirectUrl;
    // 如果 type 为 post
    if (EncryptTypeEnum.POST.getName().equals(type)) {
        // 授权操作
        redirectUrl = doAuthenticationPost(slug, password);
    } else if (EncryptTypeEnum.CATEGORY.getName().equals(type)) {
        redirectUrl = doAuthenticationCategory(slug, password);
    } else {
        throw new UnsupportedException("未知的加密类型");
    }
    return "redirect:" + redirectUrl;
}
因为 URL 中的 type 为 post(我们访问的是文章),因此由 doAuthenticationPost 方法为客户端授权:
private String doAuthenticationPost(
    String slug, String password) throws UnsupportedEncodingException {
    Post post = postService.getBy(PostStatus.INTIMATE, slug);

    post.setSlug(URLEncoder.encode(post.getSlug(), StandardCharsets.UTF_8.name()));

    authenticationService.postAuthentication(post, password);

    BasePostMinimalDTO postMinimalDTO = postService.convertToMinimal(post);

    StringBuilder redirectUrl = new StringBuilder();

    if (!optionService.isEnabledAbsolutePath()) {
        redirectUrl.append(optionService.getBlogBaseUrl());
    }

    redirectUrl.append(postMinimalDTO.getFullPath());

    return redirectUrl.toString();
}上述代码中,authenticationService.postAuthentication(post, password); 是为客户端进行授权操作的,授权完成后服务器会将请求重定向到/archives/first,如果授权成功那么用户就可以看到文章的内容,如果授权失败那么仍然处于 "密码输入" 页面。进入到 postAuthentication 方法查看授权的具体过程(省略部分代码):
public boolean postAuthentication(Post post, String password) {
    // 从 cacheStore 中查询出当前客户端已获得授权的文章 id
    Set<String> accessPermissionStore = authorizationService.getAccessPermissionStore();

    // 如果文章的密码不为空
    if (StringUtils.isNotBlank(post.getPassword())) {
        // 如果已经受过权
        if (accessPermissionStore.contains(AuthorizationService.buildPostToken(post.getId()))) {
            return true;
        }
        // 如果密码正确就为客户端授权
        if (post.getPassword().equals(password)) {
            authorizationService.postAuthorization(post.getId());
            return true;
        }
        return false;
    }
    // 省略部分代码
}-
首先利用 cacheStore 查询出当前客户端已获得授权的文章 id,cacheStore 是一个以 ConcurrentHashMap 为容器的内部缓存,该操作指的是从缓存中查询出 key 为 "ACCESS_PERMISSION: sessionId" 的 value(一个 Set 集合),其中 sessionId 是当前 session 的 id。我们在前一篇文章中介绍过 Halo 中的 3 个过滤器,用户端(非管理员)发送的浏览文章的请求会被 ContentFilter 拦截,且每次拦截后都会执行 doAuthenticate 方法,该方法中的
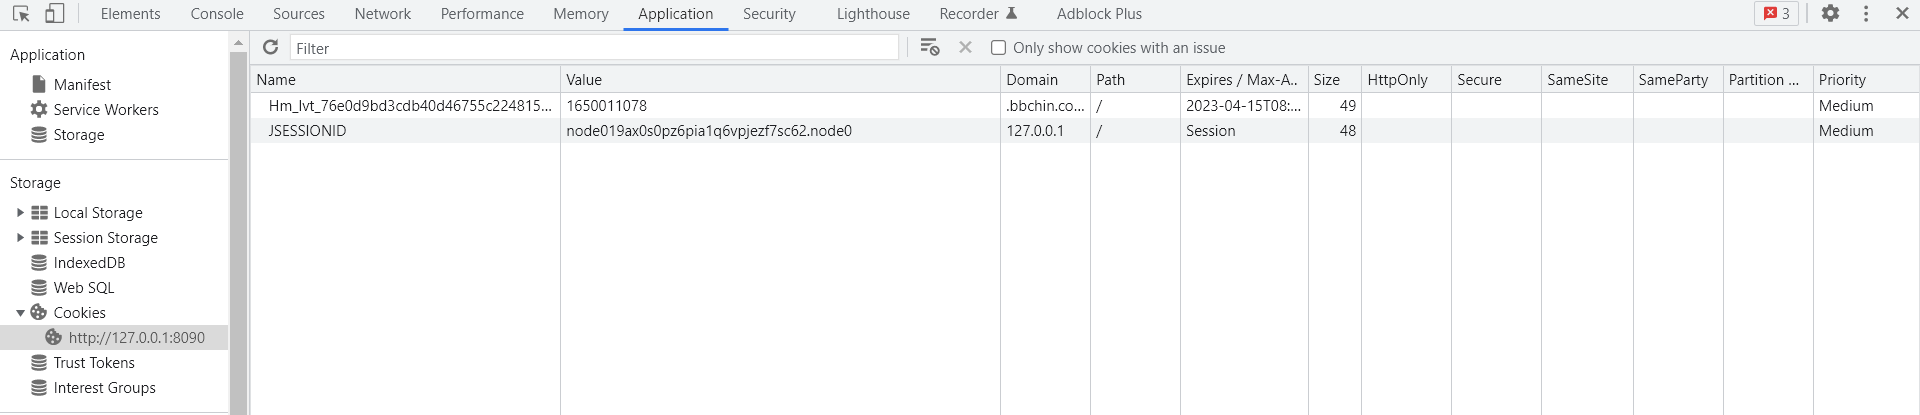
request.getSession(true);保证了服务端一定会创建一个 session。session 创建完成后存储在服务端,默认情况下服务端会为客户端分配一个特殊的 cookie,名称为 "JSESSIONID",其存储的值就是 session 的 id。之后客户端发送请求时,服务端可以通过请求中的 cookie 查询出存储的 session,并根据 session 确定客户端的身份。因此可以使用 "ACCESS_PERMISSION: sessionId" 作为 key 来保存当前客户端已获得授权的文章 id。 -
判断文章的密码是否为空,不为空就表示文章本身属于私密文章,为空表示文章属于设有密码的分类。因为文章设有密码,所以继续执行下面的步骤。
-
查看 accessPermissionStore 中(步骤 1 查询出的 Set 集合)是否包含正在访问的文章的 id。如果包含,那么就表示已为当前客户端授权过,不包含的话继续执行下面的步骤。
-
判断用户输入的密码与文章的密码是否相同,相同的话就为客户端授权,也就是在 accessPermissionStore 中存储当前文章的 id。
授权成功后,客户端再次访问该私密文章时,服务器可以根据 cookie 得到 sessionId,然后从 cacheStore 中查询出 key 为 "ACCESS_PERMISSION: sessionId" 的 value,判断 value 中是否包含当前文章的 id。如果包含,那么就表示客户端已经获得了文章的访问权限,服务器可向前端返回文章内容,这个过程对应的是前文中 postModel.content 方法的处理逻辑。
了解了 Halo 中的 "文章授权" 机制后,我们就能明白为什么服务器在创建或更新文章时会删除对所有客户端的授权。因为此时文章的信息发生了变化,密码也可能重置,因此客户端需要重新输入密码。结合前一篇文章我们可以得出结论:管理员访问管理员界面上的功能时,服务器根据 Request Headers 中的 token 来确定管理员的身份。普通用户访问私密文章时,服务器根据 cookie 判断用户是否具有文章的访问权限,cookie 和 token 是两种非常重要的身份认证方式。
客户端(浏览器)保存的cookie:
客户端访问文章时请求中携带 cookie:

元数据
元数据指的是描述数据属性的信息,Halo 中可为文章设置元数据。创建或更新文章时,点击 "高级" 选项后即可添加元数据,默认的主题caicai_anatole 没有提供可使用的元数据,所以我们将更主题更换为joe2.0(其它主题也可),为文章添加元数据:
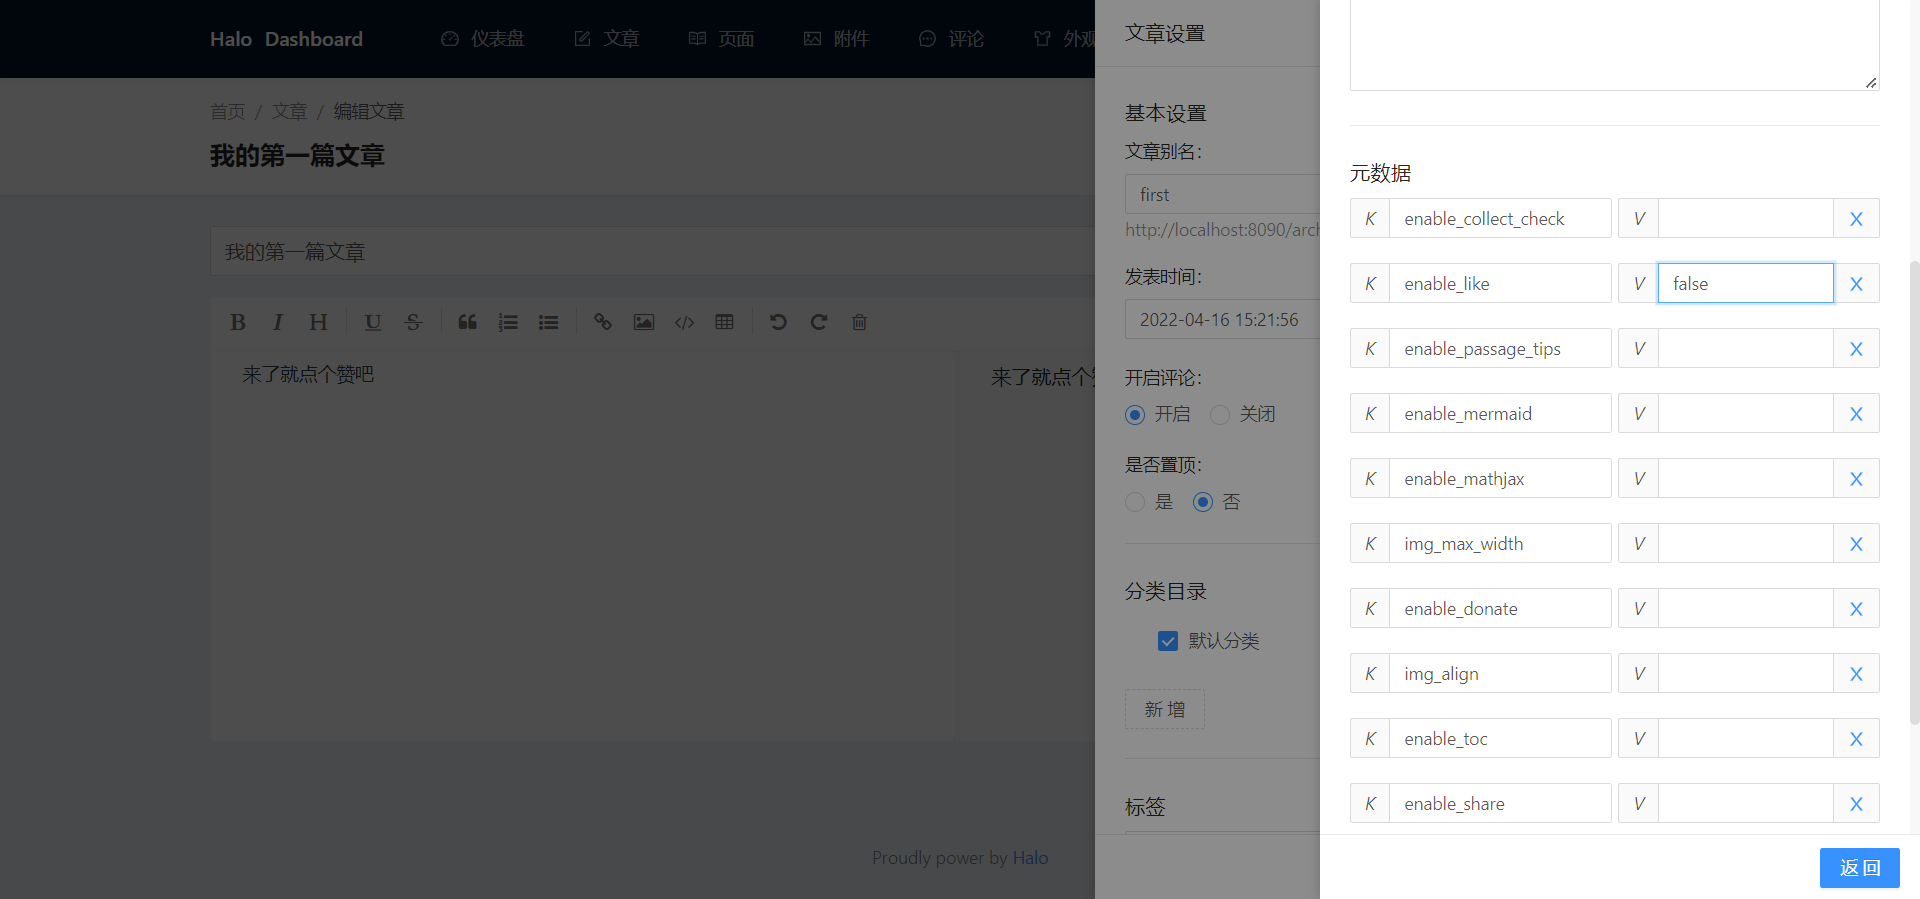
上图中,我们为 "我的第一篇文章" 添加了一个元数据,其中 meta_key 为 "enable_like",meta_value 为 "false",表示该文章不允许点赞。前文中介绍过,用户访问文章时,服务器会将文章的信息进行封装,其中就包括文章的元数据,封装完成后,由 FreeMaker 基于 post.ftl 文件生成用于浏览的 HTML 页面。joe2.0 主题的 post.ftl 文件会根据 "enable_like" 的值决定是否显示点赞按钮。
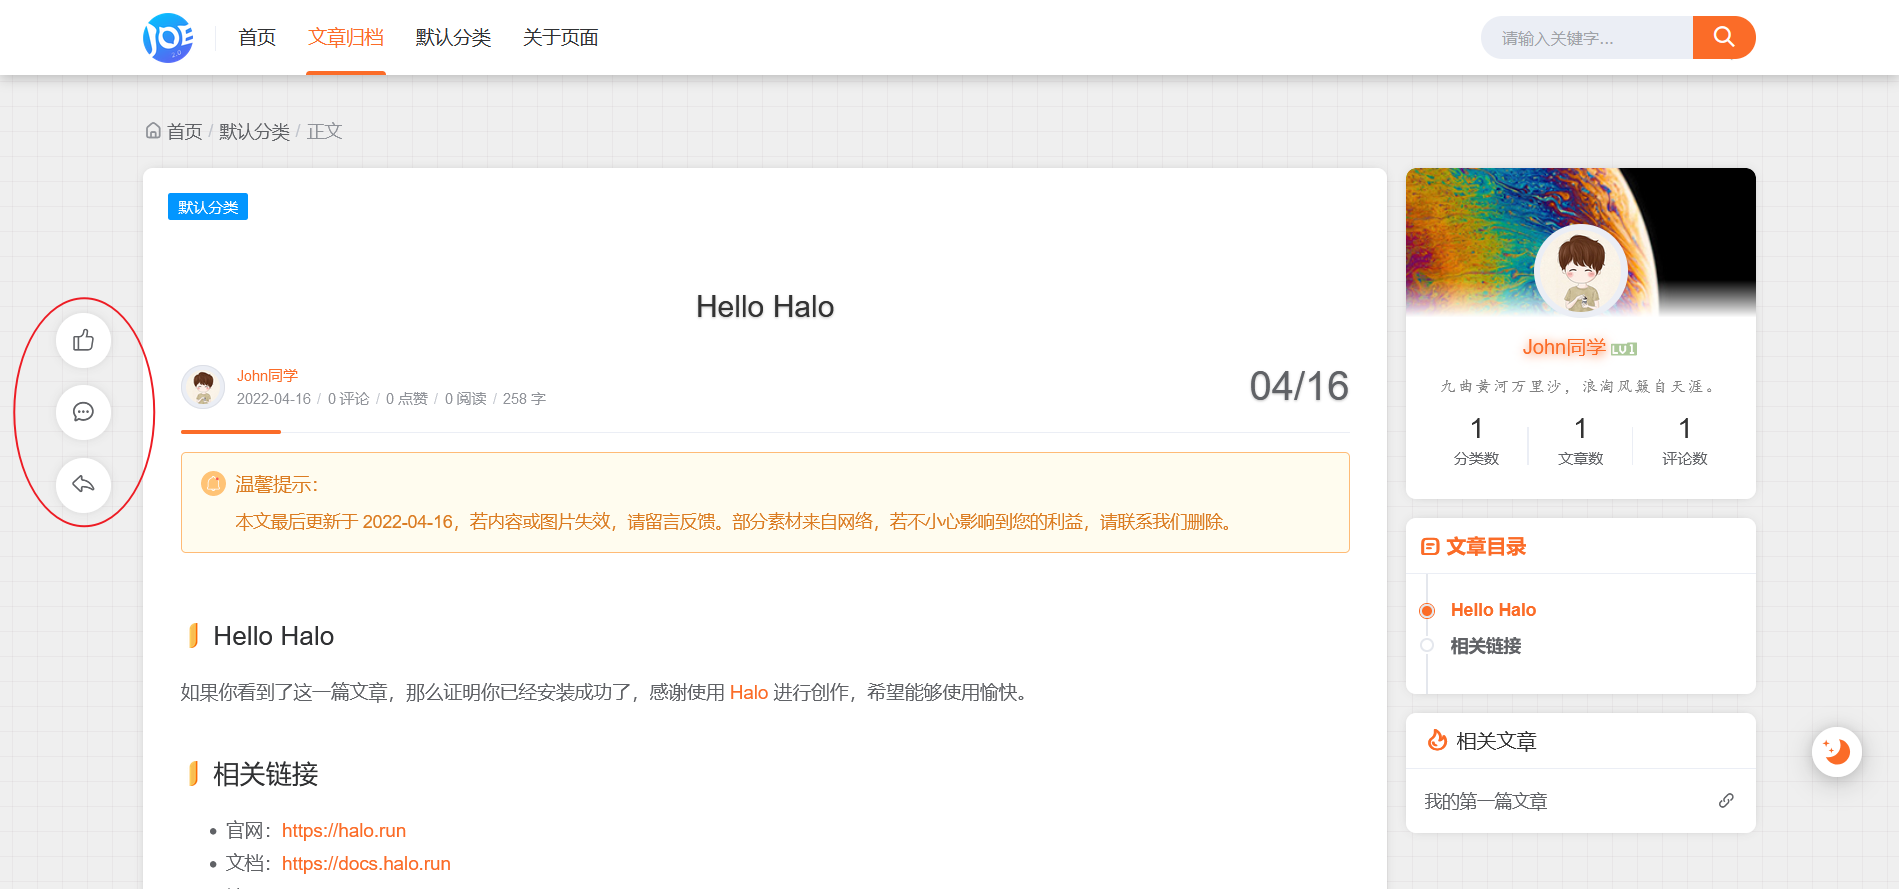
文章 "Hello Halo" 可以点赞:
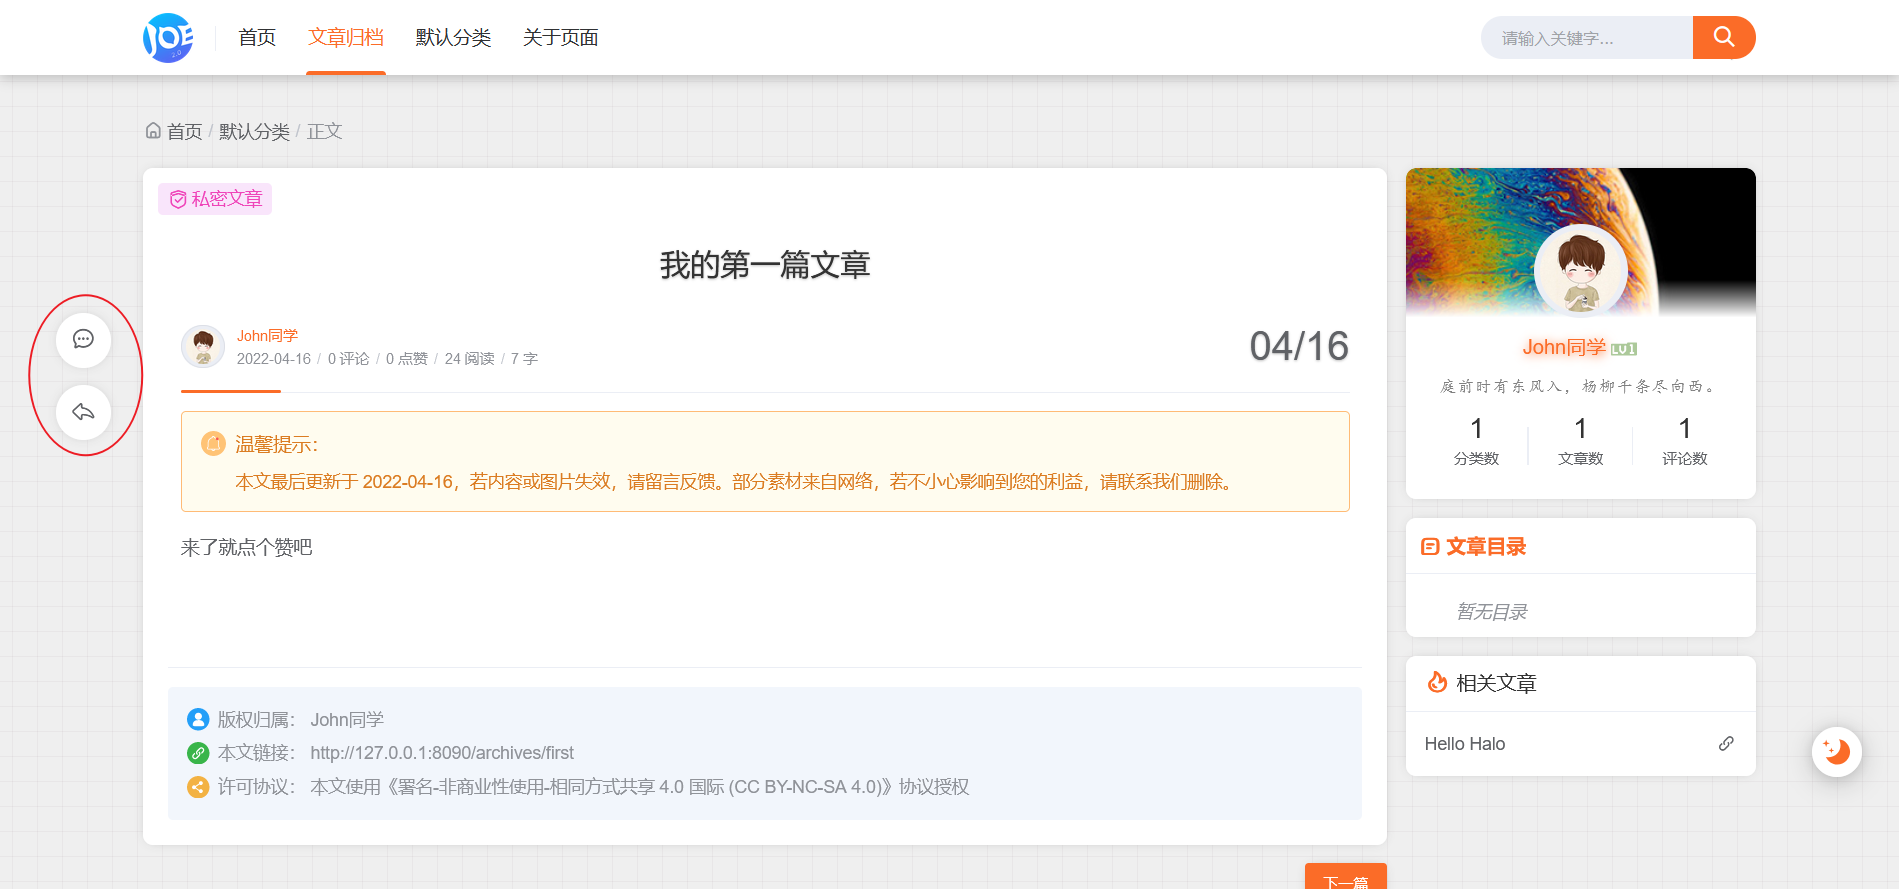
"我的第一篇文章" 不可以点赞:
除了 "enable_like",还可以设置文章是否支持 mathjax 以及设置文章中图片的宽度等。
自定义页面
Halo 中除文章外,博主还可以对外分享自定义的页面,例如博客主页的 "关于页面" 就是系统在初始化博客时为我们创建的页面。页面和文章的创建、查看等操作是相似的,所以代码的具体执行过程就不再介绍了。页面创建完成后,在管理员界面的依次点击 "外观" -> "菜单" -> "其他" -> "从系统预设链接添加" -> "自定义页面" -> "添加" 即可在博客主页完成页面的展示:
