最轻便的发布nuget包方式,方便cicd自动打包发布nuget包
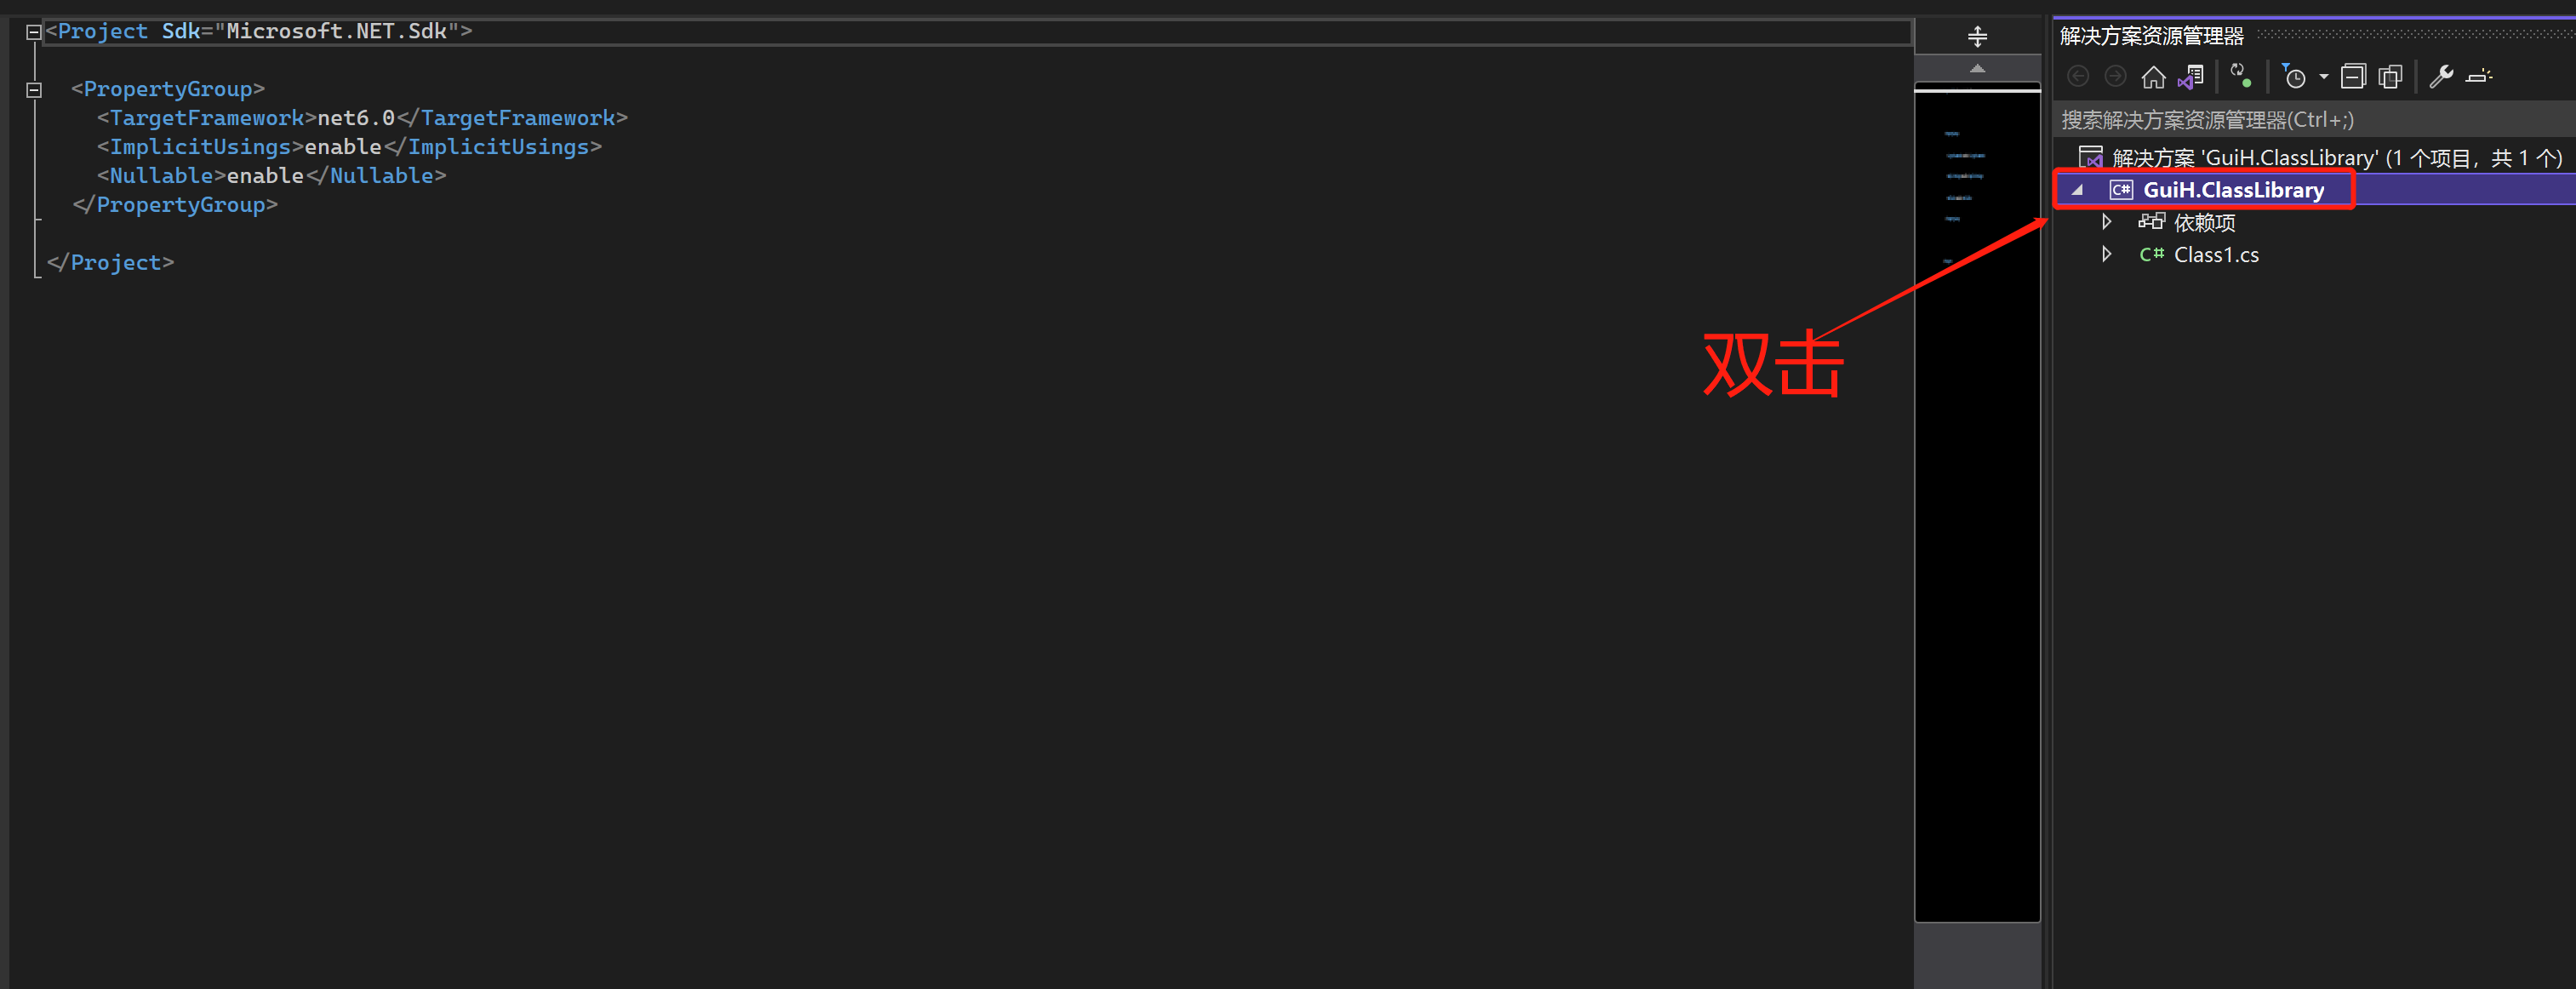
首先新建项目
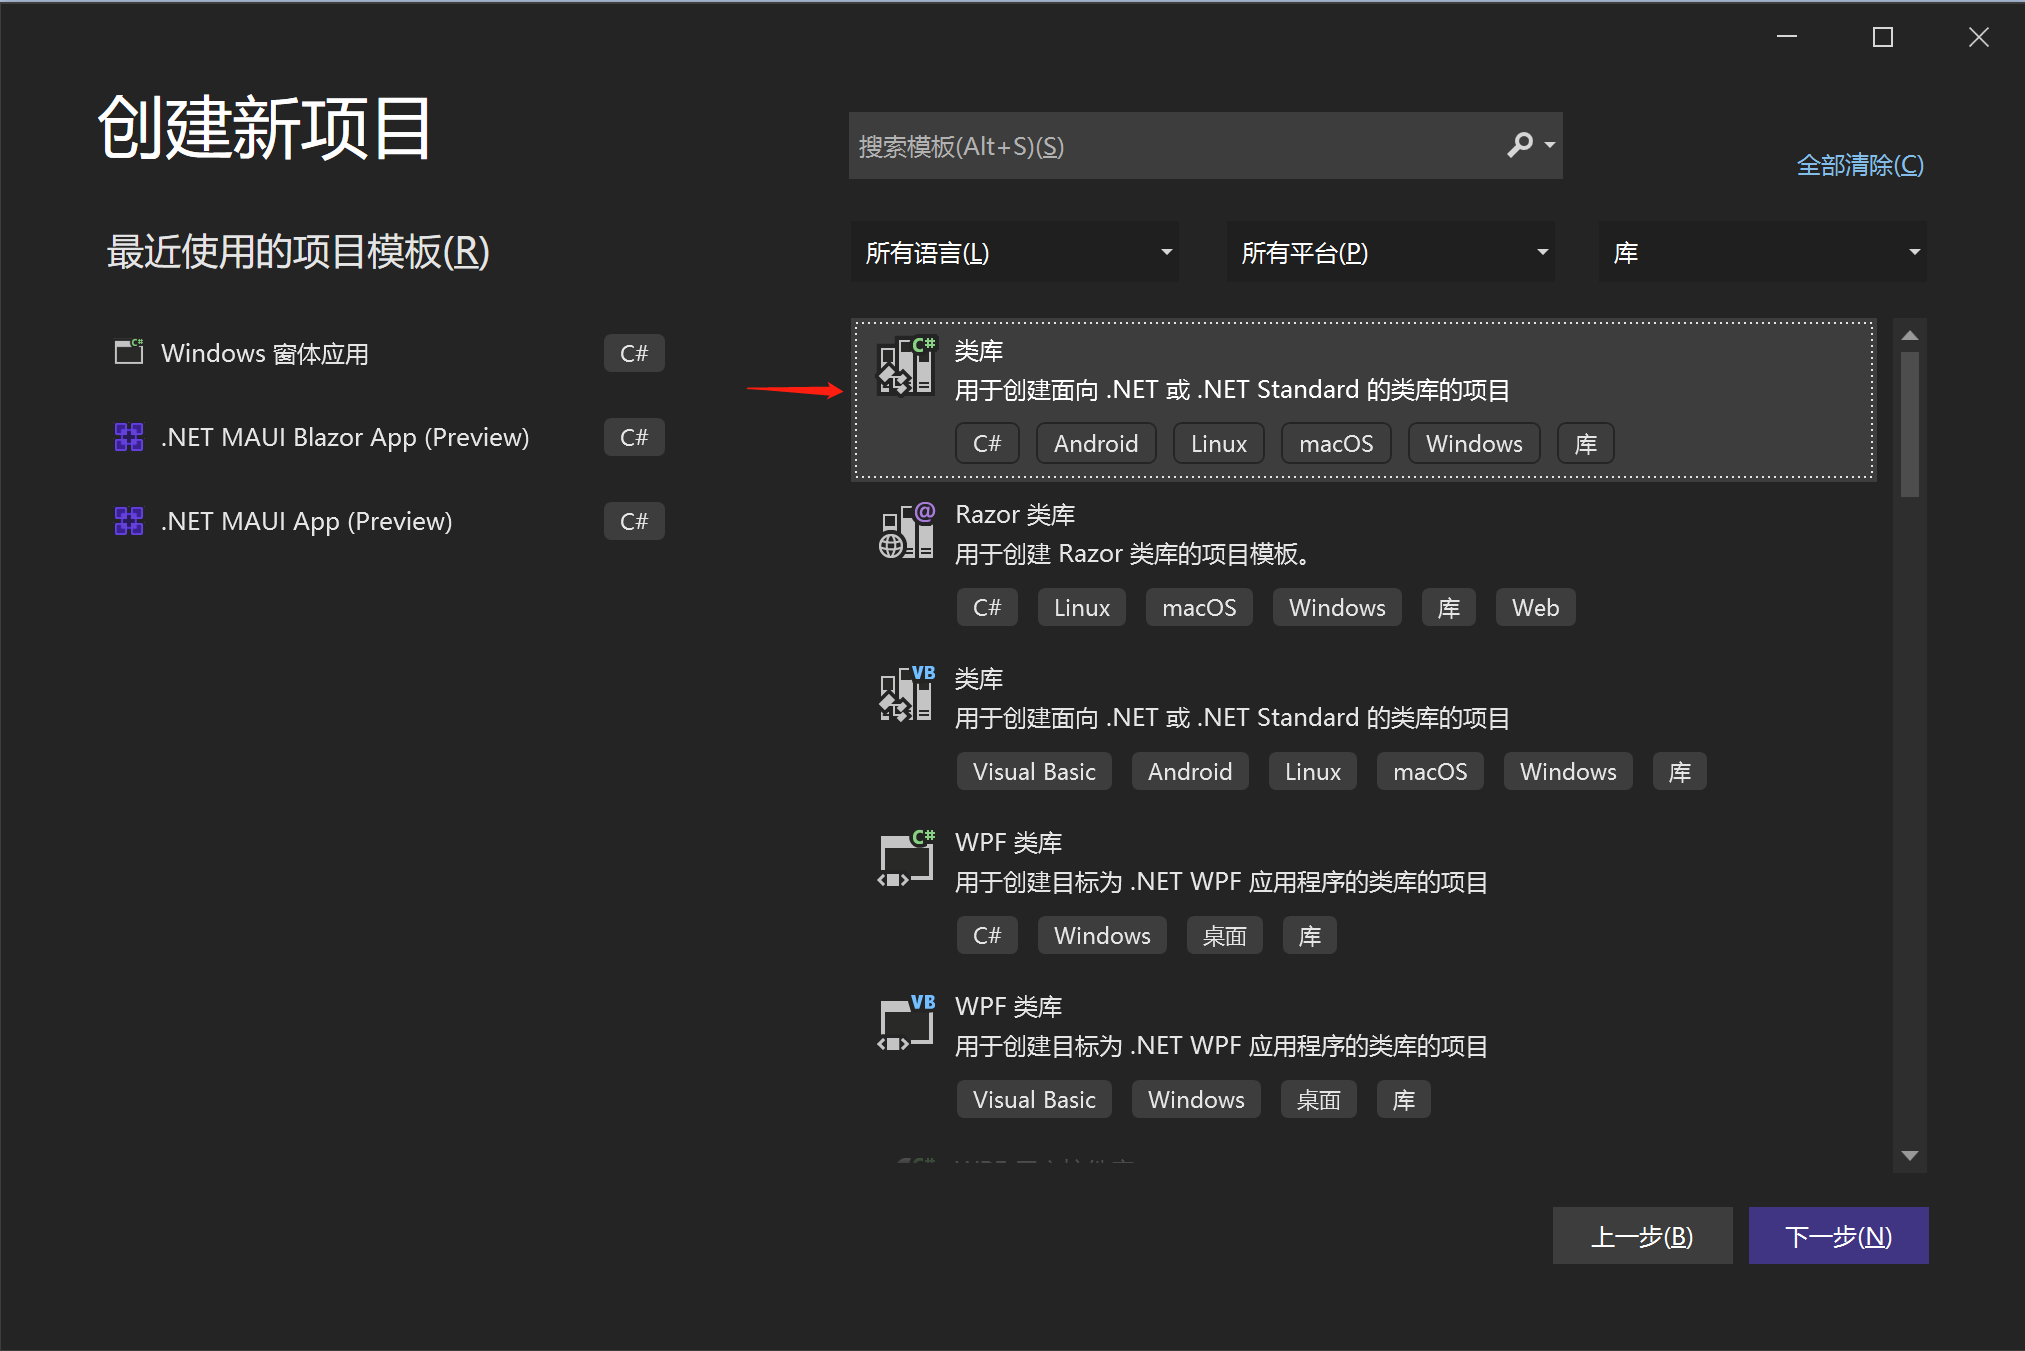
项目名随便取,这里就叫它GuiH.ClassLibrary
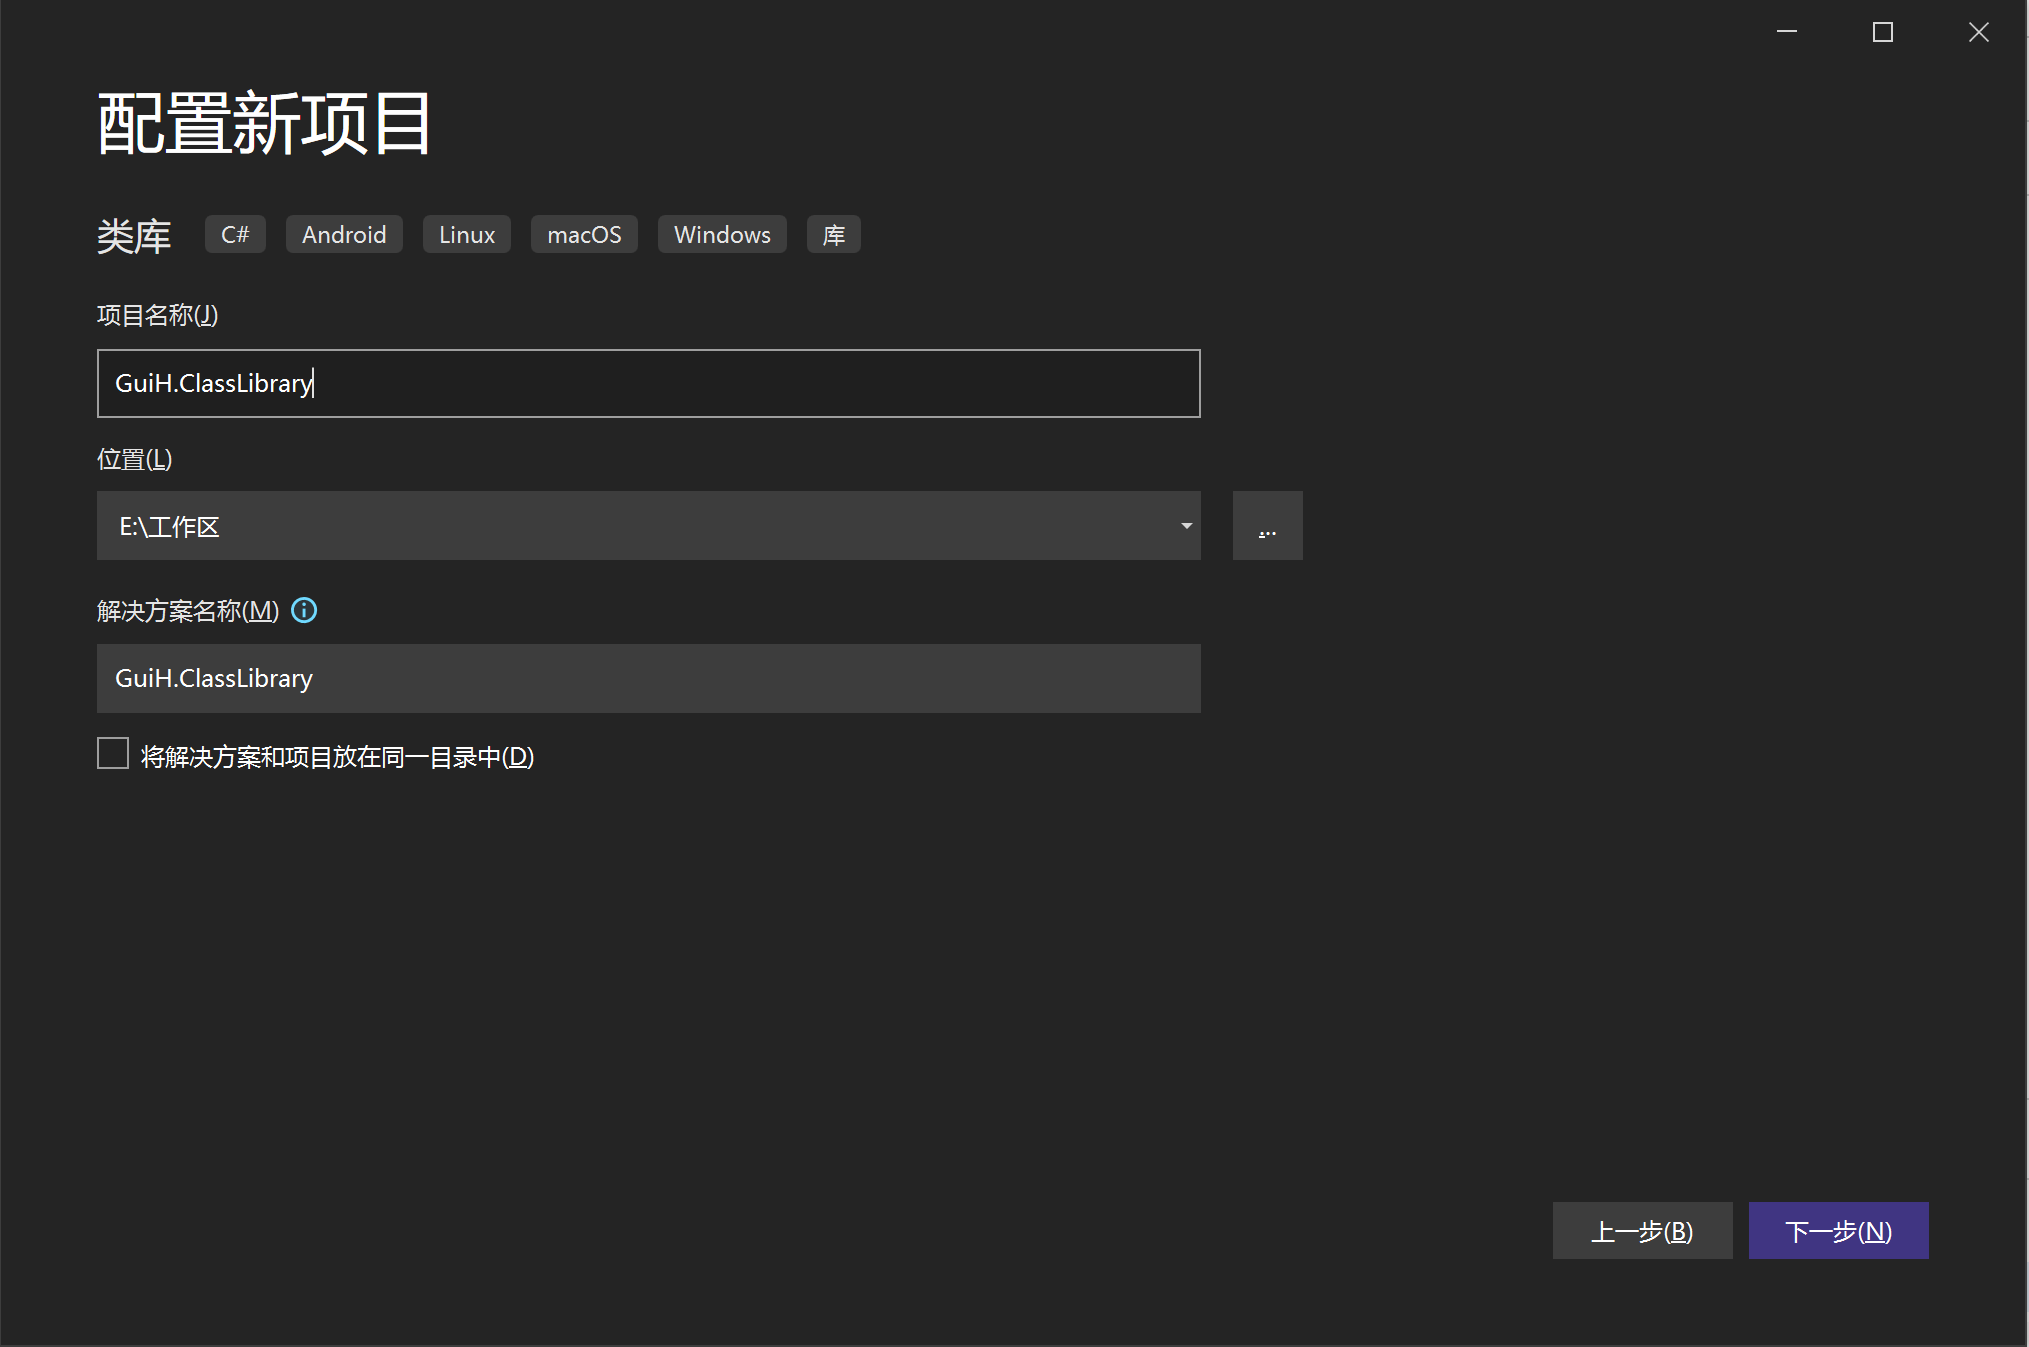
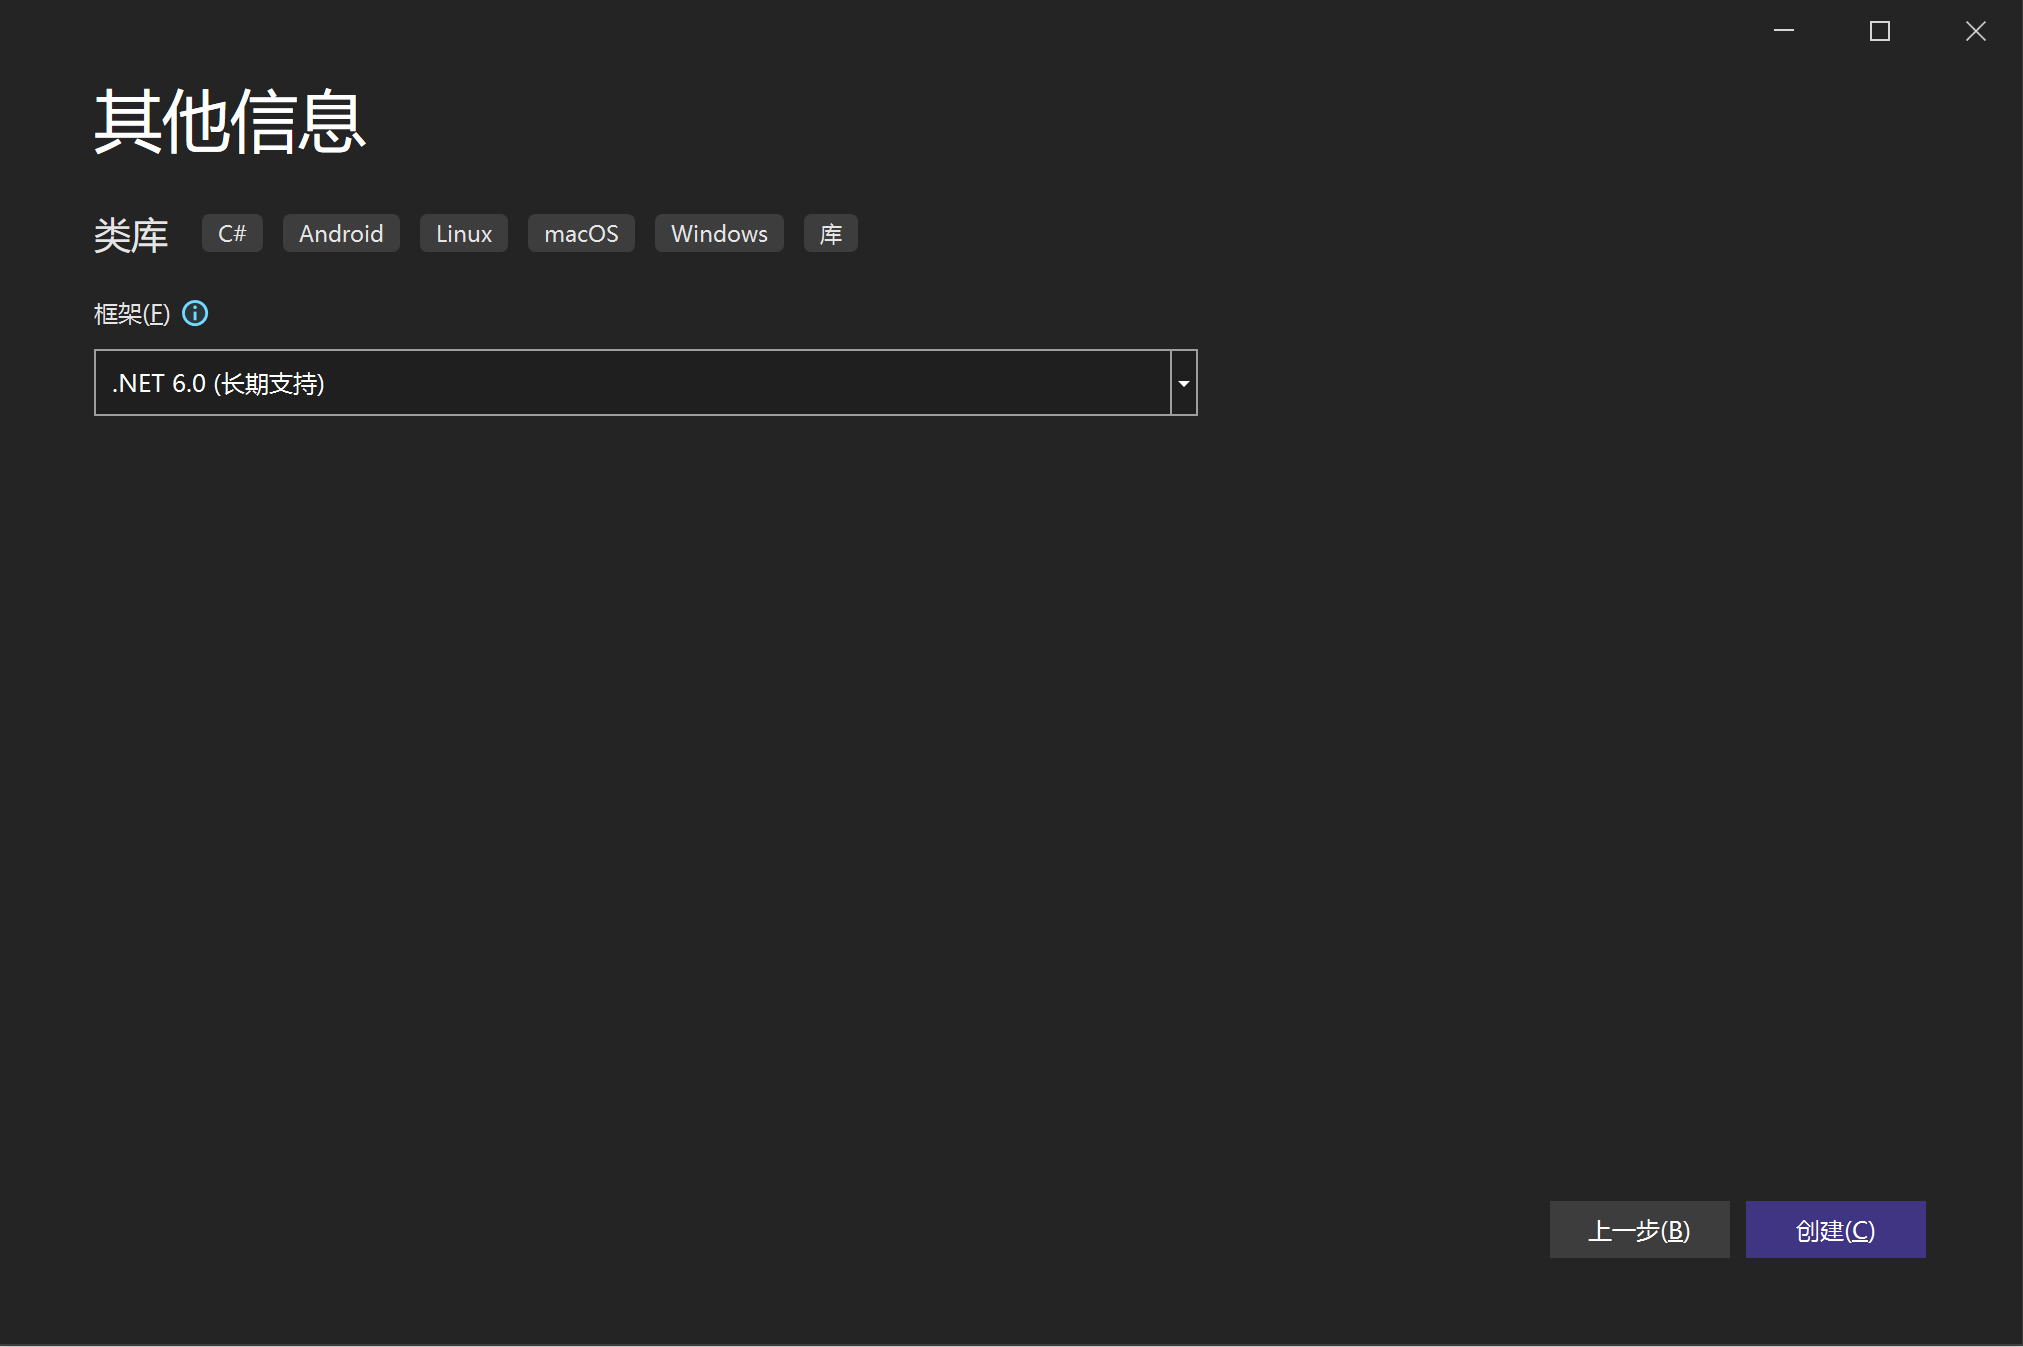
默认即可,需要改目标版本时,等创建好再改
项目创建好了
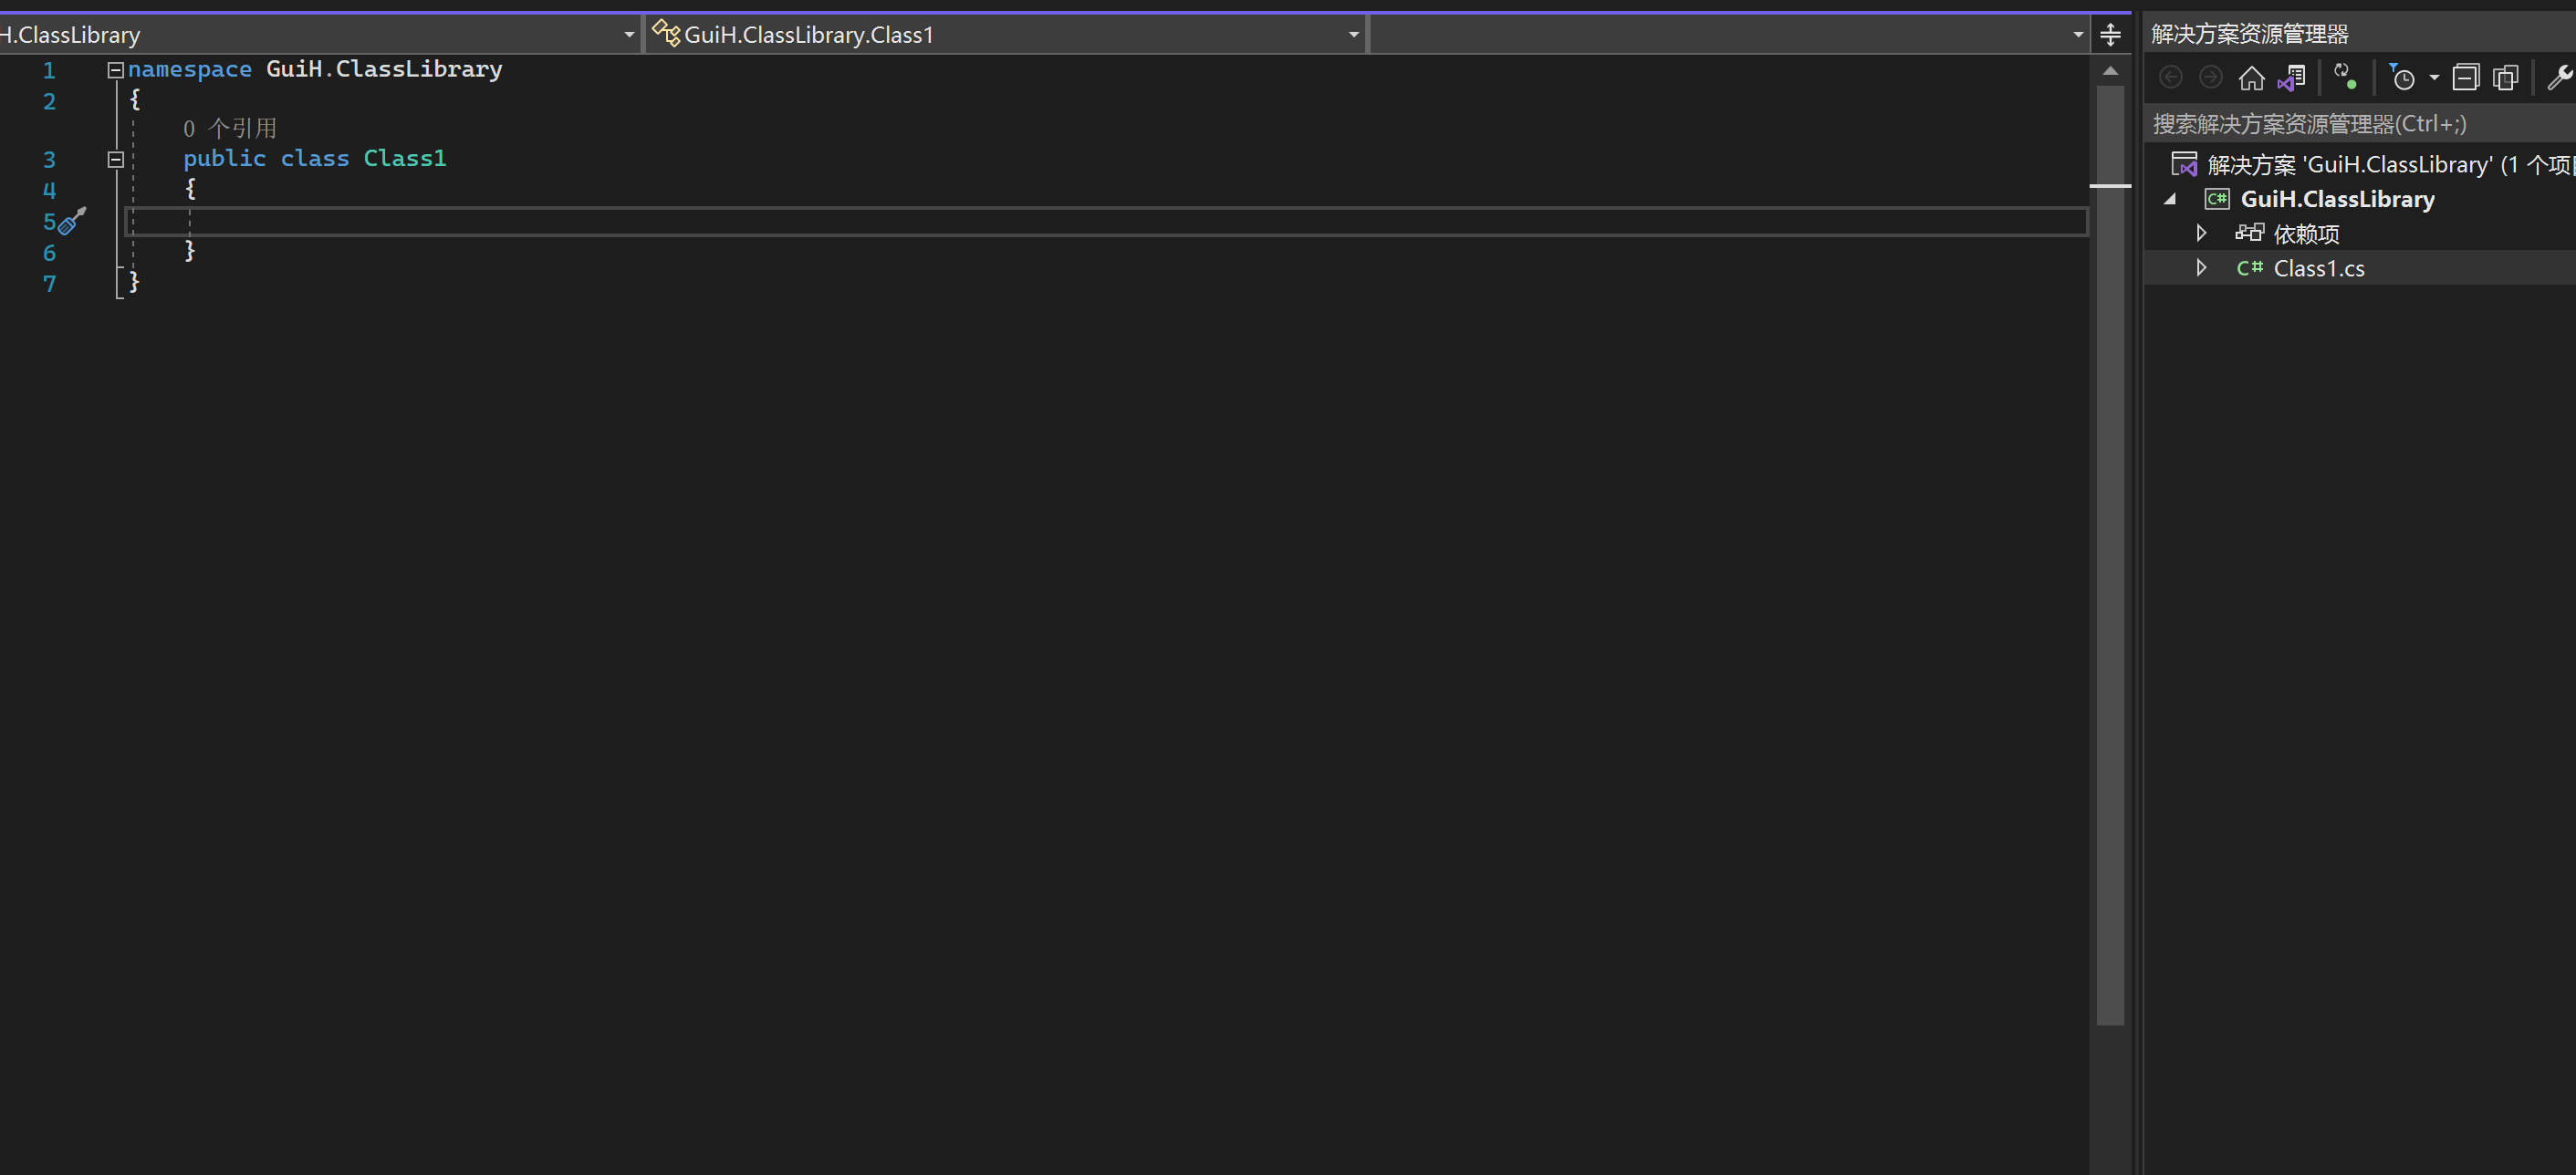
随便写个接口方法
namespace GuiH.ClassLibrary
{
    public class Class1
    {
        public static void Test()
        {
            Console.WriteLine("Hello Nuget!!!");
        }
    }
}
接下来修改工程文件,默认情况是这样的
我们添加下面一些配置
<Project Sdk="Microsoft.NET.Sdk">

	<PropertyGroup>
		<TargetFramework>net6.0</TargetFramework>
		<ImplicitUsings>enable</ImplicitUsings>
		<Nullable>enable</Nullable>

		<!--以下是我们自己添加的-->
		<!--版本号,重要性不必多说-->
		<Version>1.0.0</Version>
		<!--添加该配置,在编译时进行打包-->
		<GeneratePackageOnBuild>true</GeneratePackageOnBuild>
		<!--添加该配置才会生成注释文件,默认无注释-->
		<GenerateDocumentationFile>true</GenerateDocumentationFile>
	</PropertyGroup>

</Project>
执行编译命令,根据上面的配置,编译后会自动进行打包
// 该命令在GuiH.ClassLibrary项目根目录下执行
dotnet build -c=Release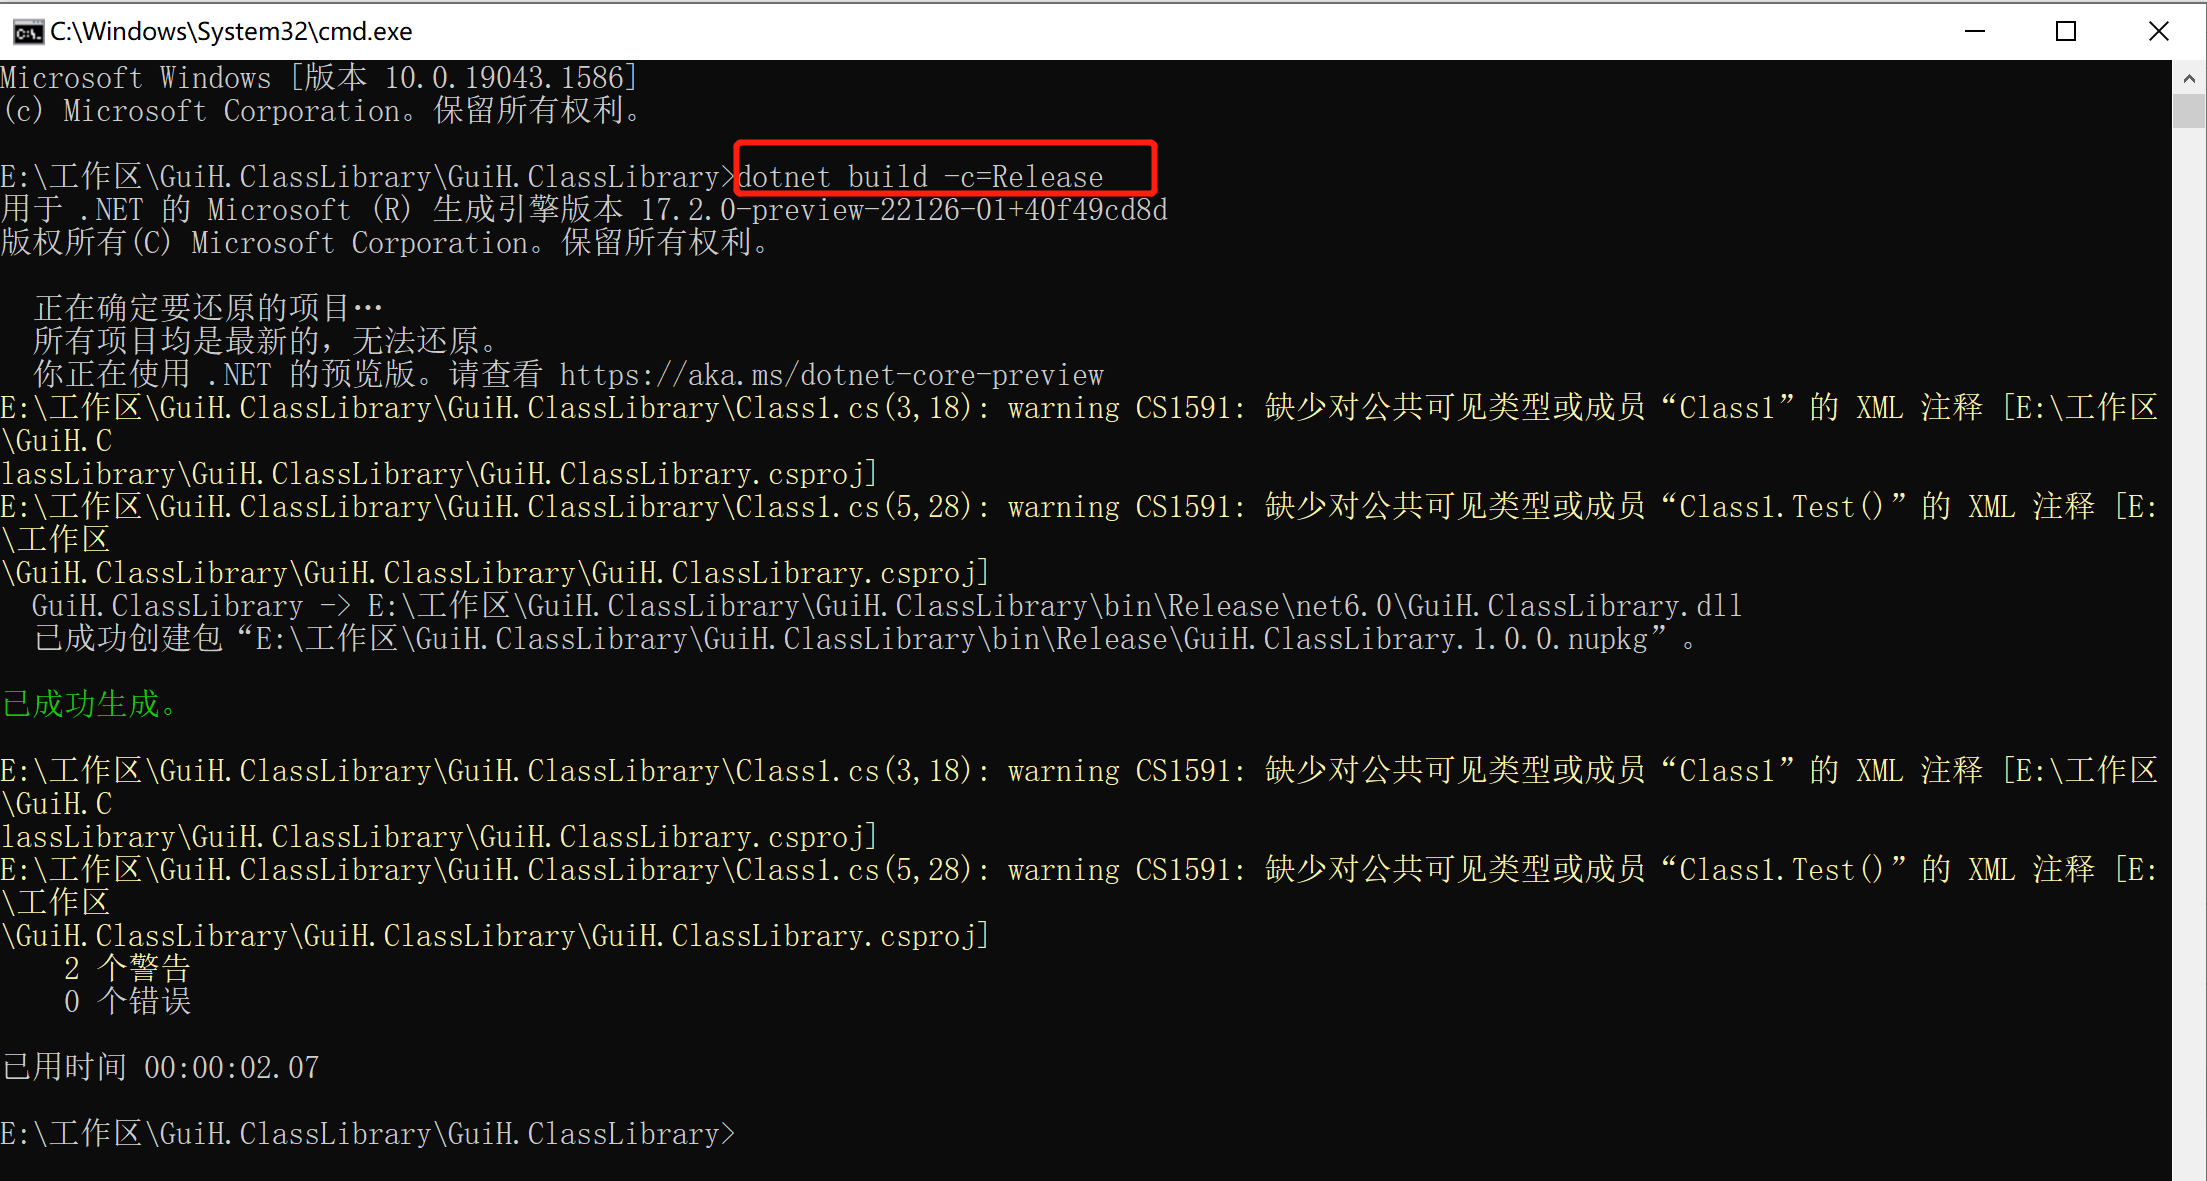
命令行中也提示了已成功创建包“E:\工作区\GuiH.ClassLibrary\GuiH.ClassLibrary\bin\Release\GuiH.ClassLibrary.1.0.0.nupkg”
将GuiH.ClassLibrary.1.0.0.nupkg推送至nuget仓库,可以自己搭建,也可以是微软官方nuget仓库
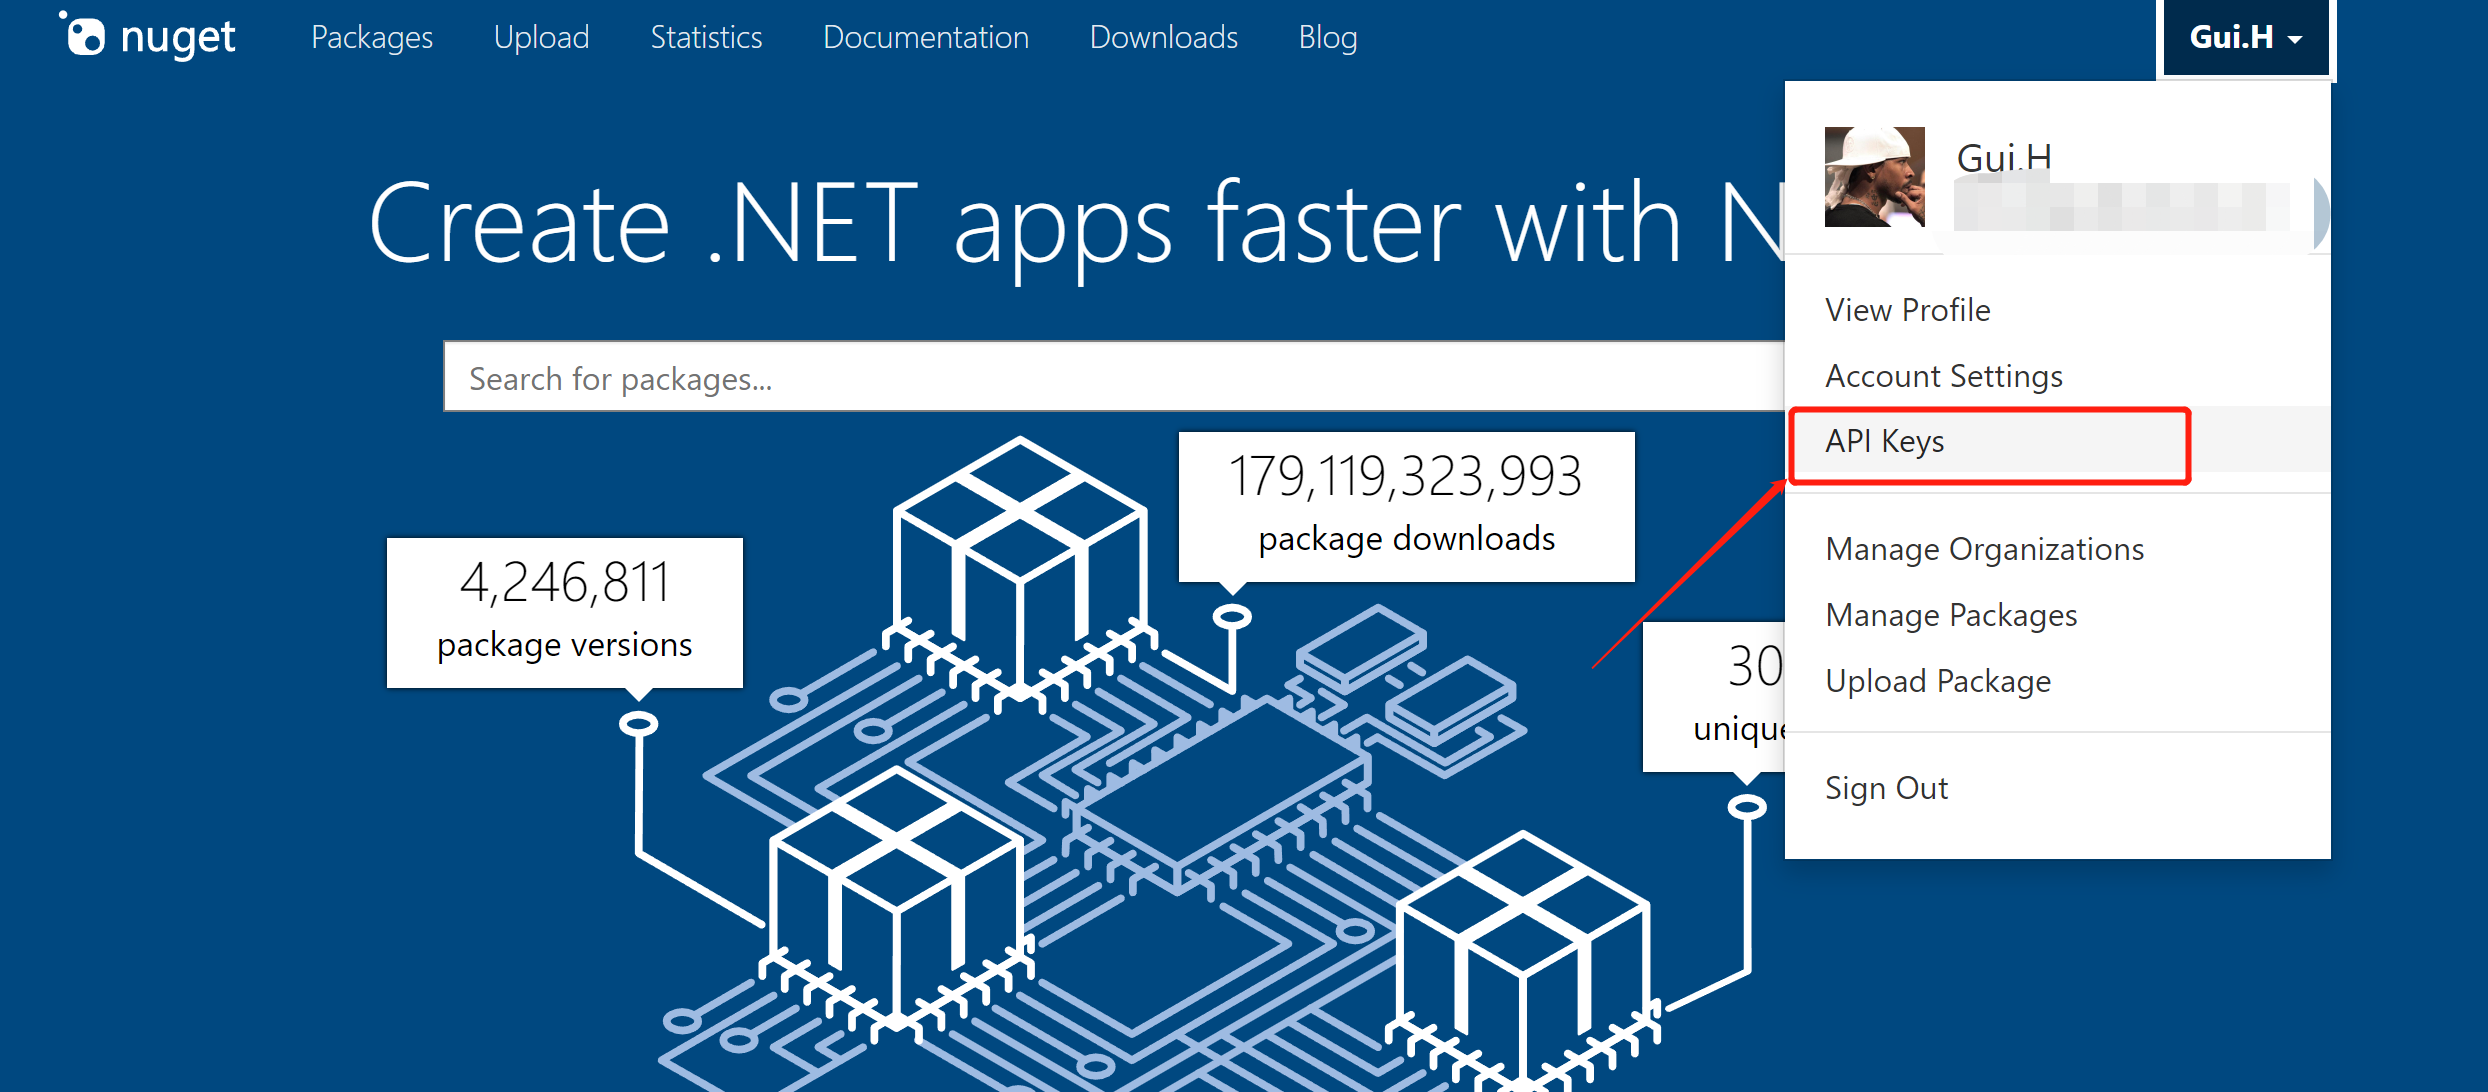
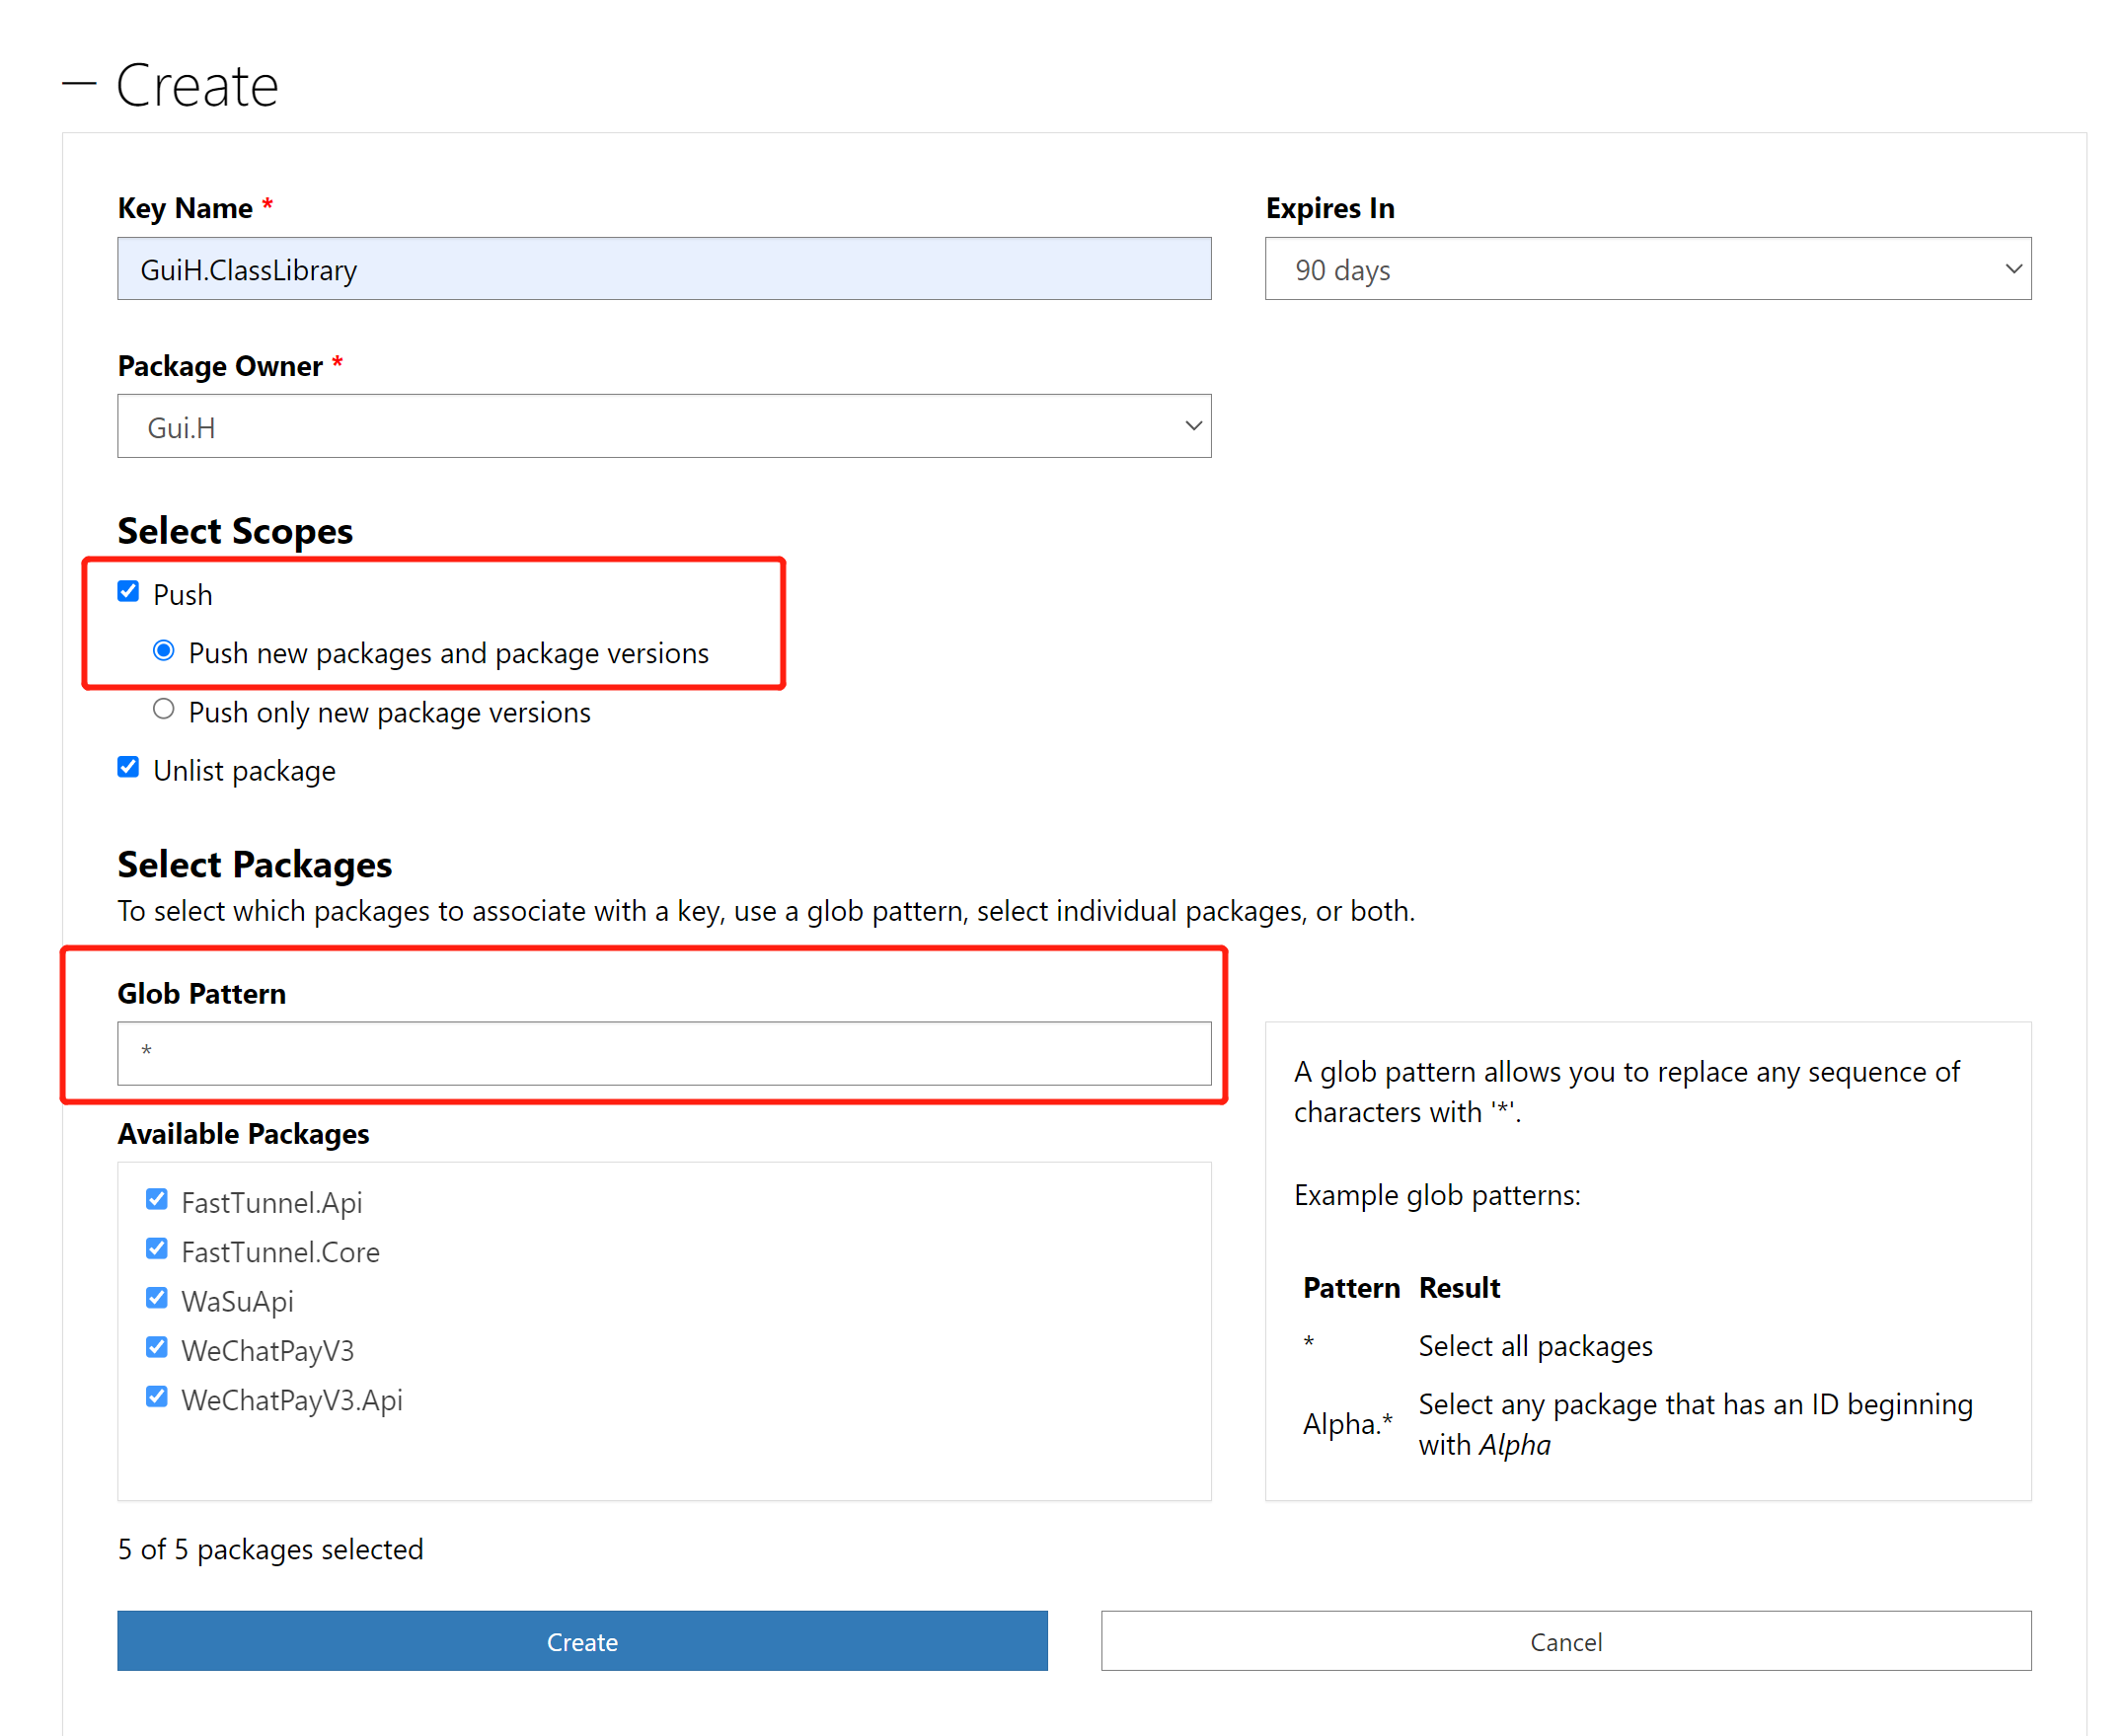
在www.nuget.org注册一个账号,然后获取apikey
详细发布nuget命令参考:dotnet-nuget-push
// $apikey 替换为你的apikey
dotnet nuget push ./bin/Release/GuiH.ClassLibrary.1.0.0.nupkg -k $apikey -s https://api.nuget.org/v3/index.json --skip-duplicate
正在将 GuiH.ClassLibrary.1.0.0.nupkg 推送到 'https://www.nuget.org/api/v2/package'...
PUT https://www.nuget.org/api/v2/package/
warn : All published packages should have license information specified. Learn more: https://aka.ms/deprecateLicenseUrl.
Created https://www.nuget.org/api/v2/package/ 1404 毫秒
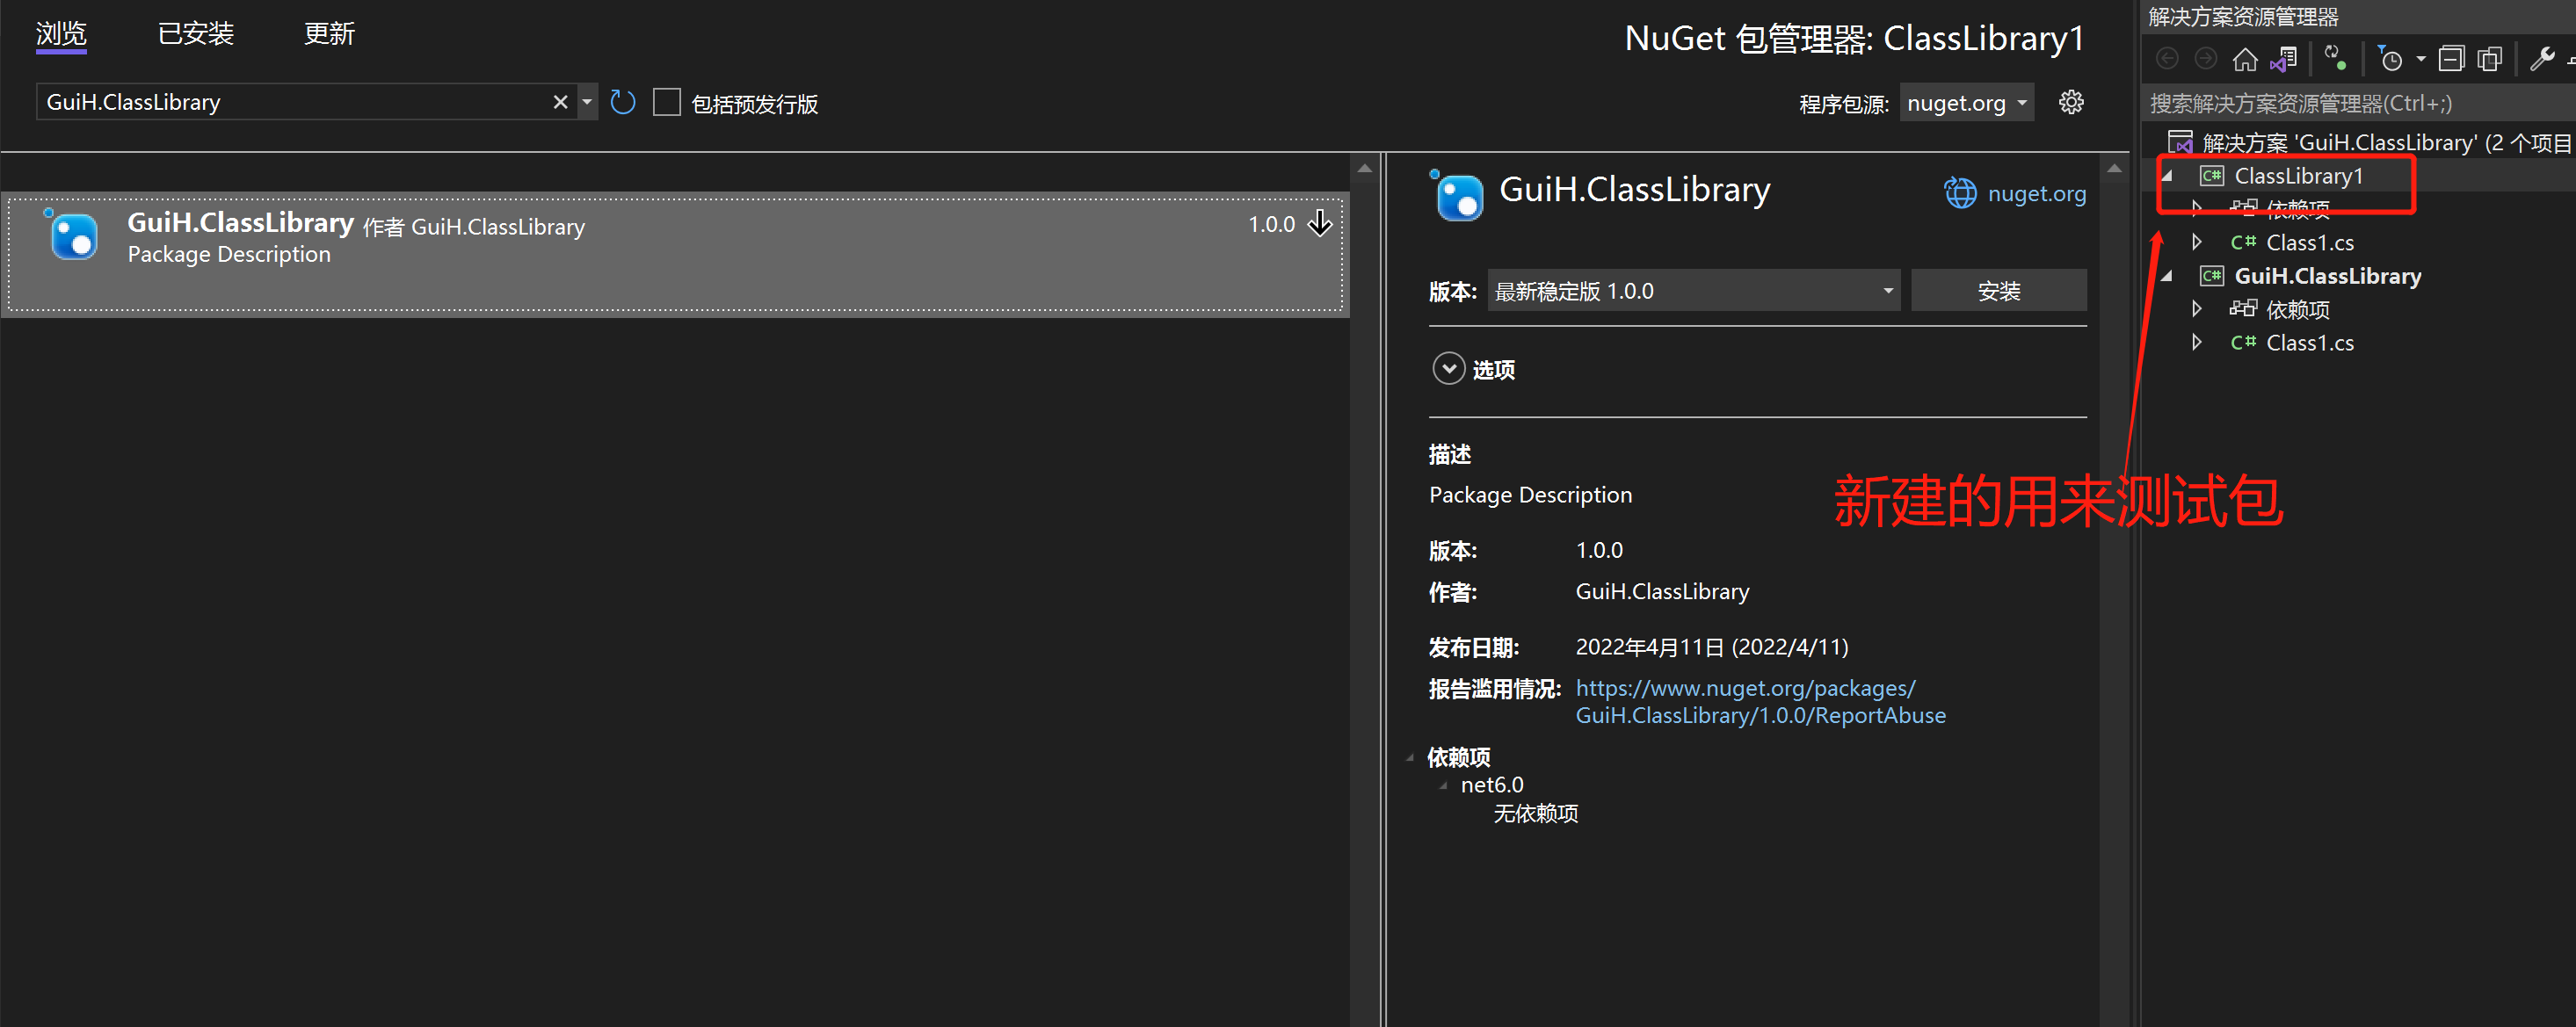
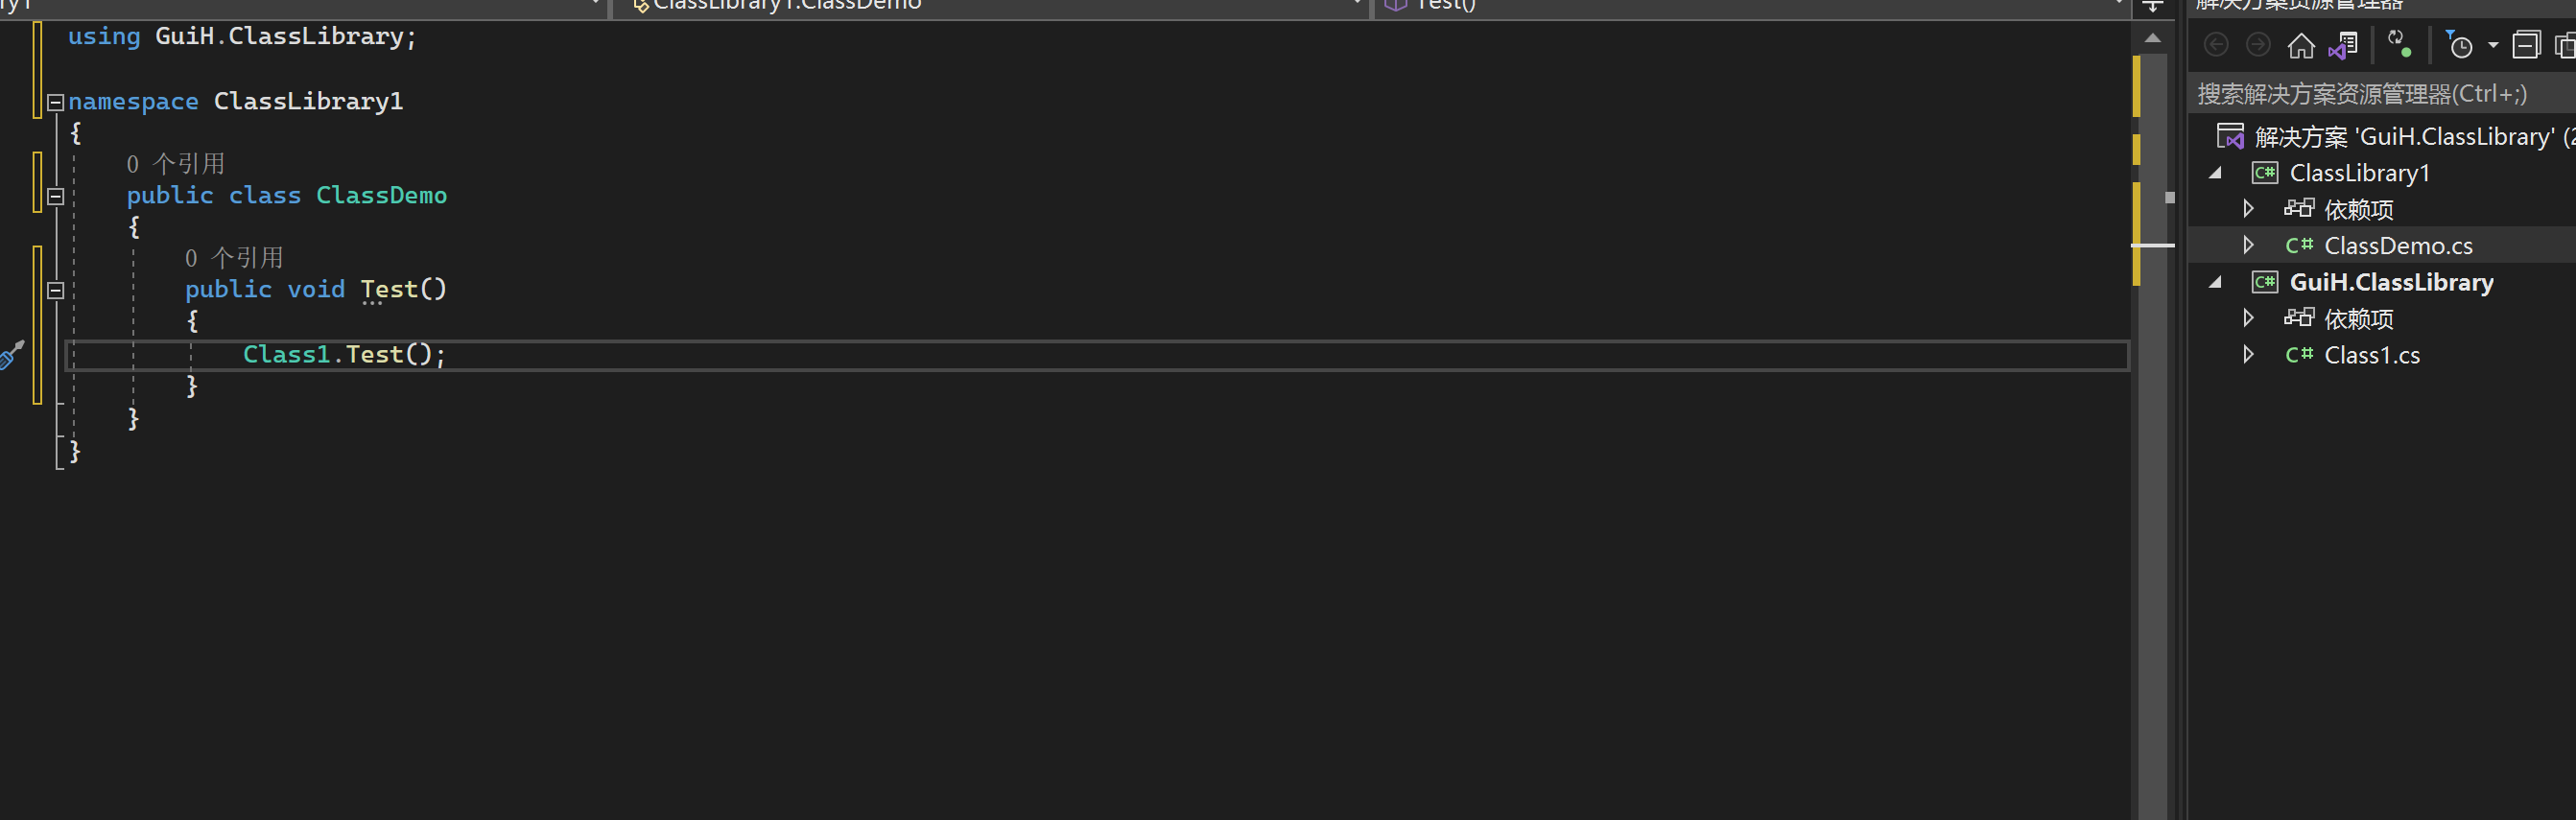
已推送包。搜索发布的包(一般会短暂延迟几分钟才能搜到),在项目中使用(应该创建一个控制台测试,知道就好~)
多种目标平台支持
例如兼容framwork4.6.1,修改工程文件如下,注意单词TargetFrameworks的单复数
// 修改前
<TargetFramework>net6.0</TargetFramework>
// 修改后
<TargetFrameworks>net6.0;net461</TargetFrameworks>
或只支持net461
<TargetFrameworks>net461</TargetFrameworks>CICD
cicd脚本中核心的两条命令就是上述两个,运行环境安装相应的sdk(.net5/.net6)即可。
