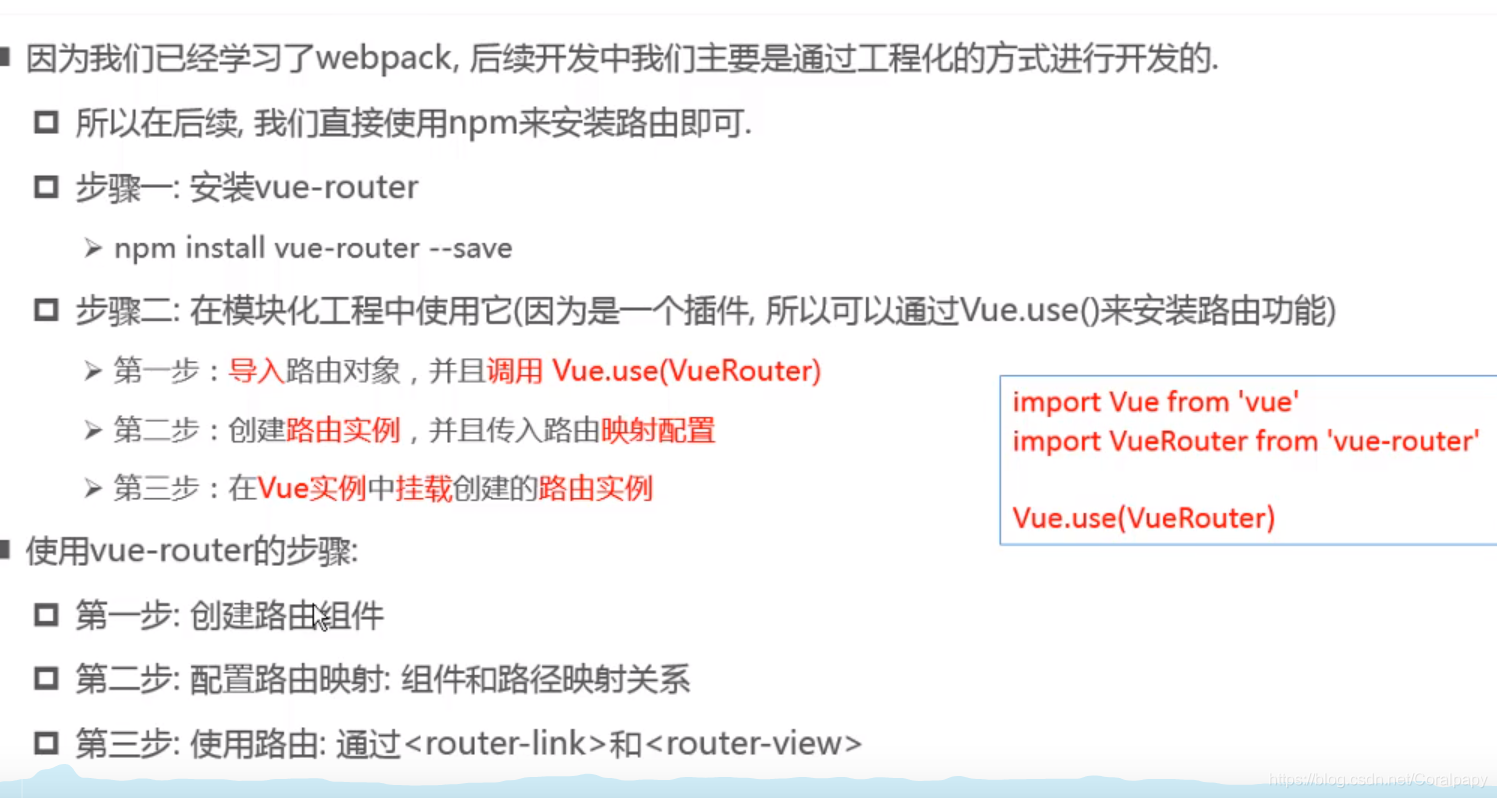
1.vue create + 项目名
2.运行命令:npm run serve,默认是这样
3. - Local: http://localhost:8081/
- Network: http://192.168.46.189:8081/
配置路由的过程:

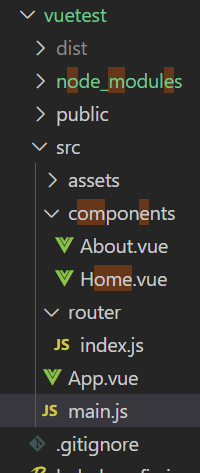
在src目录下新建router文件夹,然后在router内新建一个index.js文件,目录如下:

index.js文件用于路由的配置:注意是routes,不是routers,是component,不是components
// 配置路由
//第一步应该导入路由插件,vue
import VueRouter from 'vue-router'
import Vue from 'Vue'
import Home from '../components/Home'
import About from '../components/About'

// 2.使用vue.use来安装插件
Vue.use(VueRouter)

// 3.创建vue-router实例化对象,配置路由和组件之间的应用关系
const routes = [
    {
        path: '/home',
        component: Home
    },
    {
        path: '/about',
        component: About
    }
]
const router = new VueRouter({
    // 配置路由和组件之间的应用关系
    routes
})

//4.导出路由
export default router
main.js,需要导入路由
import Vue from 'vue'
import App from './App.vue'
import router from './router'

// 导入到router,会自动找到index
Vue.config.productionTip = false

new Vue({
  render: h => h(App),
  router,
}).$mount('#app')
Home.vue组件:
.<template>
  <div>我是首页</div>
</template>

<script>
export default {
    name: "Home"
}
</script>

<style>

</style>
About.vue组件:
<template>
  <div>我是关于</div>
</template>

<script>
export default {
    name: "About"
}
</script>

<style>

</style>
App.vue
<template>
  <div id="app">
    <router-link to="/home">首页</router-link>
    <router-link to="/about">关于</router-link>
    //必须挂载到APP上才能显示,标签是内置的
    <router-view></router-view>
    //用于决定显示的位置
  </div>
</template>

<script>
export default {
  name: 'App'
}
</script>

<style>

</style>


