引言
什么是Spring Boot Starter呢?我们直接来看看官网是怎么介绍的吧。
Starters are a set of convenient dependency descriptors that you can include in your application. You get a one-stop shop for all the Spring and related technologies that you need without having to hunt through sample code and copy-paste loads of dependency descriptors. For example, if you want to get started using Spring and JPA for database access, include the spring-boot-starter-data-jpa dependency in your project.
纳尼,一大堆的英文,这还有兴趣接着往下看吗?是不是看到这直接退出了。都到门口了,不进来喝杯茶再走嘛?看都看到这了还是接着继续往下看吧。我们先不解释这一段话是什么意思,我们可以看看starter的出现给我们解决了什么问题。
我们还是以上述官网的例子来进行说明比如说我们需要在Spring 中适应JPA来操作数据库。
在没有springBoot-starter之前,我们需要引入jpa的步骤
- 通过
maven引入jdbc的依赖、以及jpa相关的各种依赖 - 编写
jpa相关的配置文件 - 网上各种查询找资料进行调试,调试的过程对于新手可能会有点奔溃会遇到各种奇奇怪怪的问题,
jar包冲突啊,这个jar包下载不下来,缺少某个jar包。 - 终于在经历千辛万苦,哼次哼次的解决各种问题之后终于把项目跑起来了,然后把这次整合
jpa遇到的问题,以及整合的步骤都一一的详细记录下来。方便下次在需要整合jpa的时候直接copy就好了。
我们以前在没有starter之前是不是都是这么玩的。这样的缺点是不是也非常显著,比如过程复杂、需要不停的粘贴复制(不过这是程序员经常干的事情了,也不在乎多一两次了)、整合其它组件到自己的项目变的困难,效率低下。这也就造成了996的程序员比较多了(晚上就不能够回去69了)。
SpringBoot Starter的出现
我们可以看下SpringBoot 现在都为我们提供有哪些starter,我这边这截图了部分starter,更多的请点击https://github.com/spring-projects/spring-boot/tree/master/spring-boot-project/spring-boot-starters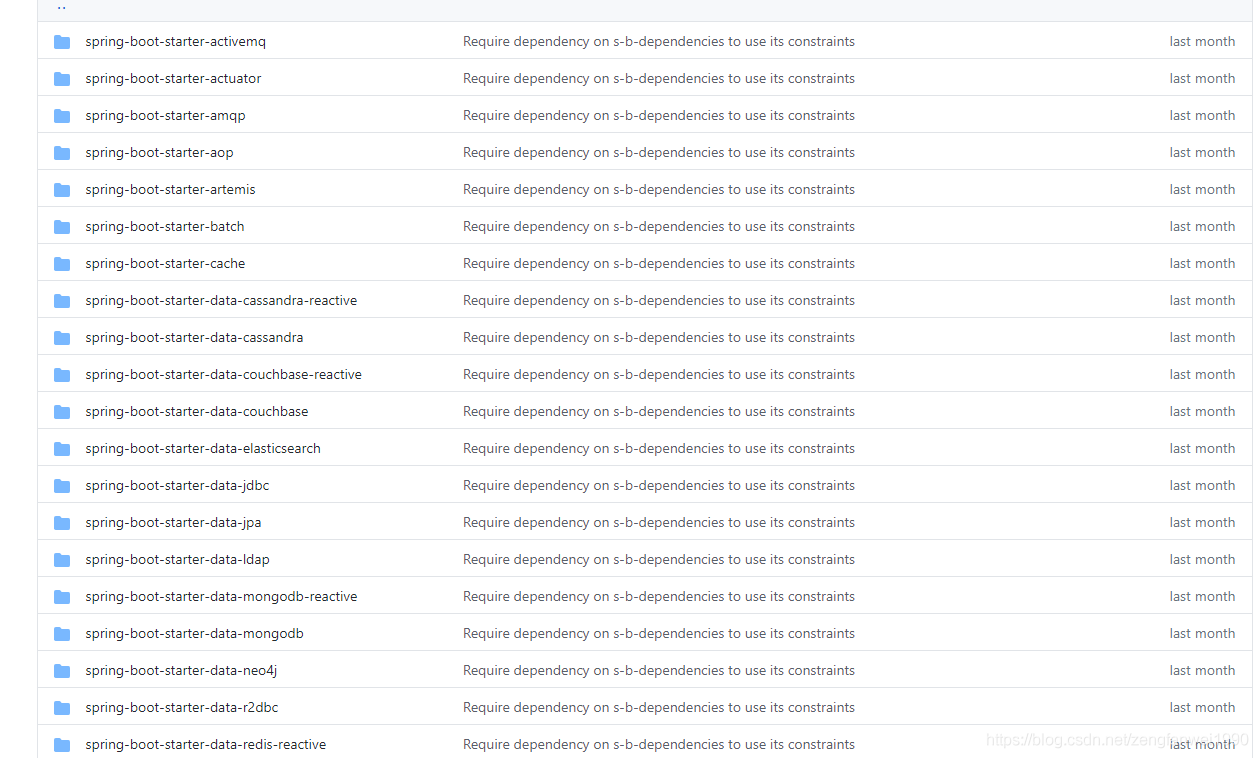
starter的实现:虽然我们每个组件的starter实现各有差异,但是它们基本上都会使用到两个相同的内容:ConfigurationProperties和AutoConfiguration。因为Spring Boot提倡“约定大于配置”这一理念,所以我们使用ConfigurationProperties来保存我们的配置,并且这些配置都可以有一个默认值,即在我们没有主动覆写原始配置的情况下,默认值就会生效。除此之外,starter的ConfigurationProperties还使得所有的配置属性被聚集到一个文件中(一般在resources目录下的application.properties),这样我们就告别了Spring项目中XML地狱。starter的出现帮把我们把各种复杂的配置都封装起来了,让我们真正的可以达到了开箱即用。不仅降低了我们使用它的门槛,并且还大大提高了我们的开发效率。正如前面所说《SpringBoot自动装配》让我们有更多的时间去陪女朋友。
实现自己的SpringBoot Starter
命名规范
如果你快有孩子了,出生前你比较急的一定是起个名字。孩子的姓名标识着你和你爱人的血统,一定不会起隔壁老王的姓氏,肯定会招来异样的眼光。在maven中,groupId代表着姓氏,artifactId代表着名字。Spring Boot也是有一个命名的建议的。所以名字是不能够随随便便取得,可以按照官方的建议来取。
What’s in a name
All official starters follow a similar naming pattern; spring-boot-starter-*, where * is a particular type of application. This naming structure is intended to help when you need to find a starter. The Maven integration in many IDEs lets you search dependencies by name. For example, with the appropriate Eclipse or STS plugin installed, you can press ctrl-space in the POM editor and type “spring-boot-starter” for a complete list.
As explained in the “Creating Your Own Starter” section, third party starters should not start with spring-boot, as it is reserved for official Spring Boot artifacts. Rather, a third-party starter typically starts with the name of the project. For example, a third-party starter project called thirdpartyproject would typically be named thirdpartyproject-spring-boot-starter.
大概意思是
官方的starter 的命名格式为spring-boot-starter-{xxxx} 比如spring-boot-starter-activemq
第三方我们自己的命名格式为{xxxx}-spring-boot-starter。比如mybatis-spring-boot-starter。
如果我们忽略这种约定,是不是会显得我们写的东西不够“专业“。
自定义一个Starter
下面我们就来实现一个自定义的发送短信的starter,命名为sms-spring-boot-starter。
- 引入
pom
<dependency><groupId>org.springframework.boot</groupId><artifactId>spring-boot-starter</artifactId></dependency><dependency><groupId>org.springframework.boot</groupId><artifactId>spring-boot-configuration-processor</artifactId><optional>true</optional></dependency><dependency><groupId>org.projectlombok</groupId><artifactId>lombok</artifactId><version>1.16.18</version><scope>provided</scope></dependency>- 编写配置文件
发短信我们需要配置一些账号信息,不同的短信供应商,账户信息是不一样的,所以我们需要定义一个XXXXProperties 来自动装配这些账户信息。下面我们就以腾讯云和阿里云两家供应商为例;
@ConfigurationProperties(prefix="sms")@DatapublicclassSmsProperties{private SmsMessage aliyun=newSmsMessage();private SmsMessage tencent=newSmsMessage();@DatapublicstaticclassSmsMessage{/**
         * 用户名
         */private String userName;/**
         * 密码
         */private String passWord;/**
         * 秘钥
         */private String sign;/**
         *
*/private String url;@Overridepublic StringtoString(){return"SmsMessage{"+"userName='"+ userName+'\''+", passWord='"+ passWord+'\''+", sign='"+ sign+'\''+", url='"+ url+'\''+'}';}}}如果需要在其他项目中使用发送短信功能的话,我们只需要在配置文件(application.yml)中配置SmsProperties 的属性信息就可以了。 比如:
sms:
  aliyun:
    pass-word:12345
    user-name: java金融
    sign: 阿里云
    url: http://aliyun.com/send
  tencent:
    pass-word:6666
    user-name: java金融
    sign: 腾讯云
url: http://tencent.com/send还记的@ConfigurationProperties注解里面是不是有个prefix 属性,我们配置的这个属性是sms,配置这个的主要一个作用的话是主要用来区别各个组件的参数。这里有个小知识点需要注意下当我们在配置文件输入sms我们的idea会提示这个sms有哪些属性可以配置,以及每个属性的注释都有标记,建议的话注释还是写英文,这样会显得你比较专业。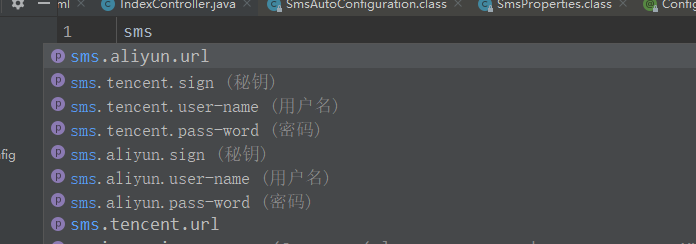
这个提示的话,是需要引入下面这个jar的。
<dependency><groupId>org.springframework.boot</groupId><artifactId>spring-boot-configuration-processor</artifactId><optional>true</optional></dependency>引入这个jar之后,我们编译之后就会在META-INF文件夹下面生成一个spring-configuration-metadata.json的文件。
我们可以看到这个文件其实 是根据SmsProperties类的成员属性来生成的。
- 然后在编写短信自动配置类:
@EnableConfigurationProperties(value= SmsProperties.class)@ConfigurationpublicclassSmsAutoConfiguration{/**
     *  阿里云发送短信的实现类
     * @param smsProperties
     * @return
     */@Beanpublic AliyunSmsSenderImplaliYunSmsSender(SmsProperties smsProperties){returnnewAliyunSmsSenderImpl(smsProperties.getAliyun());}/**
     * 腾讯云发送短信的实现类
     * @param smsProperties
     * @return
     */@Beanpublic TencentSmsSenderImpltencentSmsSender(SmsProperties smsProperties){returnnewTencentSmsSenderImpl(smsProperties.getTencent());}}
编写我们的发送短信实现类:
publicclassAliyunSmsSenderImplimplementsSmsSender{private SmsMessage smsMessage;publicAliyunSmsSenderImpl(SmsMessage smsProperties){this.smsMessage= smsProperties;}@Overridepublicbooleansend(String message){
System.out.println(smsMessage.toString()+"开始发送短信==》短信内容:"+message);returntrue;}}- 让starter生效
starter集成应用有两种方式:
- 被动生效
我们首先来看下我们熟悉的方式,通过SpringBoot的SPI的机制来去加载我们的starter。我们需要在META-INF下新建一个spring.factories文件key为org.springframework.boot.autoconfigure.EnableAutoConfiguration, value是我们的SmsAutoConfiguration全限定名(记得去除前后的空格,否则会不生效)。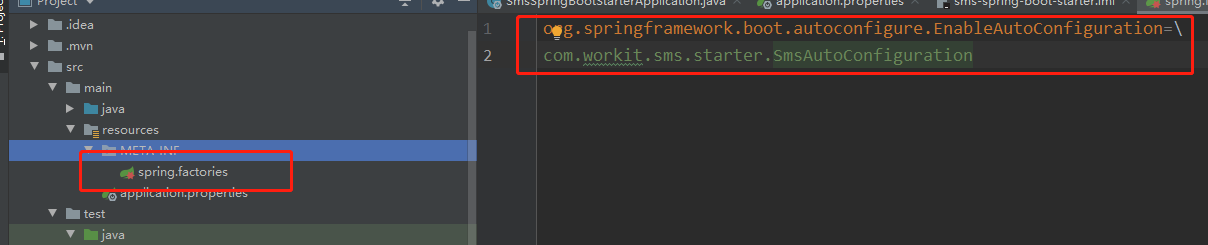
- 主动生效
在starter组件集成到我们的Spring Boot应用时需要主动声明启用该starter才生效,通过自定义一个@Enable注解然后在把自动配置类通过Import注解引入进来。
@Target({ElementType.TYPE})@Retention(RetentionPolicy.RUNTIME)@Documented@Import({SmsAutoConfiguration.class})public @interfaceEnableSms{}使用的时候需要在启动类上面开启这个注解。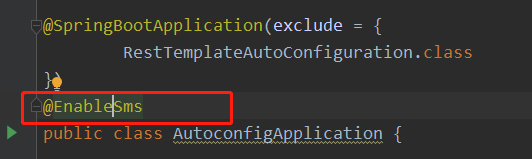
5.打包,部署到仓库
如果是本地的话,直接通过mvn install命令就可以了。
如果需要部署到公司的仓库话,这个就不说了。
6.新建一个新的SpringBoot项目引入我们刚写的starter
<dependency><groupId>com.workit.sms</groupId><artifactId>sms-spring-boot-starter</artifactId><version>0.0.1-SNAPSHOT</version></dependency>在项目配置文件配上短信账号信息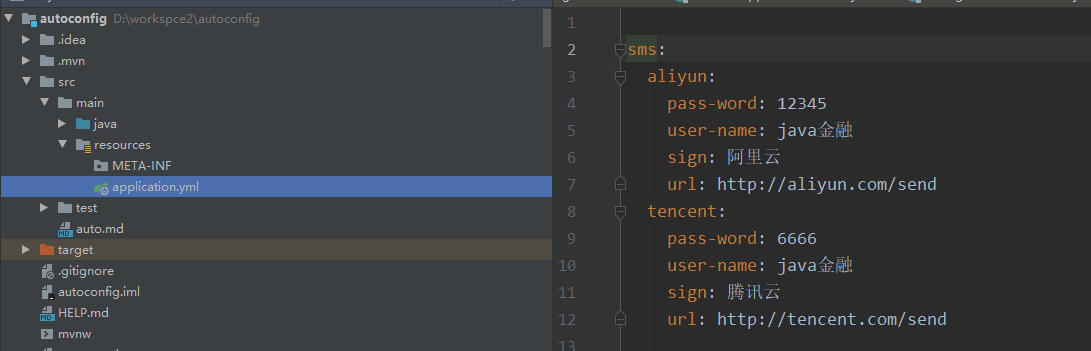
测试代码
@SpringBootApplication@EnableSmspublicclassAutoconfigApplication{publicstaticvoidmain(String[] args){
        ConfigurableApplicationContext applicationContext= SpringApplication.run(AutoconfigApplication.class, args);
        AliyunSmsSenderImpl aliyunSmsSender= applicationContext.getBean(AliyunSmsSenderImpl.class);
        aliyunSmsSender.send("用阿里云发送短信");
        TencentSmsSenderImpl tencentSmsSender= applicationContext.getBean(TencentSmsSenderImpl.class);
        tencentSmsSender.send("用腾讯云发送短信");}
运行结果:
SmsMessage{userName='java金融', passWord='12345', sign='阿里云', url='http://aliyun.com/send'}开始发送短信==》短信内容:用阿里云发送短信
SmsMessage{userName='java金融', passWord='6666', sign='腾讯云', url='http://tencent.com/send'}开始发送短信==》短信内容:用腾讯云发送短信至此的话我们自定义的一个starter就已经完成了,这个starter只是一个演示的demo,代码有点粗糙,项目结构也有点问题。重点看下这个实现原理就好。赶紧动动小手去实现一个自己的starter吧。
总结
SpringBoot starter的出现,让我们项目中集成其他组件变得简单。它把简单给了别人,把复杂留给了自己。“牺牲小我,成就大我”的思想还是值得学习的。平时我们工作中,比如要开发一个组件、或者一个工具类,也应该尽可能的让使用方可以做到无脑使用,不要搞的太复杂,又能让使用者可以灵活扩展。
结束
- 由于自己才疏学浅,难免会有纰漏,假如你发现了错误的地方,还望留言给我指出来,我会对其加以修正。
- 如果你觉得文章还不错,你的转发、分享、赞赏、点赞、留言就是对我最大的鼓励。
- 感谢您的阅读,十分欢迎并感谢您的关注。
站在巨人的肩膀上摘苹果:
https://www.cnblogs.com/tjudzj/p/8758391.html
https://blog.springlearn.cn/posts/14644/