安装配置conda
在conda官网查看对应的文件并进行下载
下载:命令行输入:wget 链接
(wget会默认下载到当前路径)
安装(bash 自己下载的文件名称):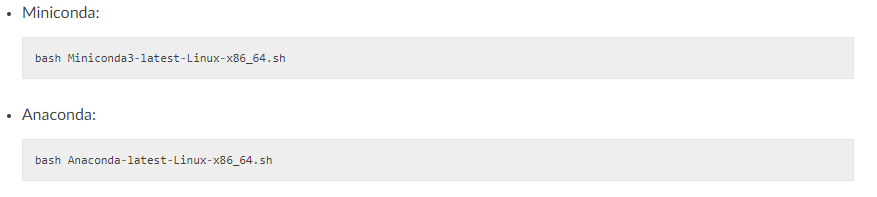
配置镜像源
(最近清华源很慢?用中科大源快一点)
命令行中直接使用以下命令
conda config--add channels https://mirrors.ustc.edu.cn/anaconda/pkgs/main/
conda config--add channels https://mirrors.ustc.edu.cn/anaconda/pkgs/free/
conda config--add channels https://mirrors.ustc.edu.cn/anaconda/cloud/conda-forge/
conda config--add channels https://mirrors.ustc.edu.cn/anaconda/cloud/msys2/
conda config--add channels https://mirrors.ustc.edu.cn/anaconda/cloud/bioconda/
conda config--add channels https://mirrors.ustc.edu.cn/anaconda/cloud/menpo/
conda config--set show_channel_urls yes
如果之前配有清华源的,建议删掉先,这样可以保证使用的是中科大源(因为添加了中科大源还是timeout,删了就快很多了~)
输入以下命令行,可以修改配置源内容,就可以删掉以前的源
vim~/.condarcconda: command not found
可以添加conda 路径
export PATH="/home/username/miniconda/bin:$PATH"如果还是 conda: command not found,重启环境变量:
source~/.bashrc新建虚拟环境
新建python虚拟环境
新建了指定python版本为3.7的r_env3虚拟环境
conda create-n r_env3 python=3.7安装R环境
(说明:这里是python+R)
激活环境:在上述安装成功带有python3.7的r_env3虚拟环境后,激活环境
source activate r_env3安装R环境
conda install r-base=3.6.1在服务器上配置jupyter lab
参考链接
背景:已经安装了上述的conda,python,R
目前尝试的是在指定环境下安装jupyterlab:
pip install jupyterlab命令行输入以下代码可生成配置文件,并记下输出的配置文件地址,一般是在~/.jupyter/jupyter_notebook_config.py :
jupyter lab--generate-config打开python解释器,输入:
from notebook.authimport passwd
passwd()
输入上面后会让你设置密码,设置完成后会得到hash好的密码,将其复制保留
'sha1:0d46e59c26c6:caab7b48941bee0095bdcf0747cd2a5a22a27581'退出刚才的python命令解释器,回到环境下,vi刚才的配置文件,进行配置文件修改(具体相关vi编辑器操作自行百度~):
vi~/.jupyter/jupyter_notebook_config.py进入配置文件后,添加下列配置,其中的密码写入hash好的密码(hash好的就是上面的密码),而不是你设置的密码。此外port端口号可以自行改,最好不要8888?【之前配置成功的jupyter lab的配置信息copy下来的】:
c.NotebookApp.ip='*'
c.NotebookApp.password= u'sha1:0d46e59c26c6:caab7b48941bee0095bdcf0747cd2a5a22a27581'
c.NotebookApp.open_browser=False
c.NotebookApp.port=9000
c.NotebookApp.allow_root=True
c.NotebookApp.allow_remote_access=True
shell内执行下行命令,即可开启jupyter lab:
jupyter lab在浏览器内输入服务器IP和端口号,输入你之前设置的密码,即可访问jupyter lab。
后台不挂断,一直执行jupyter lab
nohup jupyter lab&外网访问服务器jupyter lab
外网访问服务器的时候,需要端口映射,可以参考这个链接:本机通过中转访问服务器jupyter lab
添加新kernel
好像每在一个新的虚拟环境中,需要安装一次jupyter lab,如果没有安装就会出现报错:
jupyter-client has to be installed but “jupyter kernelspec --version”
exited with code 127. In addition: Warning message: In
system2(“jupyter”, c(“kernelspec”, “–version”), FALSE, FALSE) :
每在一个新虚拟环境中安装jupyter lab, 通过conda或pip 来install
conda install jupyterlab
pip install jupyterlab
新的python环境添加新的kernel
激活想要添加的python环境→pip 安装配置
激活想要添加新kernel的环境
source activate pytorch安装kernel,显示名称为pytorch
pip install ipykernel
python-m ipykernel install--user--name pytorch--display-name"pytorch"
安装kernel,显示名称为Python37
安装kernel,显示名称为xxx
#范例
python-m ipykernel install--user--name xxx--display-name"xxx"
之后就可以在jupyter lab主界面看到啦~
安装R语言新内核遇到的坑
写在最开始:先看完再复制代码命令,万一不能解决你的问题你又埋多了坑,因为我是在事无巨细记录我的曲折路程……
问题描述:之前在一个r_env的环境中配置了R内核,但是想在新的r_env2环境中也添加新内核。
按照官网的配置方法,我在进行到第二步的时候就会报错。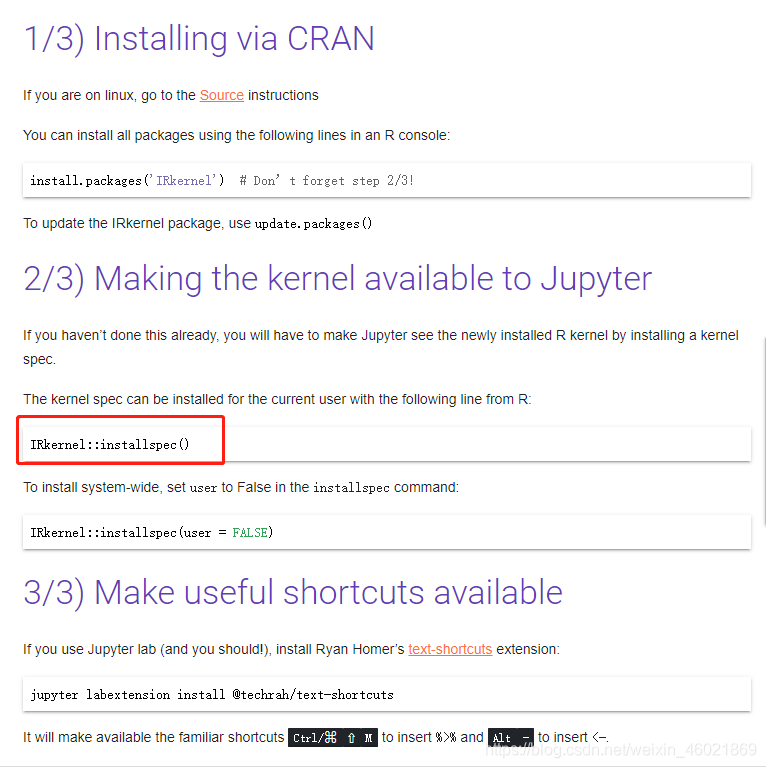 显示错误如下:
jupyter-client has to be installed but “jupyter kernelspec --version”
exited with code 1
找的解决方案:
在激活环境后的命令行中,安装IRkernal
conda install-c r r-irkernel之后再R命令行中输入:IRkernel::installspec()还是上述错误
退出R命令行,回到终端,输入:jupyter kernelspec list
出现错误: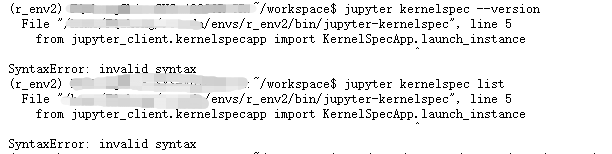 然后我参考链接的解决方案
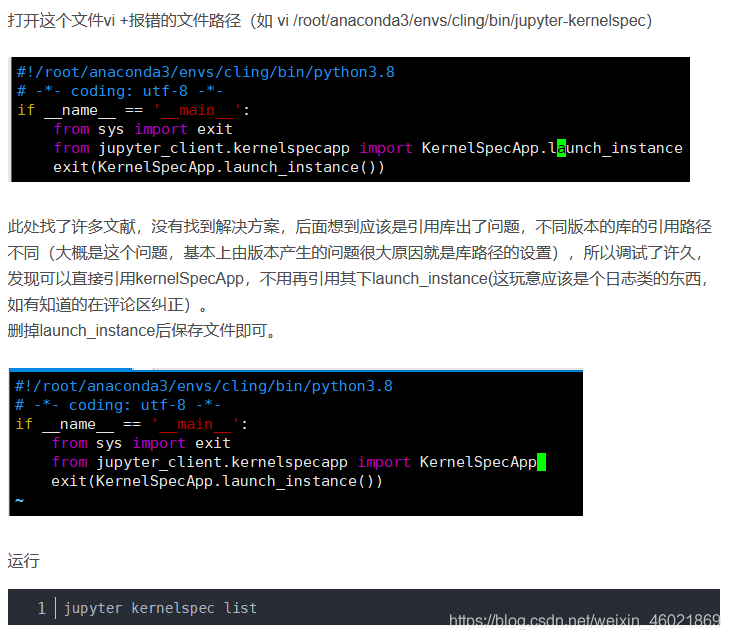 解决了小插曲,之后再R命令行中输入:
IRkernel::installspec()
没error,但是出现了下面的新问题,它是把我之前的R的内核替换了呀,我是要添加新内核啊,不是替换啊。
我一定是没有找对方法……
之后在这里找到了安装多个R 内核的方法: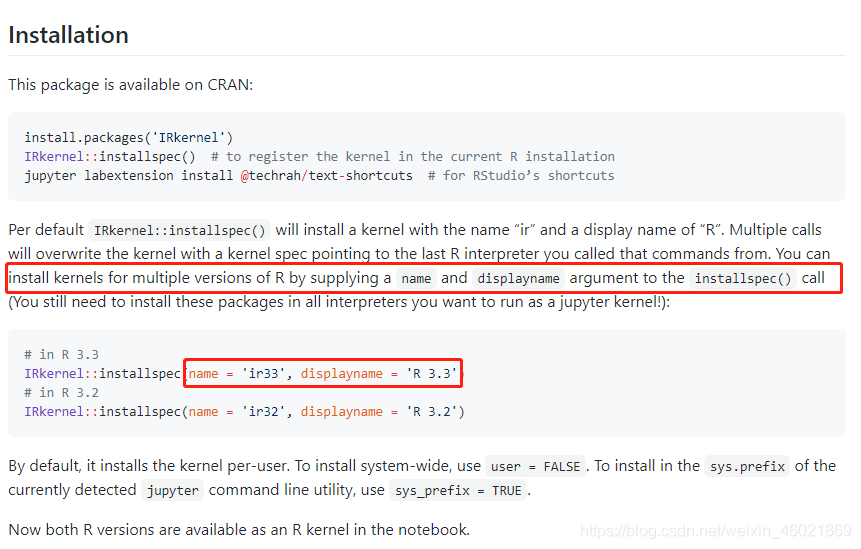
即:输入命令,就不会替换了而是新建了,实现了我想要的多个R 内核的想法
IRkernel::installspec(name='ir_env2', displayname='ir_env2')