SpringBoot整合Redis
一、快速上手
1、导入依赖
<dependency><groupId>org.springframework.boot</groupId><artifactId>spring-boot-starter-data-redis</artifactId></dependency><!--测试依赖--><dependency><groupId>org.springframework.boot</groupId><artifactId>spring-boot-starter-test</artifactId></dependency><dependency><groupId>org.projectlombok</groupId><artifactId>lombok</artifactId></dependency>2、配置连接
application.yaml
spring:redis:#如果是本地连接的话,使用127.0.0.1host: 110.41.20.61port:6379#我这边配置了密码,一般是没有密码的(可忽略)password:1234563、测试
importorg.junit.jupiter.api.Test;importorg.springframework.beans.factory.annotation.Autowired;importorg.springframework.boot.test.context.SpringBootTest;importorg.springframework.data.redis.core.RedisTemplate;@SpringBootTestpublicclassMyTest{@AutowiredprivateRedisTemplate redisTemplate;@TestvoidcontextLoads(){
        redisTemplate.opsForValue().set("mykey","张三");System.out.println(redisTemplate.opsForValue().get("mykey"));}}
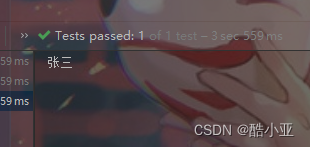
4、运行效果

二、遇到问题并解决
查看Redis数据库,发现乱码

怎么解决?
加上序列化配置即可
1、实体类
User
注意:实体类记得要继承Serializable序列化 【常用方法】
@Component@Data@NoArgsConstructor@AllArgsConstructor//在企业中,我们的所有pojo都会序列化publicclassUserimplementsSerializable{privateString name;privateInteger age;}2、Redis序列化配置
【常用】
RedisConfig
importorg.springframework.context.annotation.Bean;importorg.springframework.context.annotation.Configuration;importorg.springframework.data.redis.connection.RedisConnectionFactory;importorg.springframework.data.redis.core.RedisTemplate;importorg.springframework.data.redis.serializer.RedisSerializer;importjava.net.UnknownHostException;//固定模板,拿去直接使用@ConfigurationpublicclassRedisConfig{@BeanpublicRedisTemplate<String,Object>redisTemplate(RedisConnectionFactory redisConnectionFactory)throwsUnknownHostException{// 将template 泛型设置为 <String, Object>RedisTemplate<String,Object> template=newRedisTemplate();// 连接工厂,不必修改
        template.setConnectionFactory(redisConnectionFactory);/*
         * 序列化设置
         */// key、hash的key 采用 String序列化方式
        template.setKeySerializer(RedisSerializer.string());
        template.setHashKeySerializer(RedisSerializer.string());// value、hash的value 采用 Jackson 序列化方式
        template.setValueSerializer(RedisSerializer.json());
        template.setHashValueSerializer(RedisSerializer.json());
        template.afterPropertiesSet();return template;}}
3、再次测试
importcom.fasterxml.jackson.core.JsonProcessingException;importorg.junit.jupiter.api.Test;importorg.springframework.beans.factory.annotation.Autowired;importorg.springframework.boot.test.context.SpringBootTest;importorg.springframework.data.redis.core.RedisTemplate;@SpringBootTestpublicclassMyTest{@AutowiredprivateRedisTemplate redisTemplate;@Testpublicvoidtest()throwsJsonProcessingException{//开发一般都是使用json来传播存储对象User user=newUser("酷小亚",12);/**
         * 一定要有序列化  不然报SerializationException 序列化异常
         * 1、在实体类中直接继承序列化。
         * 2、或者添加如下代码
         * String s = new ObjectMapper().writeValueAsString(user);
         */
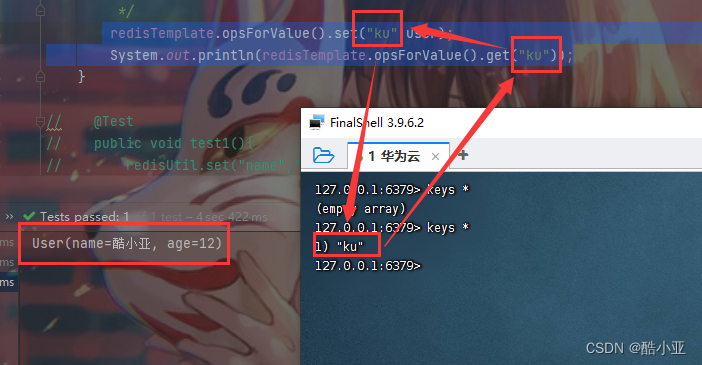
         redisTemplate.opsForValue().set("ku",user);System.out.println(redisTemplate.opsForValue().get("ku"));}}
4、运行结果

恭喜你,简单的入门啦!
不过, 聪明的你应该能够感察到,当我们使用RedisTemplate时,就需要频繁调用.opForxxx然后才能进行对应的操作。
工作中可不会这样使用哦,而是将这些常用的公共API抽取出来封装成为一个工具类,然后直接使用工具类来间接操作Redis,不但效率高并且易用。
下篇文章:
Redis封装工具类:https://blog.csdn.net/weixin_45737330/article/details/127224981
如果你觉得这篇文章对你有点帮助的话,就点个赞吧!
你的鼓励就是我写作下去的动力哦!