Java Web
【黑马程序员新版JavaWeb基础教程,Java web从入门到企业实战完整版】
13 Vue & Element
13.1 Vue
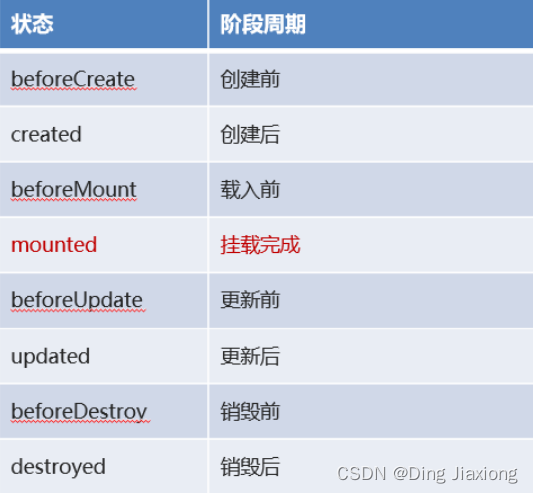
13.1.4 生命周期
生命周期的八个阶段:每触发一个生命周期事件,会自动执行一个生命周期方法,
这些生命周期方法也被称为钩子方法。
下图是 Vue 官网提供的从创建 Vue 到效果 Vue 对象的整个过程及各个阶段对应的钩子函数
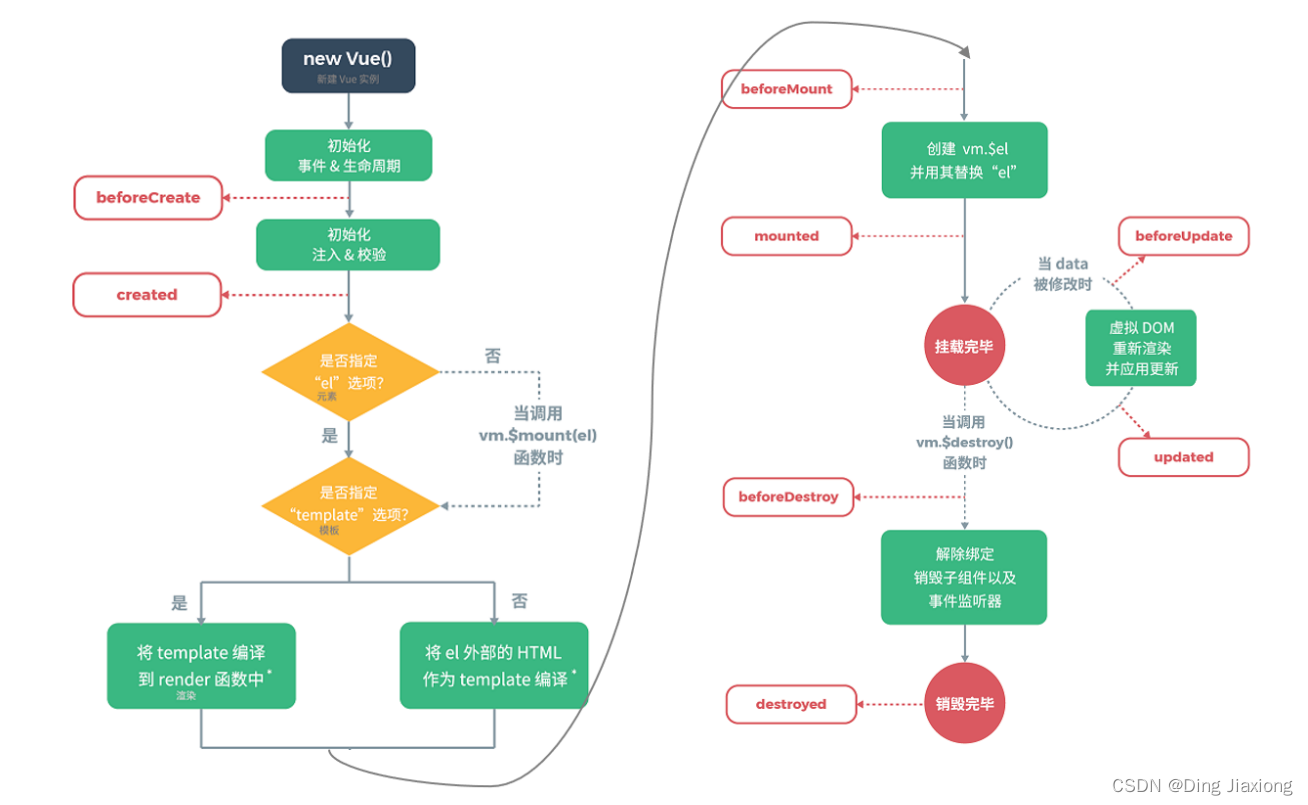
咱们只需要关注 mounted 函数就行了。【这就是后端程序员吗】
mounted :挂载完成,Vue初始化成功,HTML页面渲染成功。
而以后在该方法中发送异步请求,加载数据。
13.1.5 案例
使用 Vue 简化ajax学完后做的品牌列表数据查询和添加功能
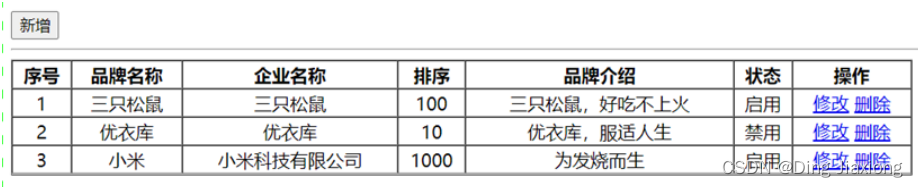
【查询所有功能】
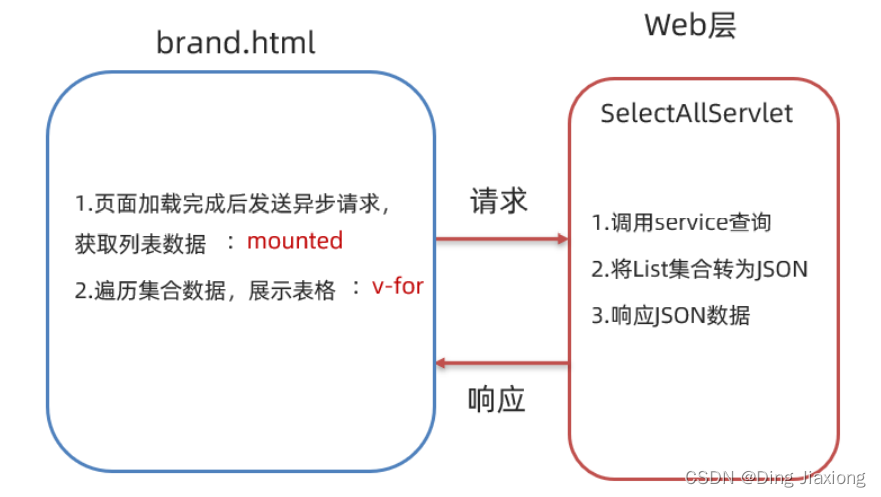
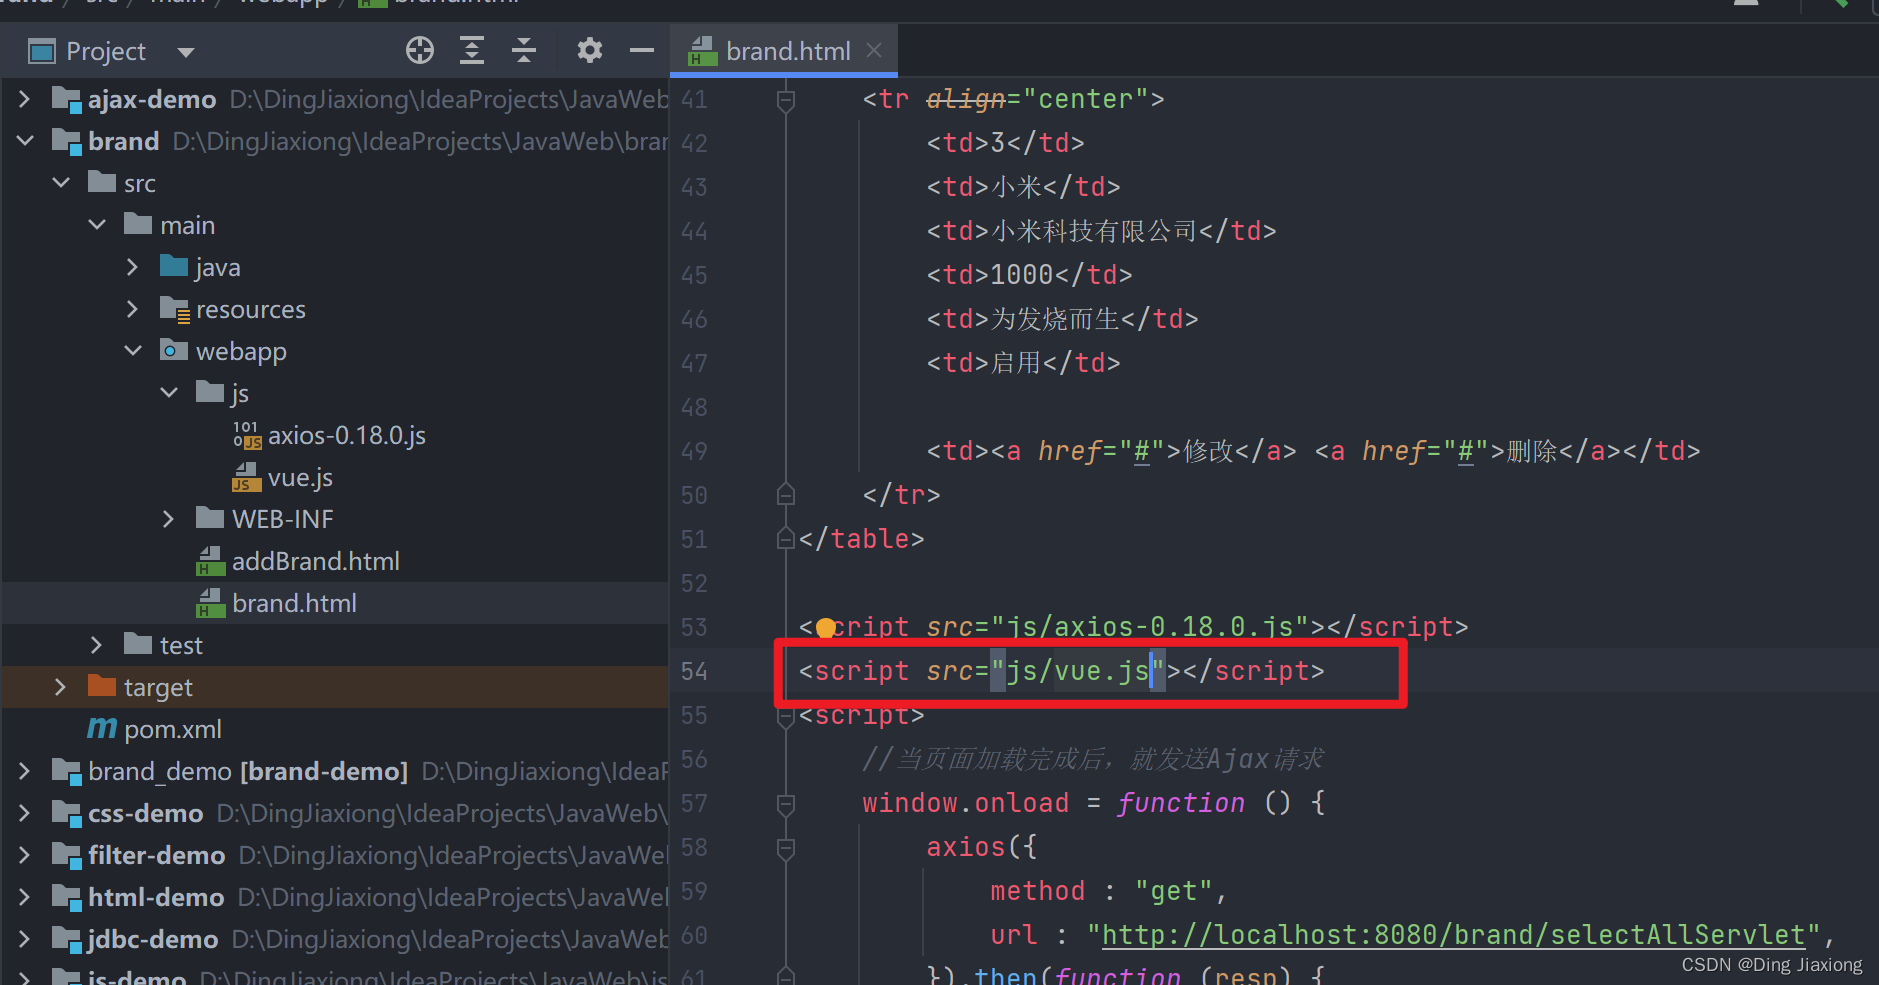
在 brand.html 页面引入 vue 的js文件
创建Vue 对象
- 在 Vue 对象中定义模型数据
- 在钩子函数中发送异步请求,并将响应的数据赋值给数据模型
newVue({el:"#app",data(){return{brands:[]}},mounted(){//页面加载完成后,发送异步请求var _this=this;axios({method:"get",url:"http://localhost:8080/brand/selectAllServlet"}).then(function(resp){
            _this.brands= resp.data;})}})
修改视图
<!DOCTYPEhtml><htmllang="en"><head><metacharset="UTF-8"><title>Title</title></head><body><divid="app"><ahref="addBrand.html"><inputtype="button"value="新增"></a><br><hr><tableid="brandTable"border="1"cellspacing="0"width="100%"><tr><th>序号</th><th>品牌名称</th><th>企业名称</th><th>排序</th><th>品牌介绍</th><th>状态</th><th>操作</th></tr><!--
            使用v-for遍历tr
        --><trv-for="(brand,i) in brands"align="center"><td>{{i + 1}}</td><td>{{brand.brandName}}</td><td>{{brand.companyName}}</td><td>{{brand.ordered}}</td><td>{{brand.description}}</td><td>{{brand.statusStr}}</td><td><ahref="#">修改</a><ahref="#">删除</a></td></tr></table></div><scriptsrc="js/axios-0.18.0.js"></script><scriptsrc="js/vue.js"></script><script>newVue({el:"#app",data(){return{brands:[]}},mounted(){// 页面加载完成后,发送异步请求,查询数据var _this=this;axios({method:"get",url:"http://localhost:8080/brand/selectAllServlet"}).then(function(resp){
                _this.brands= resp.data;})}})</script></body></html>
修改一下实体类
packagecom.dingjiaxiong.pojo;/**
 * 品牌实体类
 */publicclassBrand{// id 主键privateInteger id;// 品牌名称privateString brandName;// 企业名称privateString companyName;// 排序字段privateInteger ordered;// 描述信息privateString description;// 状态:0:禁用  1:启用privateInteger status;publicBrand(){}publicBrand(Integer id,String brandName,String companyName,String description){this.id= id;this.brandName= brandName;this.companyName= companyName;this.description= description;}publicBrand(Integer id,String brandName,String companyName,Integer ordered,String description,Integer status){this.id= id;this.brandName= brandName;this.companyName= companyName;this.ordered= ordered;this.description= description;this.status= status;}publicIntegergetId(){return id;}publicvoidsetId(Integer id){this.id= id;}publicStringgetBrandName(){return brandName;}publicvoidsetBrandName(String brandName){this.brandName= brandName;}publicStringgetCompanyName(){return companyName;}publicvoidsetCompanyName(String companyName){this.companyName= companyName;}publicIntegergetOrdered(){return ordered;}publicvoidsetOrdered(Integer ordered){this.ordered= ordered;}publicStringgetDescription(){return description;}publicvoidsetDescription(String description){this.description= description;}publicIntegergetStatus(){return status;}//逻辑视图publicStringgetStatusStr(){if(this.status==1){return"启用";}return"禁用";}publicvoidsetStatus(Integer status){this.status= status;}@OverridepublicStringtoString(){return"Brand{"+"id="+ id+", brandName='"+ brandName+'\''+", companyName='"+ companyName+'\''+", ordered="+ ordered+", description='"+ description+'\''+", status="+ status+'}';}}
运行服务器,访问
http://localhost:8080/brand/brand.html
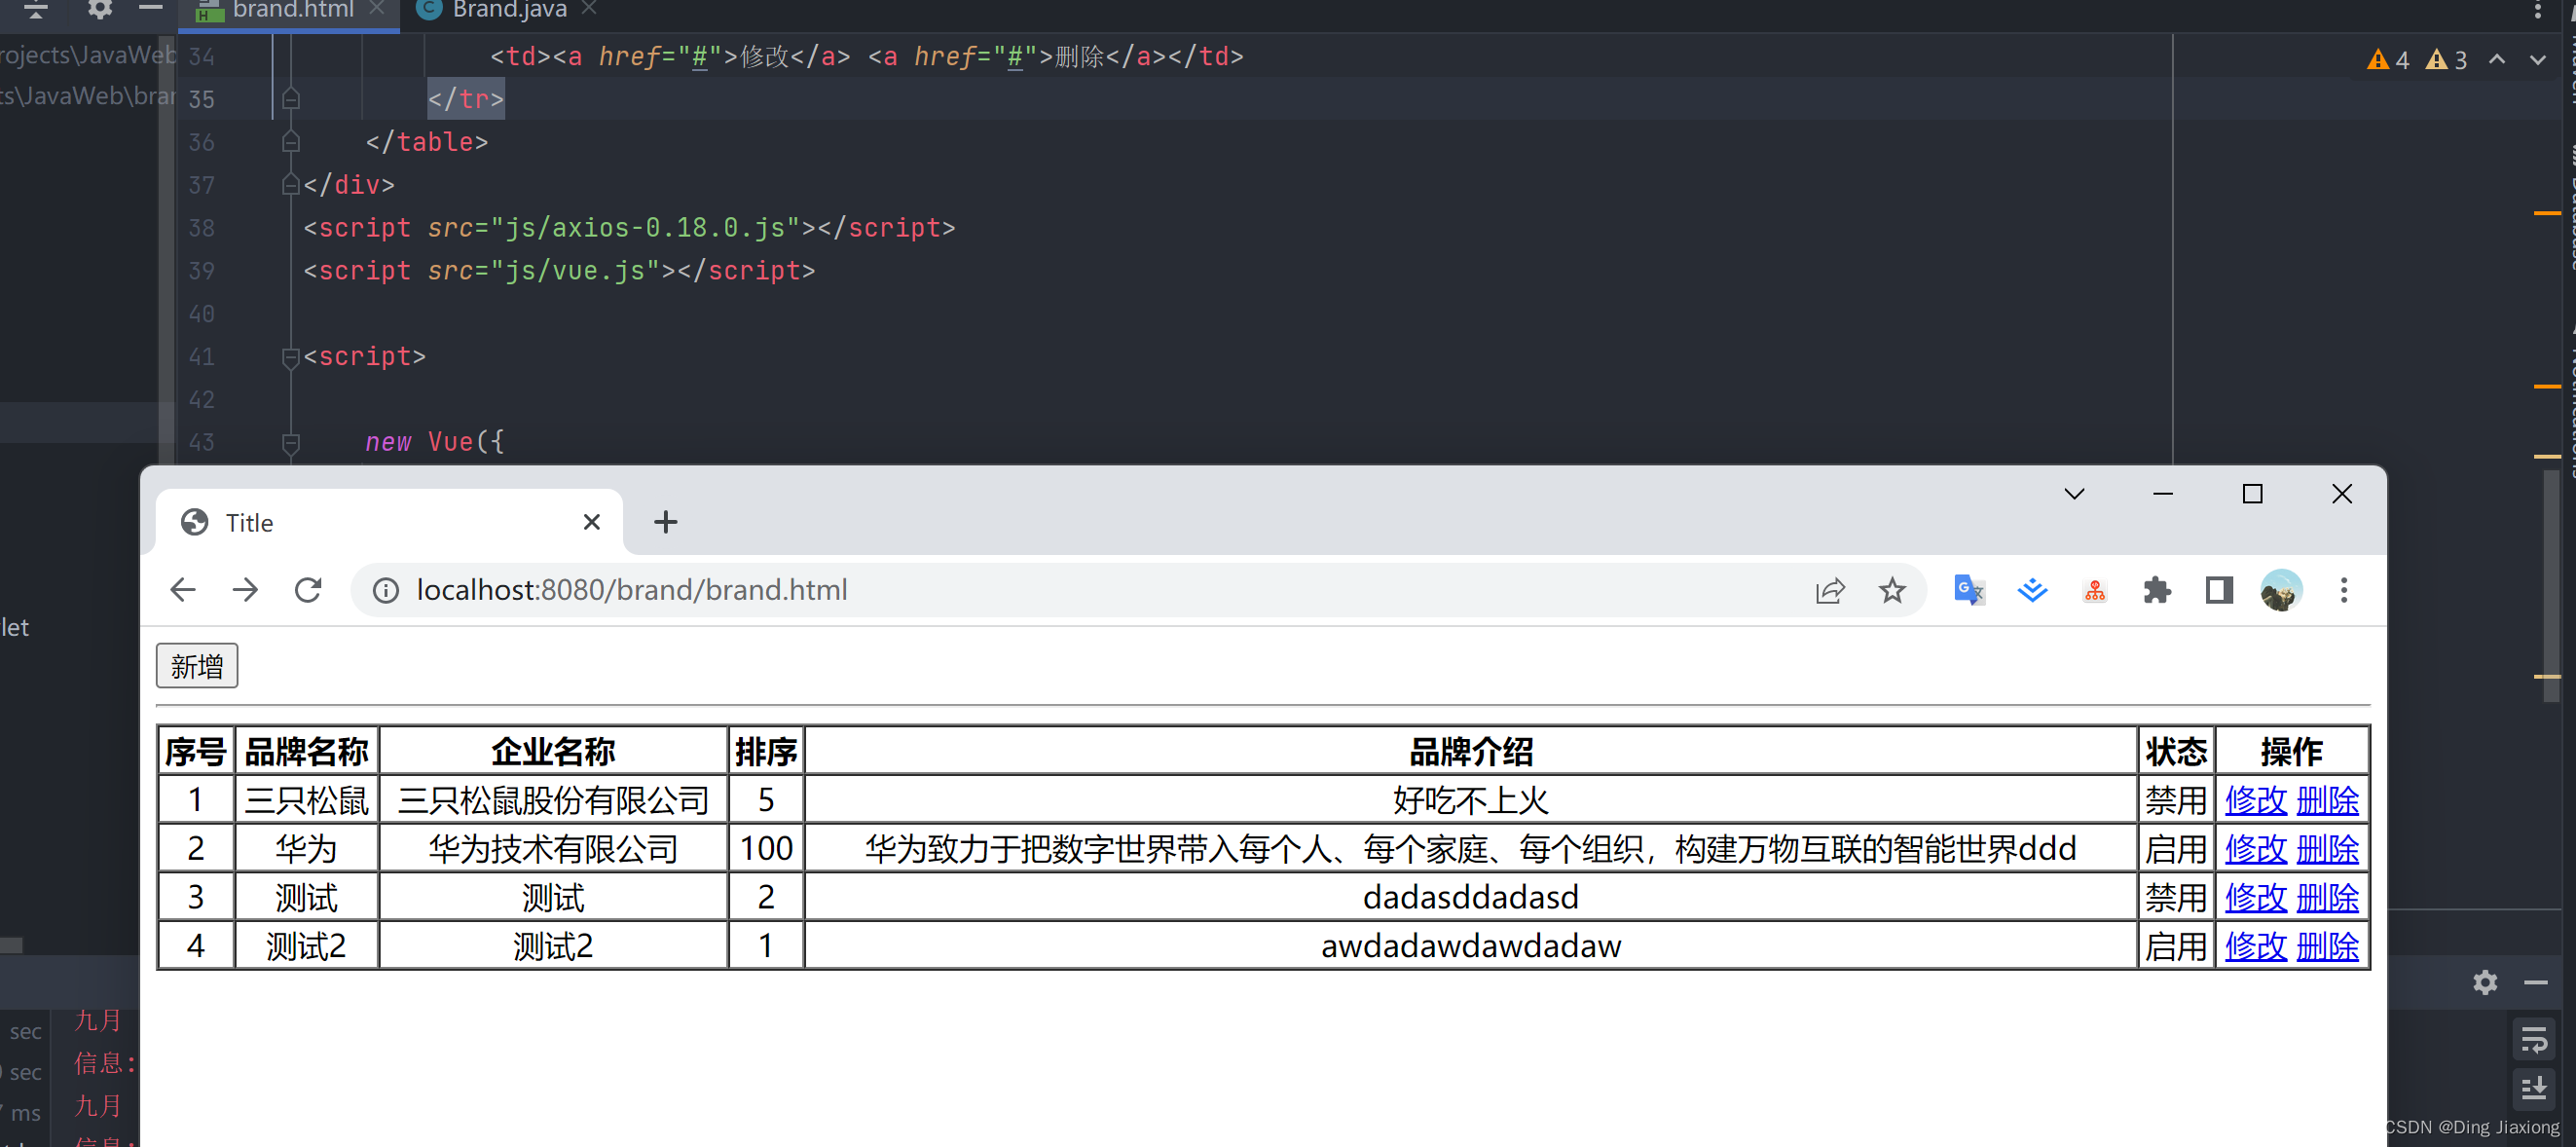
OK。
【添加功能】
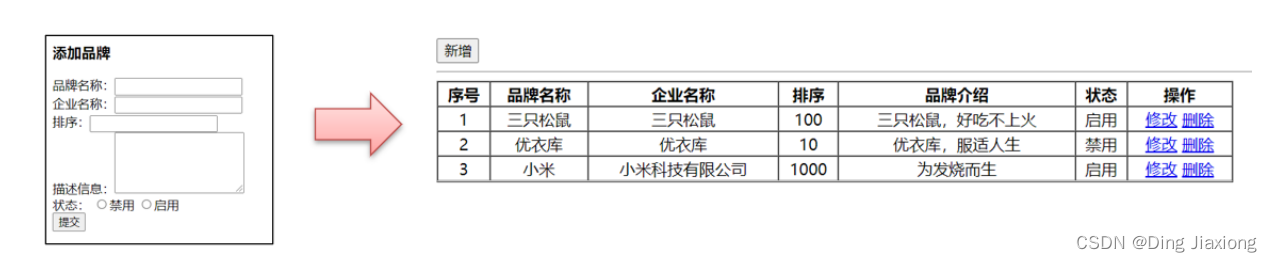
整体流程

注意:前端代码的关键点在于使用 v-model 指令给标签项绑定模型数据,利用双向绑定特性,在发送异步请求时提交数据。
修改后的addBrand.html页面
<!DOCTYPEhtml><htmllang="en"><head><metacharset="UTF-8"><title>添加品牌</title></head><body><divid="app"><h3>添加品牌</h3><formaction=""method="post">
        品牌名称:<inputid="brandName"v-model="brand.brandName"name="brandName"><br>
        企业名称:<inputid="companyName"v-model="brand.companyName"name="companyName"><br>
        排序:<inputid="ordered"v-model="brand.ordered"name="ordered"><br>
        描述信息:<textarearows="5"cols="20"id="description"v-model="brand.description"name="description"></textarea><br>
        状态:<inputtype="radio"name="status"v-model="brand.status"value="0">禁用<inputtype="radio"name="status"v-model="brand.status"value="1">启用<br><inputtype="button"id="btn"@click="submitForm"value="提交"></form></div><scriptsrc="js/axios-0.18.0.js"></script><scriptsrc="js/vue.js"></script><script>newVue({el:"#app",data(){return{brand:{}}},methods:{submitForm(){// 发送ajax请求,添加var _this=this;axios({method:"post",url:"http://localhost:8080/brand/addServlet",data:_this.brand}).then(function(resp){// 判断响应数据是否为 successif(resp.data=="success"){
                        location.href="http://localhost:8080/brand/brand.html";}})}}})</script></body></html>
启动服务测试,运行效果:
OK。代码改造完成。
通过上面的优化,前端代码确实简化了不少。
但是页面依旧是不怎么好看, Element,它可以美化页面。