多加两个保姆级别的大红心❤️,会不会上热榜啊,哈哈哈。来吧,先上个冒泡排序的效果图:
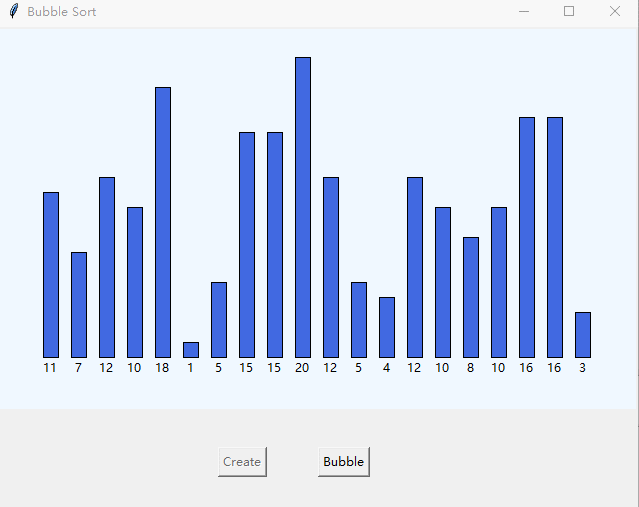
是不是,有那么一点点像了? 其实要做这个动图真不是很难,来看冒泡的代码:
>>> def Bubble(List):
	L = len(List)-1
	for i in range(L):
		for j in range(L-i):
			if List[j]>List[j+1]:
				List[j],List[j+1]=List[j+1],List[j]
	return List

>>> lst = [randint(1,20) for _ in range(15)]
>>> lst
[1, 10, 4, 18, 3, 15, 8, 8, 20, 12, 14, 14, 20, 6, 19]
>>> Bubble(lst)
[1, 3, 4, 6, 8, 8, 10, 12, 14, 14, 15, 18, 19, 20, 20]
动态排序的原理
冒泡排序就是在循环中当 List[j]>List[j+1] 时不停交换元素,双循环结果排序即成。那么,在做动图时,除了交换元素,还要交换色块位置以及数字标注的值。用python自带的tkinter库,写gui界面比较容易。添加一个画布 canvas 和两个按钮 button,然后用create_rectangle 和 create_text 画色块和文字标签;在冒泡排序的循环中添加交换它们位置的代码即可。另外,改变文本和填充颜色用itemconfig()函数,参数分别用 text和fill。更多注释见第三部分;python常用颜色表参见:
 https://blog.csdn.net/boysoft2002/article/details/115016170
动态排序的完整代码
import tkinter as tk
from random import randint
from time import sleep

def init():
    global rect,font,pos,lst,step
    count = 20
    rect,font,pos = [0]*count,[0]*count,[]
    lst = [randint(1,20) for _ in range(count)]
    x,y = 45,330
    width,step = 15,28
    cv.delete('all')
    for i in range(count):
        pos.append((x+i*step,y-lst[i]*width,x+i*step+width,y))
        sleep(0.1)
        rect[i] = cv.create_rectangle(pos[i], fill='royalblue')
        font[i] = cv.create_text(x+i*step+7,y+10,text=str(lst[i]),anchor=tk.CENTER)
        cv.update()
    btn2.configure(state=tk.NORMAL)
    btn1.configure(state=tk.DISABLED)

def bubble():
    global cv,rect,font,pos,lst,step
    L = len(lst)-1
    btn2.configure(state=tk.DISABLED)
    for i in range(L):
        for j in range(L-i):
            if lst[j]>lst[j+1]:
                lst[j],lst[j+1] = lst[j+1],lst[j]
                cv.move(rect[j],step,0)
                cv.move(rect[j+1],-step,0)
                rect[j],rect[j+1]=rect[j+1],rect[j]
                cv.itemconfig(font[j],text = str(lst[j]),fill='red')
                cv.itemconfig(font[j+1],text = str(lst[j+1]),fill='red')
                cv.itemconfig(rect[j],fill='orangered')
                cv.itemconfig(rect[j+1],fill='orangered')
                cv.update()
                sleep(0.4)
                cv.itemconfig(font[j],fill='black')
                cv.itemconfig(font[j+1],fill='black')
                cv.itemconfig(rect[j],fill='royalblue')
                cv.itemconfig(rect[j+1],fill='royalblue')
                cv.update()
    btn1.configure(state=tk.NORMAL)

def main():
    global cv,btn1,btn2
    root = tk.Tk()
    root.geometry('640x480')
    root.title('Bubble Sort')
    root.resizable(False,False)
    cv = tk.Canvas(root, width=640, height=380, bg='aliceblue')
    cv.pack()
    btn1 = tk.Button(root,text='Create',command=init)
    btn1.place(x=240,y=420)
    btn2 = tk.Button(root,text='Bubble',command=bubble,state=tk.DISABLED)
    btn2.place(x=320,y=420)
    root.mainloop()

if __name__=="__main__":

    app = main()
部分代码注释
给初次接触 tkinter 控件的新同学给点代码注释,大佬们略过:
- root = tk.Tk() #Tkinter建立窗口
root.geometry('640x480') #设置分辨率
root.title('Bubble Sort') #设置窗口标题
root.resizable(False,False) #取消窗口大小变动
- cv = tk.Canvas(root, width=640, height=380, bg='aliceblue') #创建画面
- cv.pack() # 控件布局方式: .pack自动填充空间 .place指定位置
btn1 = tk.Button(root,text='Create',command=init) #创建按钮
btn1.place(x=240,y=420) # place() 指定控件横纵坐标x,y
btn2 = tk.Button(root,text='Bubble',command=bubble,state=tk.DISABLED)
btn2.place(x=320,y=420)
# Canvas(): width height = 宽、高 bg=背景填充色
# Button(): text=按钮标题,command=绑定函数,state=按钮状态
rect[i] = cv.create_rectangle(pos[i], fill='royalblue') #在画布上创建矩形
font[i] = cv.create_text(x+i*step+7,y+10,text=str(lst[i]),anchor=tk.CENTER)
# create_text 参数: X,Y坐标 ,text 文字, anchor=tk.CENTER 居中
btn2.configure(state=tk.NORMAL) #恢复btn2按钮可点击状态
btn1.configure(state=tk.DISABLED) #设置btn2不可点击
cv.move(rect[j+1],X,Y) #画布子控件相对位置移动, X,Y正数向右或下,负数反向
cv.itemconfig(font[j],text = str(lst[j]),fill='red') #画布子控件的参数设置文字颜色等
如果你想要其它功能,就可以考虑增加滑块钮联动count变量来改变初始化时色块的数量,或者增加速度变量改变色块交换的速度等等。常见排序有十种,基本上制作动图的原理是一样的,只要知道排序的代码就能做,开动起来自己动手去制作吧!
---All done!