通用PopupWindow,几行代码搞定PopupWindow弹窗
我们都知道,Android 中的弹窗基本有两种,一种是AlertDialog,另一种是PopupWindow,AlertDialog的显示位置是固定的,PopWindow 的显示位置是我们可以设置和调整的,因此,像项目中的一些场景如:某个功能的提示说明、点击按钮在按钮上方或者下方弹出菜单、新功能弹窗引导等。由于这些弹窗的位置不固定,因此都可以用PopupWindow来做。最近项目中也用到了PopupWindow弹窗功能,在写的过程中,发现虽然API比较简单,但是写一个PopupWindow,还是有点繁琐,很多重复代码,决定简单封装一下,以后添加一个弹窗就不用那么麻烦了,几行代码就搞定了。本篇文章是对项目中使用 PopupWindow做一个笔记和总结。
文/JayZhouFan(简书作者)
原文链接:http://www.jianshu.com/p/9304d553aa67
著作权归作者所有,转载请联系作者获得授权,并标注“简书作者”。
一、首先先看一下效果图
效果图: 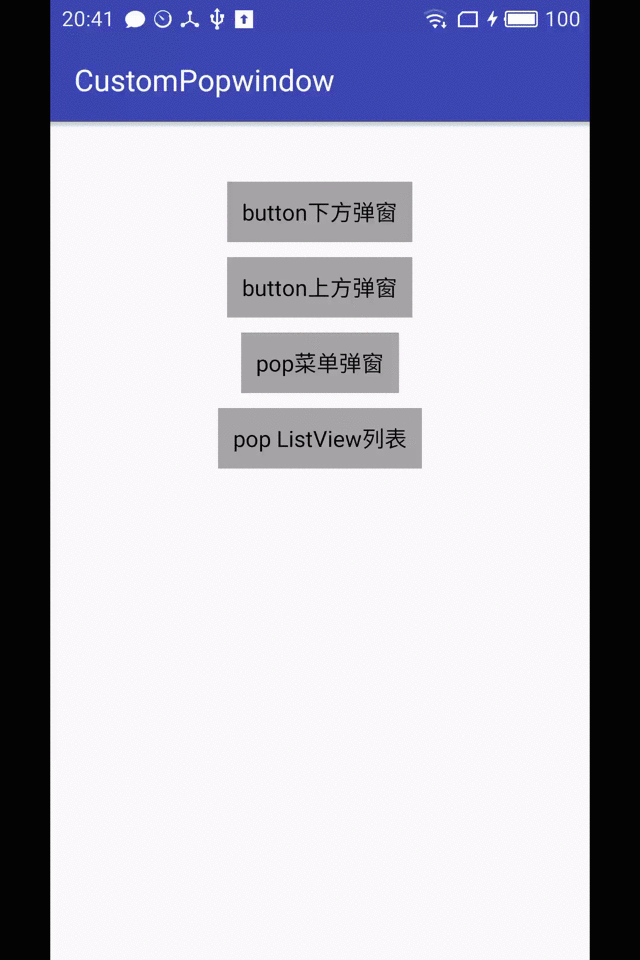
二、PopupWindow 简单介绍
首先看一下Google 官方文档对PopupWindow的介绍:
This class represents a popup window that can be used to display an arbitrary view. The popup window is a floating container that appears on top of the current activity.
大致意思就是:popup window 是一个出现在当前Activity顶层的悬浮容器,可以用来展示任意的View。
因此只要是个View,都可以用PopupWindow 来展示。这里我就不过多介绍PopupWindow 的API,挑几个重要并且常用的说一下:
1,构造函数,这个不用多说,多个重载函数,穿不同的参数。
public PopupWindow(int width, int height)
public PopupWindow(View contentView, int width, int height)
public PopupWindow(View contentView, int width, int height, boolean focusable)
2,设置显示的View:
public void setContentView(View contentView)
3,设置展示的宽、高,构造函数传了宽高就不用重新设置
// 设置宽,其实构造函数也是调用的这个方法
public void setWidth(int width)
//设置高
public void setHeight(int height)
4,设置是否获取焦点
public void setFocusable(boolean focusable)
5,设置点击PopupWindow 以外区域是否可以隐藏PopupWindow
public void setOutsideTouchable(boolean touchable)
注意:这里要注意一下,有时侯我们希望触摸PopupWindow 以外区域就隐藏PopupWindow,理论上我们只需要调用 setOutsideTouchable(ture)设置为ture就可以了,但是实际上只设置这个属性是不行的,必须设置背景,也就是说要和setBackgroundDrawable(Drawable background)同时使用才有效,不然,点击PopupWindow以外区域是不能隐藏掉的。
6,隐藏PopupWindow
public void dismiss()
7,设置dissmiss 回调监听
public void setOnDismissListener(OnDismissListener onDismissListener)
8,显示PopupWindow
//直接显示在参照View 的左下方
public void showAsDropDown(View anchor)
// 显示在参照View的左下方,可以通过xoff,yOff,来调节x,y方向的偏移
public void showAsDropDown(View anchor, int xoff, int off)
public void showAsDropDown(View anchor, int xoff, int yoff, int gravity)
//显示在指定位置,相对于整个屏幕的window而言,通过gravity调解显示在左、上、右、下、中. x,y调整两个方向的偏移
public void showAtLocation(View parent, int gravity, int x, int y)
以上就是PopupWindow 重要的并且常用的API。
三、封装通用PopupWindow,CustomPopWindow,使用链式的方式配置并显示
由于每次写PopupWindow都要写很多重复代码,因此简单的封装了一个CustomPopWindow.封装了PopupWindow 的一些常用API,使用Builder模式,就像写AlertDialog 一样,链式配置。
使用方法:
1,简便写法:
CustomPopWindow popWindow = new CustomPopWindow.PopupWindowBuilder(this)
.setView(R.layout.pop_layout1)//显示的布局,还可以通过设置一个View
// .size(600,400) //设置显示的大小,不设置就默认包裹内容
.setFocusable(true)//是否获取焦点,默认为ture
.setOutsideTouchable(true)//是否PopupWindow 以外触摸dissmiss
.create()//创建PopupWindow
.showAsDropDown(mButton1,0,10);//显示PopupWindow
以上就是弹出一个简单的PopupWindow,是不是看起来很优雅和简单,还可以简单一点:
CustomPopWindow popWindow = new CustomPopWindow.PopupWindowBuilder(this)
.setView(R.layout.pop_layout1)//显示的布局
.create()//创建PopupWindow
.showAsDropDown(mButton1,0,10);//显示PopupWindow
如果是一个简单的只展示文案的弹窗,就可以只设置一个View,就可以了,很简单吧!!!
2,展示一个PopupWindow 弹窗菜单(像手机QQ,微信的顶部菜单)
View contentView = LayoutInflater.from(this).inflate(R.layout.pop_menu,null);
//处理popWindow 显示内容
handleLogic(contentView);
//创建并显示popWindow
mCustomPopWindow= new CustomPopWindow.PopupWindowBuilder(this)
.setView(contentView)
.create()
.showAsDropDown(mButton3,0,20);
如果PopupWindow 展示的内容需要在程序代码中设置或者响应点击事件等,可以现获取到这个View,然后处理一些显示和点击事件逻辑,再交给CustomPopWindow 创建显示。比如响应菜单点击事件的逻辑处理:
/**
* 处理弹出显示内容、点击事件等逻辑
* @param contentView
*/
private void handleLogic(View contentView){
View.OnClickListener listener = new View.OnClickListener() {
@Override
public void onClick(View v) {
if(mCustomPopWindow!=null){
mCustomPopWindow.dissmiss();
}
String showContent = “”;
switch (v.getId()){
case R.id.menu1:
showContent = “点击 Item菜单1”;
break;
case R.id.menu2:
showContent = “点击 Item菜单2”;
break;
case R.id.menu3:
showContent = “点击 Item菜单3”;
break;
case R.id.menu4:
showContent = “点击 Item菜单4”;
break;
case R.id.menu5:
showContent = “点击 Item菜单5” ;
break;
}
Toast.makeText(MainActivity.this,showContent,Toast.LENGTH_SHORT).show();
}
};
contentView.findViewById(R.id.menu1).setOnClickListener(listener);
contentView.findViewById(R.id.menu2).setOnClickListener(listener);
contentView.findViewById(R.id.menu3).setOnClickListener(listener);
contentView.findViewById(R.id.menu4).setOnClickListener(listener);
contentView.findViewById(R.id.menu5).setOnClickListener(listener);
}
}
3,展示一个ListView,其实跟上面是一样的,这里贴一下实例代码:
private void showPopListView(){
View contentView = LayoutInflater.from(this).inflate(R.layout.pop_list,null);
//处理popWindow 显示内容
handleListView(contentView);
//创建并显示popWindow
mListPopWindow= new CustomPopWindow.PopupWindowBuilder(this)
.setView(contentView)
.size(ViewGroup.LayoutParams.MATCH_PARENT,ViewGroup.LayoutParams.MATCH_PARENT)//显示大小
.create()
.showAsDropDown(mButton4,0,20);
}
private void handleListView(View contentView){
    RecyclerView recyclerView = (RecyclerView) contentView.findViewById(R.id.recyclerView);
    LinearLayoutManager manager = new LinearLayoutManager(this);
    manager.setOrientation(LinearLayoutManager.VERTICAL);
    recyclerView.setLayoutManager(manager);
    MyAdapter adapter = new MyAdapter();
    adapter.setData(mockData());
    recyclerView.setAdapter(adapter);
    adapter.notifyDataSetChanged();

}
以上就是对于 PopupWindow的封装和使用示例。封装了PopupWindow 常用的API,没有展示完全,还有像添加显示和隐藏动画setAnimationStyle(int animationStyle),隐藏回调监听等等。需要的朋友自己试试。
最后,贴出CustomPopWindow的源码:
/**
*
* 自定义PopWindow类,封装了PopWindow的一些常用属性,用Builder模式支持链式调用
* Created by zhouwei on 16/11/28.
*/
public class CustomPopWindow {
private Context mContext;
private int mWidth;
private int mHeight;
private boolean mIsFocusable = true;
private boolean mIsOutside = true;
private int mResLayoutId = -1;
private View mContentView;
private PopupWindow mPopupWindow;
private int mAnimationStyle = -1;
private boolean mClippEnable = true;//default is true
private boolean mIgnoreCheekPress = false;
private int mInputMode = -1;
private PopupWindow.OnDismissListener mOnDismissListener;
private int mSoftInputMode = -1;
private boolean mTouchable = true;//default is ture
private View.OnTouchListener mOnTouchListener;
private CustomPopWindow(Context context){
    mContext = context;
}

public int getWidth() {
    return mWidth;
}

public int getHeight() {
    return mHeight;
}

/**
 *
 * @param anchor
 * @param xOff
 * @param yOff
 * @return
 */
public CustomPopWindow showAsDropDown(View anchor, int xOff, int yOff){
    if(mPopupWindow!=null){
        mPopupWindow.showAsDropDown(anchor,xOff,yOff);
    }
    return this;
}

public CustomPopWindow showAsDropDown(View anchor){
    if(mPopupWindow!=null){
        mPopupWindow.showAsDropDown(anchor);
    }
    return this;
}

@RequiresApi(api = Build.VERSION_CODES.KITKAT)
public CustomPopWindow showAsDropDown(View anchor, int xOff, int yOff, int gravity){
    if(mPopupWindow!=null){
        mPopupWindow.showAsDropDown(anchor,xOff,yOff,gravity);
    }
    return this;
}


/**
 * 相对于父控件的位置(通过设置Gravity.CENTER,下方Gravity.BOTTOM等 ),可以设置具体位置坐标
 * @param parent
 * @param gravity
 * @param x the popup's x location offset
 * @param y the popup's y location offset
 * @return
 */
public CustomPopWindow showAtLocation(View parent, int gravity, int x, int y){
    if(mPopupWindow!=null){
        mPopupWindow.showAtLocation(parent,gravity,x,y);
    }
    return this;
}

/**
 * 添加一些属性设置
 * @param popupWindow
 */
private void apply(PopupWindow popupWindow){
    popupWindow.setClippingEnabled(mClippEnable);
    if(mIgnoreCheekPress){
        popupWindow.setIgnoreCheekPress();
    }
    if(mInputMode!=-1){
        popupWindow.setInputMethodMode(mInputMode);
    }
    if(mSoftInputMode!=-1){
        popupWindow.setSoftInputMode(mSoftInputMode);
    }
    if(mOnDismissListener!=null){
        popupWindow.setOnDismissListener(mOnDismissListener);
    }
    if(mOnTouchListener!=null){
        popupWindow.setTouchInterceptor(mOnTouchListener);
    }
    popupWindow.setTouchable(mTouchable);


}

private PopupWindow build(){

    if(mContentView == null){
        mContentView = LayoutInflater.from(mContext).inflate(mResLayoutId,null);
    }

    if(mWidth != 0 && mHeight!=0 ){
        mPopupWindow = new PopupWindow(mContentView,mWidth,mHeight);
    }else{
        mPopupWindow = new PopupWindow(mContentView, ViewGroup.LayoutParams.WRAP_CONTENT, ViewGroup.LayoutParams.WRAP_CONTENT);
    }
    if(mAnimationStyle!=-1){
        mPopupWindow.setAnimationStyle(mAnimationStyle);
    }

    apply(mPopupWindow);//设置一些属性

    mPopupWindow.setFocusable(mIsFocusable);
    mPopupWindow.setBackgroundDrawable(new ColorDrawable(Color.TRANSPARENT));
    mPopupWindow.setOutsideTouchable(mIsOutside);

    if(mWidth == 0 || mHeight == 0){
        mPopupWindow.getContentView().measure(View.MeasureSpec.UNSPECIFIED, View.MeasureSpec.UNSPECIFIED);
        //如果外面没有设置宽高的情况下,计算宽高并赋值
        mWidth = mPopupWindow.getContentView().getMeasuredWidth();
        mHeight = mPopupWindow.getContentView().getMeasuredHeight();
    }

    mPopupWindow.update();

    return mPopupWindow;
}

/**
 * 关闭popWindow
 */
public void dissmiss(){
    if(mPopupWindow!=null){
        mPopupWindow.dismiss();
    }
}


public static class PopupWindowBuilder{
    private CustomPopWindow mCustomPopWindow;

    public PopupWindowBuilder(Context context){
        mCustomPopWindow = new CustomPopWindow(context);
    }
    public PopupWindowBuilder size(int width,int height){
        mCustomPopWindow.mWidth = width;
        mCustomPopWindow.mHeight = height;
        return this;
    }


    public PopupWindowBuilder setFocusable(boolean focusable){
        mCustomPopWindow.mIsFocusable = focusable;
        return this;
    }


    public PopupWindowBuilder setView(int resLayoutId){
        mCustomPopWindow.mResLayoutId = resLayoutId;
        mCustomPopWindow.mContentView = null;
        return this;
    }

    public PopupWindowBuilder setView(View view){
        mCustomPopWindow.mContentView = view;
        mCustomPopWindow.mResLayoutId = -1;
        return this;
    }

    public PopupWindowBuilder setOutsideTouchable(boolean outsideTouchable){
        mCustomPopWindow.mIsOutside = outsideTouchable;
        return this;
    }

    /**
     * 设置弹窗动画
     * @param animationStyle
     * @return
     */
    public PopupWindowBuilder setAnimationStyle(int animationStyle){
        mCustomPopWindow.mAnimationStyle = animationStyle;
        return this;
    }


    public PopupWindowBuilder setClippingEnable(boolean enable){
        mCustomPopWindow.mClippEnable =enable;
        return this;
    }


    public PopupWindowBuilder setIgnoreCheekPress(boolean ignoreCheekPress){
        mCustomPopWindow.mIgnoreCheekPress = ignoreCheekPress;
        return this;
    }

    public PopupWindowBuilder setInputMethodMode(int mode){
        mCustomPopWindow.mInputMode = mode;
        return this;
    }

    public PopupWindowBuilder setOnDissmissListener(PopupWindow.OnDismissListener onDissmissListener){
        mCustomPopWindow.mOnDismissListener = onDissmissListener;
        return this;
    }


    public PopupWindowBuilder setSoftInputMode(int softInputMode){
        mCustomPopWindow.mSoftInputMode = softInputMode;
        return this;
    }


    public PopupWindowBuilder setTouchable(boolean touchable){
        mCustomPopWindow.mTouchable = touchable;
        return this;
    }

    public PopupWindowBuilder setTouchIntercepter(View.OnTouchListener touchIntercepter){
        mCustomPopWindow.mOnTouchListener = touchIntercepter;
        return this;
    }


    public CustomPopWindow create(){
        //构建PopWindow
        mCustomPopWindow.build();
        return mCustomPopWindow;
    }

}
}
好了,本篇文章到此结束,以上就是PopupWindow的一些介绍和一个简单的封装
点击源码
文/JayZhouFan(简书作者)
原文链接:http://www.jianshu.com/p/9304d553aa67
著作权归作者所有,转载请联系作者获得授权,并标注“简书作者”。