因想要在开发环境使用jmeter进行压测功能的学习,顺便自己写个简单的分布式锁进行测试。
@Autowiredprivate Redisson redisson;@Autowiredprivate StringRedisTemplate stringRedisTemplate;@RequestMapping("/myLock")public StringmyLock()throws InterruptedException{
        String lockKey="product_001";
        String clientId= UUID.randomUUID().toString();try{
            stringRedisTemplate.expire(lockKey,30, TimeUnit.SECONDS);
            Boolean result= stringRedisTemplate.opsForValue().setIfAbsent(lockKey, clientId,30, TimeUnit.SECONDS);if(!result){
                System.out.println("未获得锁资源,无法进行操作!!!");return"1001";}//TODO 加锁,实现锁续命功能int stock= Integer.parseInt(stringRedisTemplate.opsForValue().get("stock"));// jedis.get("stock")if(stock>0){int realStock= stock-1;
                stringRedisTemplate.opsForValue().set("stock", realStock+"");// jedis.set(key,value)
                System.out.println("扣减成功!,剩余库存:"+ realStock+"");}else{
                System.out.println("扣减失败,库存不足");}}finally{if(clientId.equals(stringRedisTemplate.opsForValue().get(lockKey))){
                    stringRedisTemplate.delete(lockKey);}}return"end";}
于是为了方便测试就需要在windows环境下安装使用nginx。
windows环境下使用nginx
1、下载
http://nginx.org/en/download.html 下载稳定版本,以nginx/Windows-1.12.2为例,直接下载 nginx-1.12.2.zip
2、解压
下载后解压,目录如下: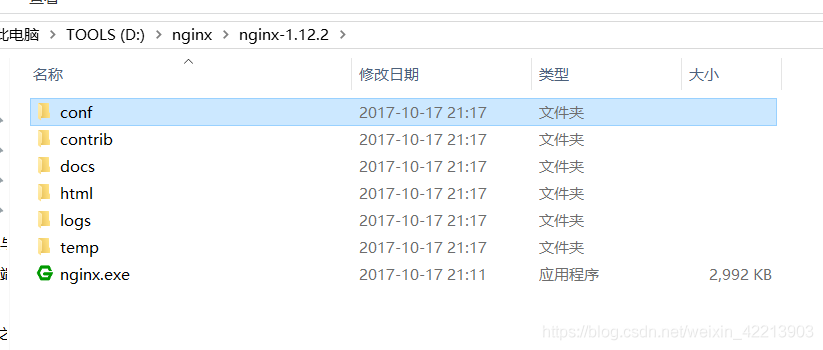
3、启动nginx
有很多种方法启动nginx
(1)直接双击nginx.exe,双击后一个黑色的弹窗一闪而过
(2)打开cmd命令窗口,切换到nginx解压目录下,输入命令 nginx.exe 或者 start nginx ,回车即可
4、检查nginx是否启动成功
直接在浏览器地址栏输入网址 http://localhost:80,回车,出现以下页面说明启动成功。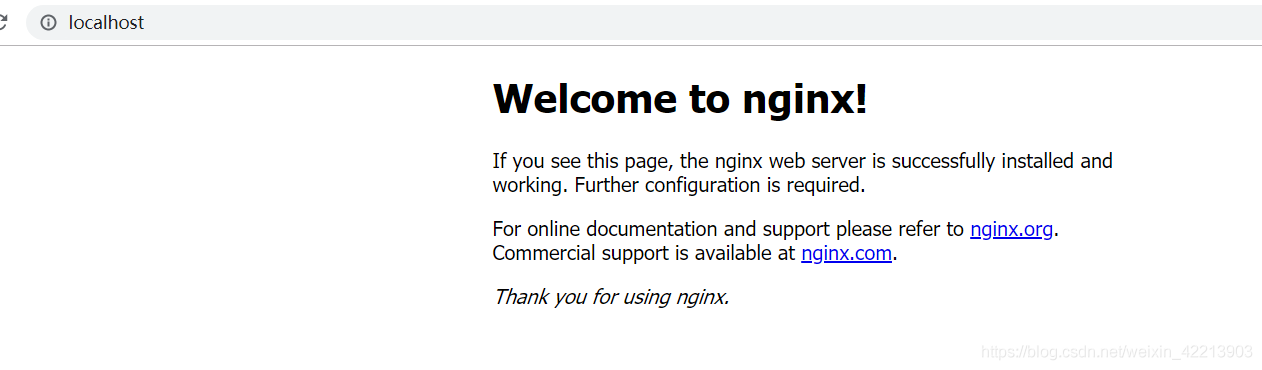
也可以在cmd命令窗口输入命令 tasklist /fi “imagename eq nginx.exe” ,出现如下结果说明启动成功。
nginx的配置文件是conf目录下的nginx.conf,默认配置的nginx监听的端口为80,如果80端口被占用可以修改为未被占用的端口即可,初始配置文件如下:
#user  nobody;
worker_processes  1;#error_log  logs/error.log;#error_log  logs/error.log  notice;#error_log  logs/error.log  info;#pid        logs/nginx.pid;
events{
    worker_connections  1024;}

http{
    include       mime.types;
    default_type  application/octet-stream;#log_format  main  '$remote_addr - $remote_user [$time_local] "$request" '#                  '$status $body_bytes_sent "$http_referer" '#                  '"$http_user_agent" "$http_x_forwarded_for"';#access_log  logs/access.log  main;

    sendfile        on;#tcp_nopush     on;#keepalive_timeout  0;
    keepalive_timeout  65;#gzip  on;

    server{
        listen       80;
        server_name  localhost;#charset koi8-r;#access_log  logs/host.access.log  main;

        location /{
            root   html;
            index  index.html index.htm;}#error_page  404              /404.html;# redirect server error pages to the static page /50x.html#
        error_page   500 502 503 504  /50x.html;
        location= /50x.html{
            root   html;}# proxy the PHP scripts to Apache listening on 127.0.0.1:80##location ~ \.php$ {#    proxy_pass   http://127.0.0.1;#}# pass the PHP scripts to FastCGI server listening on 127.0.0.1:9000##location ~ \.php$ {#    root           html;#    fastcgi_pass   127.0.0.1:9000;#    fastcgi_index  index.php;#    fastcgi_param  SCRIPT_FILENAME  /scripts$fastcgi_script_name;#    include        fastcgi_params;#}# deny access to .htaccess files, if Apache's document root# concurs with nginx's one##location ~ /\.ht {#    deny  all;#}}# another virtual host using mix of IP-, name-, and port-based configuration##server {#    listen       8000;#    listen       somename:8080;#    server_name  somename  alias  another.alias;#    location / {#        root   html;#        index  index.html index.htm;#    }#}# HTTPS server##server {#    listen       443 ssl;#    server_name  localhost;#    ssl_certificate      cert.pem;#    ssl_certificate_key  cert.key;#    ssl_session_cache    shared:SSL:1m;#    ssl_session_timeout  5m;#    ssl_ciphers  HIGH:!aNULL:!MD5;#    ssl_prefer_server_ciphers  on;#    location / {#        root   html;#        index  index.html index.htm;#    }#}}
检查80端口是否被占用的命令是: netstat -ano | findstr 0.0.0.0:80 或 netstat -ano | findstr “80”。
当我们修改了nginx的配置文件nginx.conf 时,不需要关闭nginx后重新启动nginx,只需要执行命令 nginx -s reload 即可让改动生效。
5、关闭nginx
如果使用cmd命令窗口启动nginx,关闭cmd窗口是不能结束nginx进程的,可使用两种方法关闭nginx。
(1)输入nginx命令 nginx -s stop(快速停止nginx) 或 nginx -s quit(完整有序的停止nginx)
(2)使用taskkill taskkill /f /t /im nginx.exe
6、使用nginx代理服务器做负载均衡
我们可以修改nginx的配置文件nginx.conf 达到访问nginx代理服务器时跳转到指定服务器的目的,即通过proxy_pass 配置请求转发地址,即当我们依然输入http://localhost:80 时,请求会跳转到我们配置的服务器。
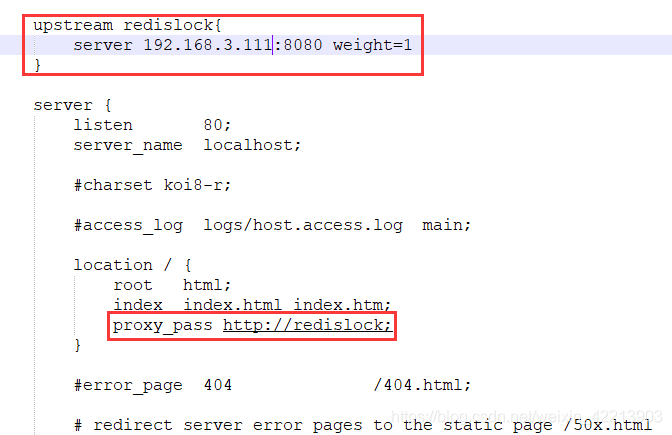
同理,我们可以配置多个目标服务器,当一台服务器出现故障时,nginx能将请求自动转向另一台服务器,例如配置如下: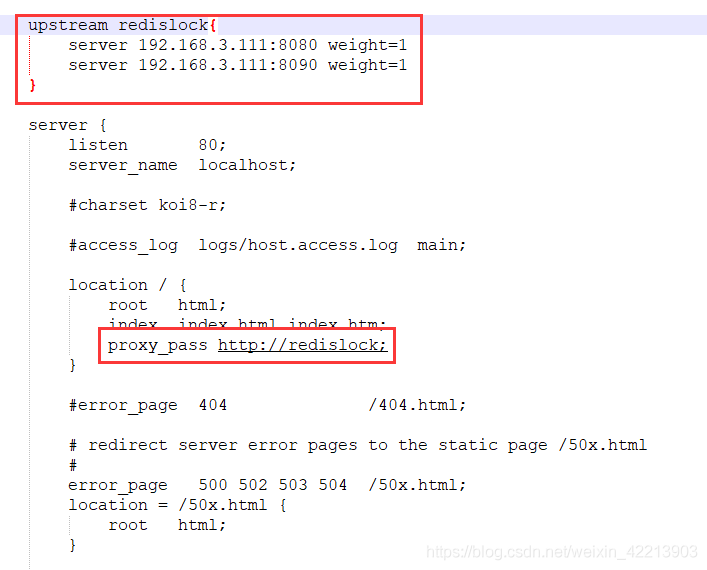
当服务器 192.168.3.111:8080 挂掉时,nginxnginx能将请求自动转向服务器 192.168.3.111:8090 。上面还加了一个weight属性,此属性表示各服务器被访问到的权重,weight 越高被访问到的几率越高。
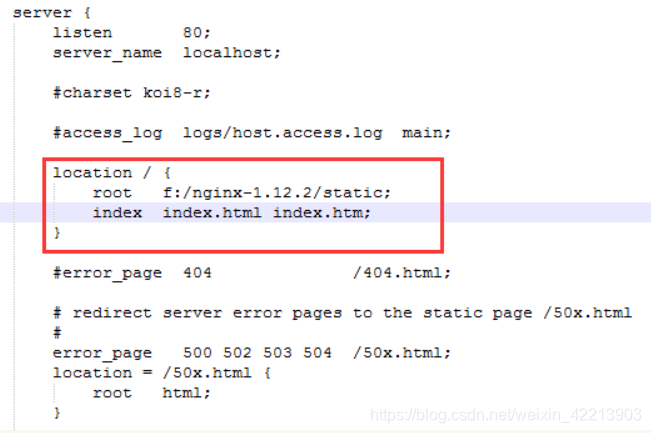
6.nginx配置静态资源
将静态资源(如jpg|png|css|js等)放在如下配置的f:/nginx-1.12.2/static目录下,然后在nginx配置文件中做如下配置(注意:静态资源配置只能放在 location / 中),浏览器中访问 http://localhost:80/1.png 即可访问到 f:/nginx-1.12.2/static目录下的 1.png图片