功能:发送激活链接,在邮箱中点击链接即可激活
(可以在业务层结合数据库实现链接激活失效时长,本文不详述)
springboot(后端)
项目依赖pom.xml
<dependency><groupId>org.apache.commons</groupId><artifactId>commons-email</artifactId><version>1.4</version></dependency><dependency><groupId>org.springframework.boot</groupId><artifactId>spring-boot-starter-web</artifactId></dependency><dependency><groupId>org.springframework.boot</groupId><artifactId>spring-boot-starter-thymeleaf</artifactId></dependency><dependency><groupId>org.springframework.boot</groupId><artifactId>spring-boot-starter-mail</artifactId></dependency>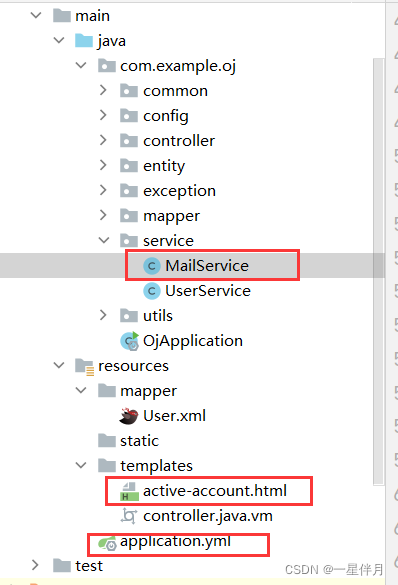
配置邮箱信息
首先先开通邮箱的协议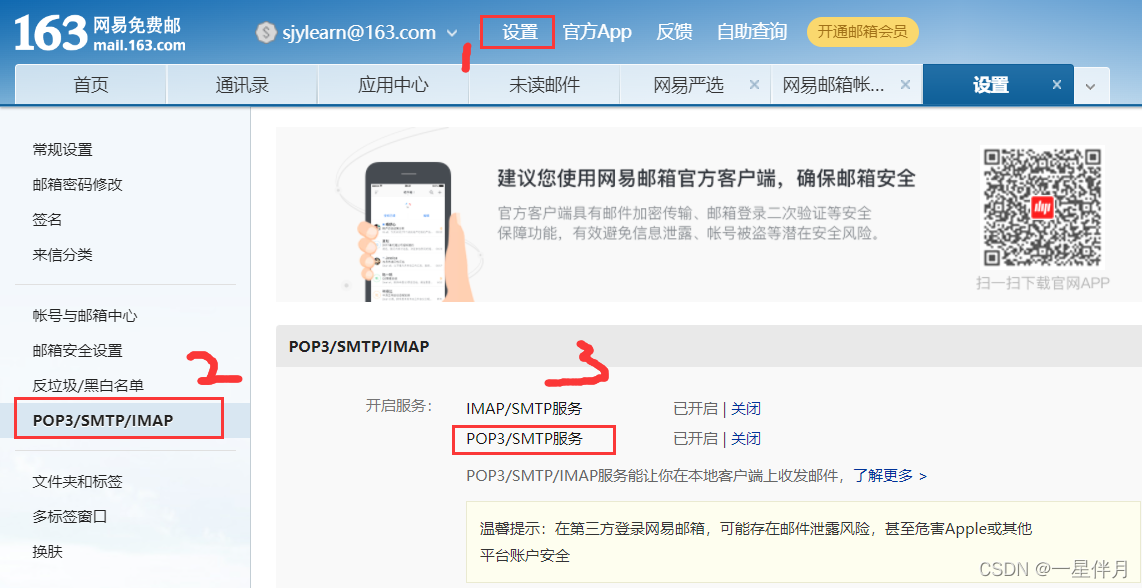
只开通POP3/SMTP服务即可,然后将授权码记到你的小本本上
application.yml
下面是以163邮箱为例的配置信息(其他邮箱只修改host即可)
spring.mail:
  host: smtp.163.com	#163邮箱
  username: 邮箱名
  password: 生成的授权密码
  protocol: smtp
  port:25default-encoding: utf-8
  properties:
    mail:
      debug:true #打印日志
配置发送的邮件内容
MailService.java
packagecom.example.oj.service;importcom.example.oj.common.Constants;importcom.example.oj.exception.ServiceException;importorg.springframework.beans.factory.annotation.Value;importorg.springframework.mail.javamail.JavaMailSender;importorg.springframework.mail.javamail.MimeMessageHelper;importorg.springframework.stereotype.Service;importorg.thymeleaf.TemplateEngine;importorg.thymeleaf.context.Context;importjavax.annotation.Resource;importjavax.mail.MessagingException;importjavax.mail.internet.MimeMessage;importjava.util.Date;/**
 * @author sjy
 * @date 2022/2/15
 **/@ServicepublicclassMailService{@Value("${spring.mail.username}")privateString adminEmail;@ResourceprivateJavaMailSender mailSender;@ResourceprivateTemplateEngine templateEngine;/**
     * 激活账号邮件发送
     * @param activationUrl 激活url连接
     * @param email 收件人邮箱
     * @return
     * @throws MessagingException
     */publicvoidsendMailForActivationAccount(String activationUrl,String email){// 创建邮件对象MimeMessage mimeMessage= mailSender.createMimeMessage();// 获取信息编辑对象MimeMessageHelper  message=null;try{
            message=newMimeMessageHelper(mimeMessage,true,"UTF-8");// 邮件发送者
            message.setFrom(adminEmail);// 接收者
            message.setTo(email);//日期
            message.setSentDate(newDate());// 标题
            message.setSubject("欢迎来到【Online Judge】- 个人账号激活");// 内容使用htmlContext context=newContext();
            context.setVariable("activationUrl",activationUrl);String text= templateEngine.process("active-account.html",context);//设置正文
            message.setText(text,true);}catch(MessagingException e){thrownewServiceException(Constants.CODE_510,"邮件服务器错误");}
        mailSender.send(mimeMessage);}}
我想要发送的是HTML格式的文件,因此,需要再写一个html文本
active-account.html
<!DOCTYPEhtml><body><div>
    Email 地址验证<br>
    这封邮件是由<ahref="#"target="_blank">Online Judge</a>发送的。<br>
    您收到这封邮件,是由于在<ahref="#"target="_blank">Online Judge</a>进行了新用户注册。<br>
    ---------------------------------------------------------<br>
    账号激活说明<br>
    ---------------------------------------------------------<br>
    您是<ahref="#"target="_blank">Online Judge</a>的新用户,我们欢迎您的加入,您只需要点击下面的链接激活账号即可:<br><ath:href="@{${activationUrl}}"><spanth:text="${activationUrl}"></span></a><br>
    感谢您的访问,祝您生活愉快!<br>
    此致<br><ahref="#"target="_blank">Online Judge</a>管理团队</div></body></html>
发送邮件,并且生成激活链接
在Service或者Controller中使用
// 雪花算法生成验证码String confirmCode=IdUtil.getSnowflake(1,1).nextIdStr();// 生成激活链接String activationUrl="http://localhost:3000/#/activation?confirmCode="+ confirmCode;// 发送邮件
mailService.sendMailForActivationAccount(activationUrl,user.getEmail());
最后业务层写账号激活
以我的为例,我封装了返回的结果
/**
     * 激活码激活
     * @param confirmCode
     * @return
     */publicStringactivationAccount(String confirmCode){QueryWrapper<User> queryWrapper=newQueryWrapper<>();
        queryWrapper.eq("confirm_code",confirmCode);User user=getOne(queryWrapper);if(user==null){returnConstants.CODE_410;}boolean after=LocalDateTime.now().isAfter(user.getCreateTime());if(after){returnConstants.CODE_409;}else{// 账号状态修改UpdateWrapper updateWrapper=newUpdateWrapper();
            updateWrapper.eq("username",user.getUsername());
            updateWrapper.set("confirm_code","");
            updateWrapper.set("state",true);this.update(null,updateWrapper);returnConstants.CODE_200;}}
vue2(前端)
激活成功跳转到登录页面,激活失败跳转到注册页面
<template><divid="show"></div></template><script>exportdefault{mounted(){this.getActivation()},
  methods:{asyncgetActivation(){const activationAccount=this.$route.query.confirmCodeconst{ msg, code}=awaitthis.$axios.get(`user/activation/${activationAccount}`)if(code==='200'){this.$message.success('激活成功',2000)this.$router.push('/login')}else{this.$message.error(msg,2000)this.$router.push('/register')}}}}</script><stylelang="less">#show{left: 50%;transform:translate(-50%,-50%);top: 50%;position: absolute;}</style>