django rest framework jwt登录及验证
安装相关的包
pip install django
pip install djangorestframework
pip install djangorestframework_simplejwt
pip install mysqlclient
首先新建一个django项目名为project1
创建app
python manage.py startapp [appname]接下来在项目的setting中写入appname
INSTALLED_APPS = [
...
    'rest_framework',
    'appname',

...
]
配置数据库:
DATABASES = {
    'default': {
        'ENGINE': 'django.db.backends.mysql',
        'NAME': 'test1',
        'USER':'root',
        'PASSWORD':'*********',
        'HOST':'localhost',
        'PORT':'3306',
    }
}
配置rest_framework的信息:
REST_FRAMEWORK = {
    #设置所有接口都需要被验证
    'DEFAULT_PERMISSION_CLASSES': (
        'rest_framework.permissions.IsAuthenticated',
    ),
    # 用户登陆认证方式
    'DEFAULT_AUTHENTICATION_CLASSES': (
        'rest_framework.authentication.TokenAuthentication',
        'rest_framework.authentication.SessionAuthentication',
        'rest_framework_simplejwt.authentication.JWTAuthentication', #这里配置jwt
    ),
}

AUTH_USER_MODEL = "login.Users"  #验证所根据的模型


SIMPLE_JWT = {
    # 设置jwt的一些参数,比如过期时间
    'ACCESS_TOKEN_LIFETIME': timedelta(hours=8),
}
在总项目下的urls.py中加入自己定义的url,给自己的新建的app一个总的路由,inclue中写入自己appname中urls.py的路径
from django.contrib import admin
from django.urls import path
from django.conf.urls import include,url

urlpatterns = [
    path('admin/', admin.site.urls),
    path('appname/', include('login.urls')),
    url(r'^api-auth', include('rest_framework.urls', namespace='rest_framework')),
]
接下来创建数据库模型,在models.py中写入,由于rest_framework_simplejwt源码中默认使用django自带的users表,这里也定义一个并继承它:
from django.contrib.auth.models import AbstractUser

class Users(AbstractUser):
    class Meta:
    db_table = 'Users'
DRF需要序列化操作,新建一个serializers.py在里面做序列化:
from .models import Users
from rest_framework import serializers
class UserSerializer(serializers.Serializer):
user_id = serializers.IntegerField(label='user_id', read_only=True)
username = serializers.CharField(required=False, allow_blank=True, max_length=100)
password = serializers.CharField(required=False, max_length=20)
phone_number = serializers.CharField(required=False, max_length=20)
email_address = serializers.CharField(required=False, max_length=25)
def create(self, validated_data):
#根据提供的验证过的数据创建并返回一个新的`Users`实例。
return Users.objects.create(**validated_data)
def update(self, instance, validated_data):
#根据提供的验证过的数据更新和返回一个已经存在的`Users`实例。
instance.user_id = validated_data.get('user_id', instance.user_id)
instance.username = validated_data.get('username', instance.title)
instance.password = validated_data.get('password', instance.password)
instance.phone_number = validated_data.get('phone_number', instance.phone_number)
instance.email_address = validated_data.get('email_address', instance.email_address)
instance.save()
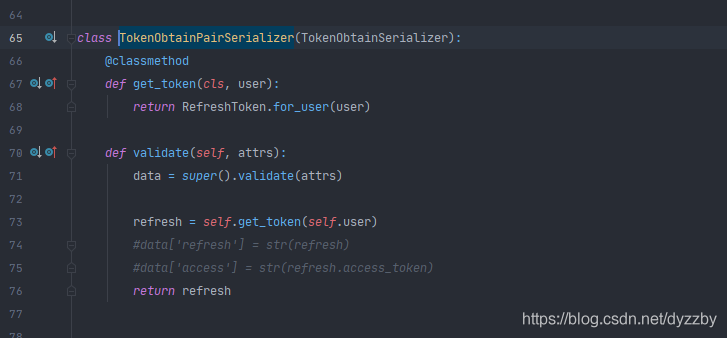
return instancesimplejwt中默认返回两个字段access 和refresh, 这里自定义以下返回的数据,新建utils.py:
from rest_framework_simplejwt.serializers import TokenObtainPairSerializer
from rest_framework_simplejwt.views import TokenObtainPairView
class MyTokenObtainPairSerializer(TokenObtainPairSerializer):
    @classmethod
    def get_token(cls, user):
        token = super().get_token(user)
        print(token)
        print(token.access_token)
        data = {}
        data['message'] = '获取token成功'
        data['id'] = user.id
        data['username'] = user.username
        data['access'] = str(token)
        data['refresh'] = str(token.access_token)
        return data


class MyTokenObtainPairView(TokenObtainPairView):

    serializer_class = MyTokenObtainPairSerializer
没改完,要在继承的这个类中改一下源码:
编写views.py,写个login,如果是get方式,返回👇,如果post,返回一开始post的信息:
from login.serializers import UserSerializer
from rest_framework.response import Response
from rest_framework_simplejwt.serializers import TokenObtainPairSerializer
from rest_framework.views import APIView

class UserList(APIView):
    def get(self, request):
        data = {"message":"This api doesn't have get method and we have recorded your information"}
        return Response(data)

    def post(self, request):
        serializer = UserSerializer(data=request.data)
        print(serializer)
        return Response(request.data)
然后编写urls.py:
from django.conf.urls import url, include
from . import views
from login.utils import MyTokenObtainPairView

urlpatterns = [
    url(r'inin', views.UserList.as_view()),
    url(r'test2', MyTokenObtainPairView.as_view())
]
大功告成,先别急着运行,要先更新数据库:
python manage.py makemigrations
python3 manage.py migrate
还要创建用户:
python manage.py createsuperuser然后就可以运行了。报错了就按照提示,该装包装包,该修改修改