Go后端项目服务器部署笔记
前言
最近写的一个Golang后端项目需要部署到服务器上,涉及到许多方面的知识,操作较为繁复。所以我一边部署一边把相关步骤记录下来,形成此文,供大家参考。
作者水平有限,有任何问题欢迎在文章下方留言交流!本文使用的电脑是m1的mac,系统为macOS Big Sur 11.5.1。
服务器是华为云的x86云服务器,系统是Ubuntu20.04.1 LTS。
mac远程连接服务器
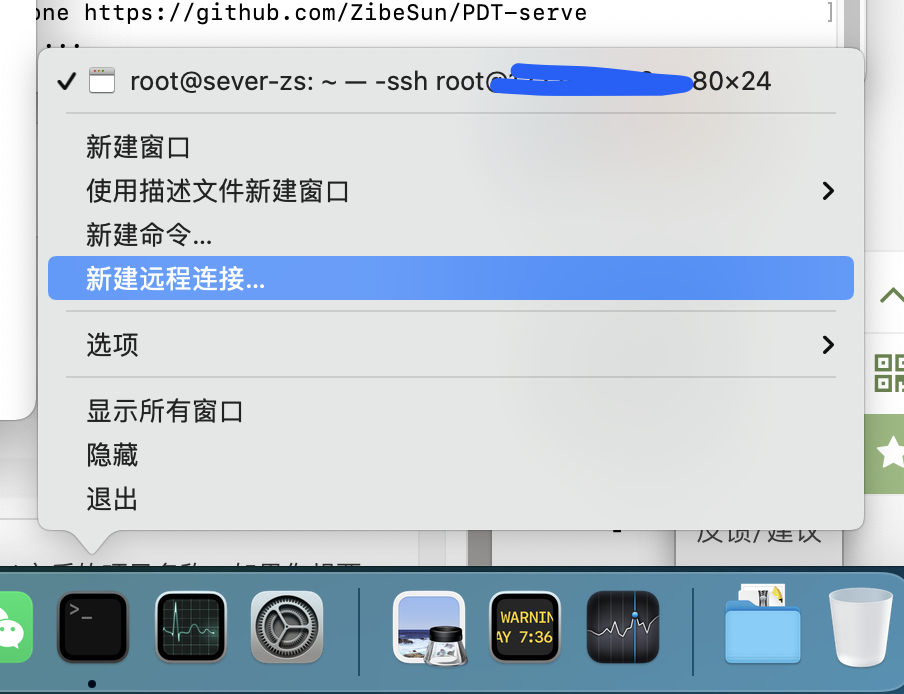
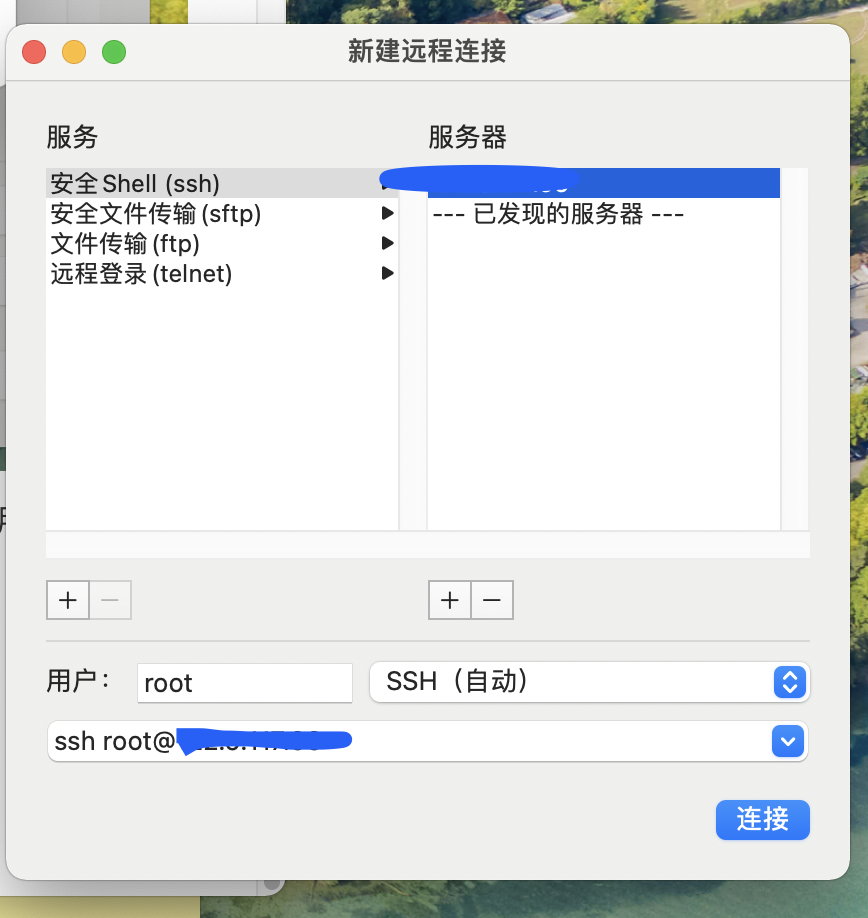
1、右键dock栏的终端,选择新建远程连接
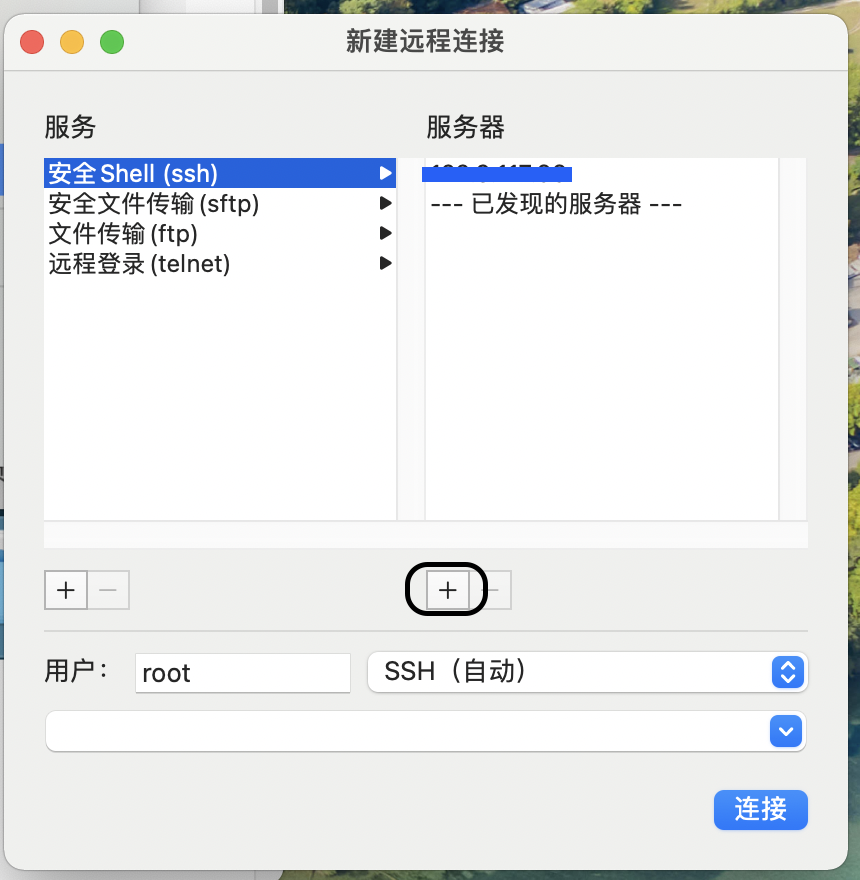
2、在弹出来的窗口中点击“+”号
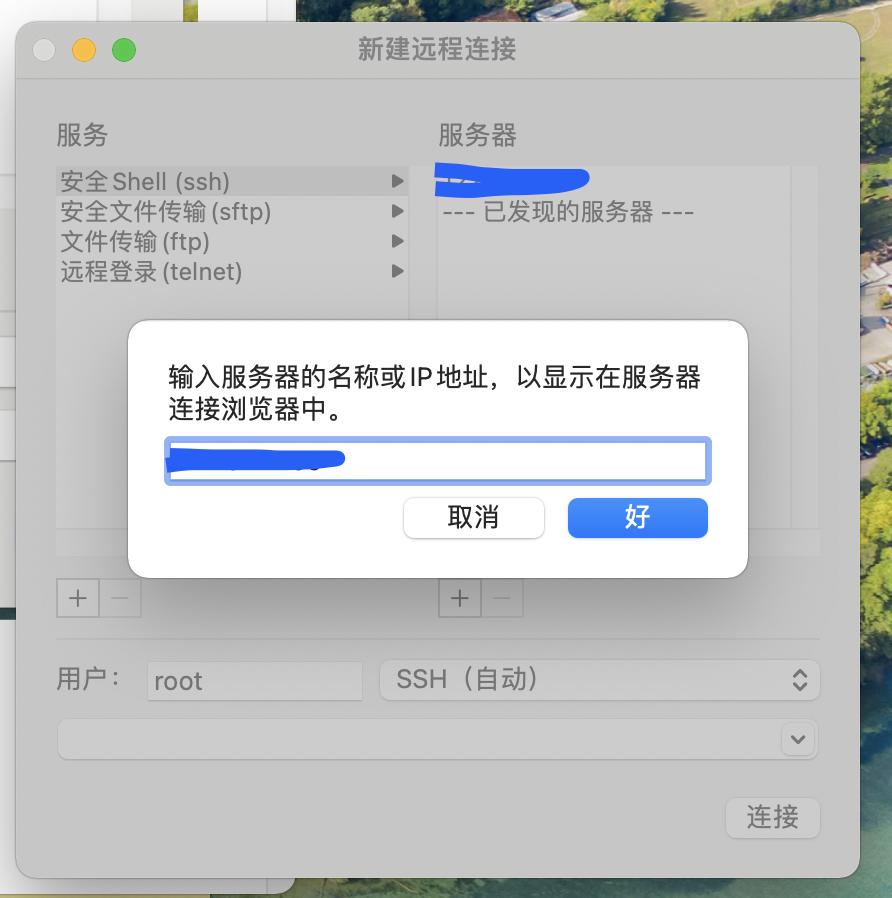
3、输入你的服务器IP地址
4、在服务器栏选择你的服务器IP地址,然后在用户栏填入你的用户名,点击链接
5、输入你的密码即可连接你的服务器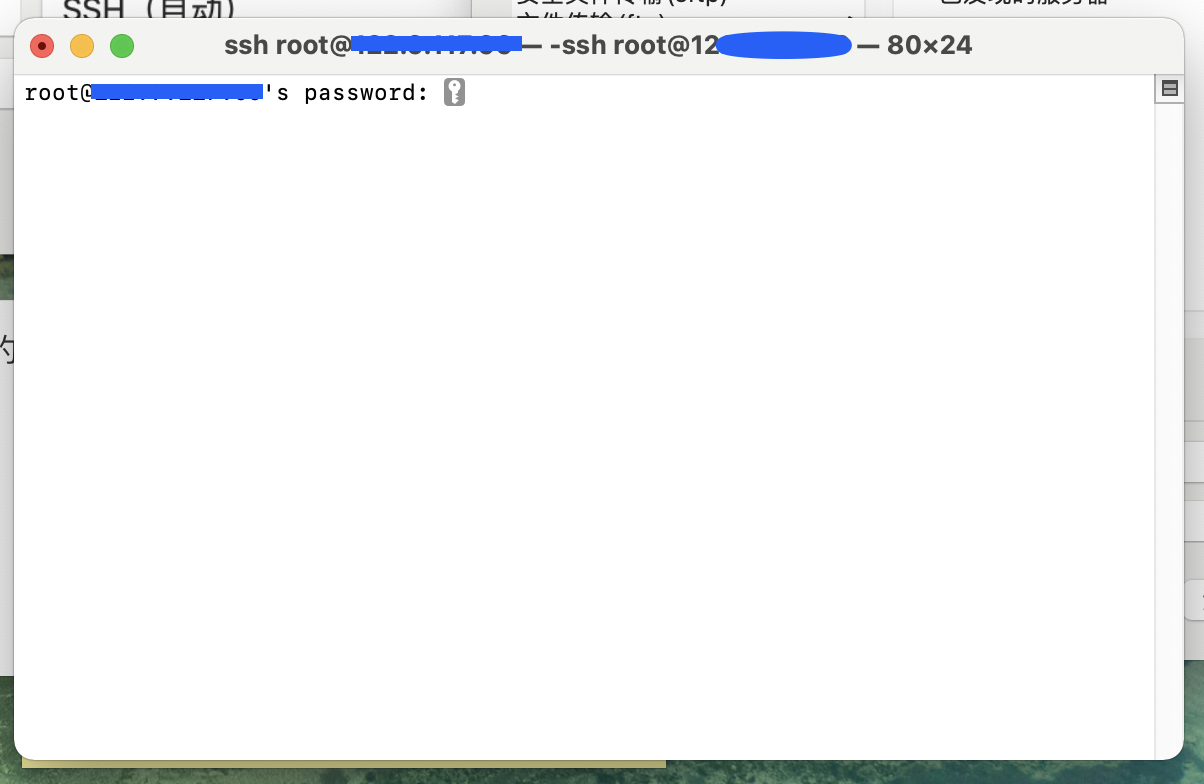
连接成功!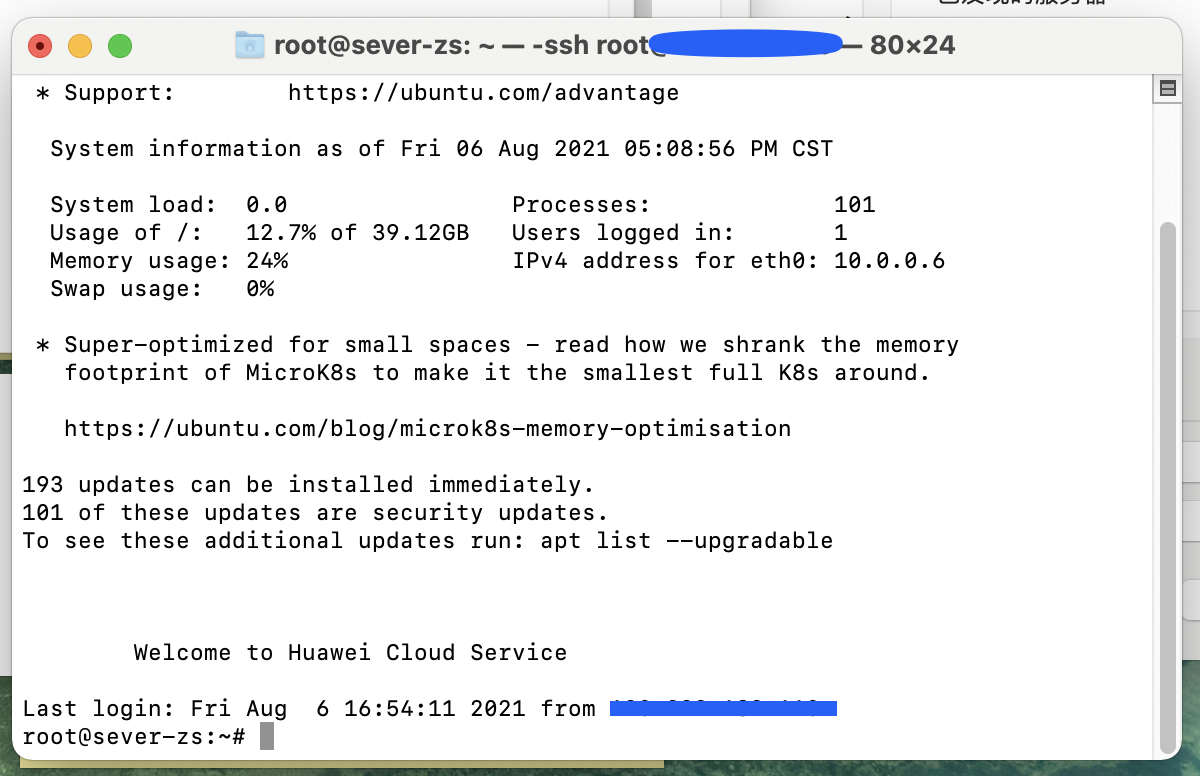
一些Linux小工具
htop
安装
$ sudo apt install htop
Byobu
安装
$ sudo apt install byobu
操作:
mac下很多快捷键被系统占用,导致许多快捷键与windows和linux不同。
这里我列举mac下几个常用操作的快捷键:
F2:新建窗口
F3/F4:切换窗口
ctrl+d:关闭当前窗口
F6:退出byobu
Go环境安装
wget安装
$ apt-get install wget
wget命令下载安装包
官网下载地址:https://golang.org/dl/(需要梯子)
国内安装包下载路径:https://studygolang.com/dl
$ wget https://studygolang.com/dl/golang/go1.16.6.linux-amd64.tar.gz
解压gz包
$ gzip -d go1.16.6.linux-amd64.tar.gz
再解压tar包
$ tar -xvf go1.16.6.linux-amd64.tar
用ls命令查看文件目录(多了个go文件夹)

配置Go环境变量
首先使用vim打开环境变量编辑
$ vim /etc/profile
在文件最后加上几行配置
export GOPATH=/root/gopath   你的工作目录(在这里创建.go文件)
export GOROOT=/root/go     go的安装目录
export PATH=$PATH:$GOROOT/bin:$GOPATH/bin
注意:GOPATH和GOROOT不能一样
按esc键退出编辑。
输入“:wq”保存并关闭文件。
使用source命令应用环境变量更新
$ source /etc/profile
测试go安装
$ go version
MySQL
安装
$ apt install mysql-server
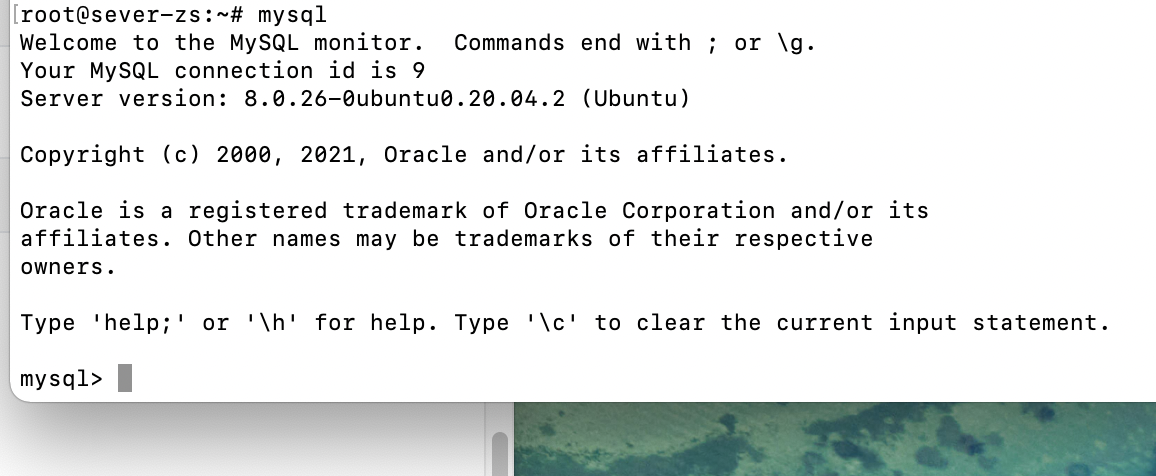
验证是否安装成功
$ mysql
初始化MySQL
root@sever-zs:~# mysql_secure_installation

Securing the MySQL server deployment.

Connecting to MySQL using a blank password.

VALIDATE PASSWORD COMPONENT can be used to test passwords
and improve security. It checks the strength of password
and allows the users to set only those passwords which are
secure enough. Would you like to setup VALIDATE PASSWORD component?

Press y|Y for Yes, any other key for No: n   # 是否需要安装验证密码插件?
Please set the password for root here.

New password:              # 设置root账户的密码

Re-enter new password:     # 再次输入root账户的密码
By default, a MySQL installation has an anonymous user,
allowing anyone to log into MySQL without having to have
a user account created for them. This is intended only for
testing, and to make the installation go a bit smoother.
You should remove them before moving into a production
environment.

Remove anonymous users? (Press y|Y for Yes, any other key for No) : y  # 是否需要删除匿名账户?
Success.


Normally, root should only be allowed to connect from
'localhost'. This ensures that someone cannot guess at
the root password from the network.

Disallow root login remotely? (Press y|Y for Yes, any other key for No) : n    # 是否禁止root管理员从远程登录?

 ... skipping.
By default, MySQL comes with a database named 'test' that
anyone can access. This is also intended only for testing,
and should be removed before moving into a production
environment.


Remove test database and access to it? (Press y|Y for Yes, any other key for No) : y   # 是否删除默认的test数据库并取消对它的访问权限?
 - Dropping test database...
Success.

 - Removing privileges on test database...
Success.

Reloading the privilege tables will ensure that all changes
made so far will take effect immediately.

Reload privilege tables now? (Press y|Y for Yes, any other key for No) : y     # 是否刷新授权表,让初始化后的设定立即生效?
Success.

All done!
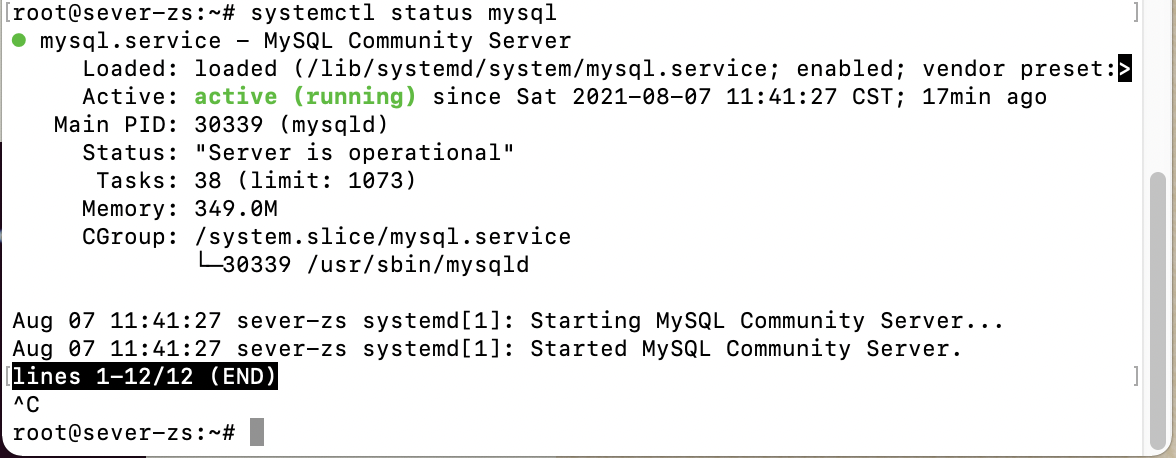
检查mysql服务状态
$ systemctl status mysql
如下图则表示mysql服务运行正常
创建mysql账户
$ mysql -u root -p
输入密码
mysql> use mysql;
mysql> create user '用户名'@'localhost' identified by '密码';
配置mysql允许远程访问
进入mysql数据库,执行授权命令
$ mysql -u root -p

mysql> grant all privileges on *.* to 'syb'@'%';
ERROR 1410 (42000): You are not allowed to create a user with GRANT\
// 授权失败
mysql> select user, host from user;
+------------------+-----------+
| user             | host      |
+------------------+-----------+
| root             | %         |
| root             | 127.0.0.1 |
| root             | localhoat |
| debian-sys-maint | localhost |
| mysql.infoschema | localhost |
| mysql.session    | localhost |
| mysql.sys        | localhost |
| root             | localhost |
| syb              | localhost |
+------------------+-----------+

// 我们尝试直接更新数据表中的host
mysql> update user set host = '%' where user = 'syb' and host='localhost';
Query OK, 1 row affected (0.01 sec)
Rows matched: 1  Changed: 1  Warnings: 0

// 手动更新成功
mysql> select user, host from user;
+------------------+-----------+
| user             | host      |
+------------------+-----------+
| root             | %         |
| syb              | %         |
| root             | 127.0.0.1 |
| root             | localhoat |
| debian-sys-maint | localhost |
| mysql.infoschema | localhost |
| mysql.session    | localhost |
| mysql.sys        | localhost |
| root             | localhost |
+------------------+-----------+

// 再次授权
mysql> grant all privileges on *.* to 'syb'@'%';
Query OK, 0 rows affected (0.01 sec)

// 执行更改
mysql> flush privileges;
Query OK, 0 rows affected (0.01 sec)
退出mysql,重启一下mysql服务
$ service mysql restart
使用Navicat远程连接mysql
打开Navicat Premium,新建MySQL连接,将服务器主机地址,端口,mysql用户名及密码填写好,点击保存。
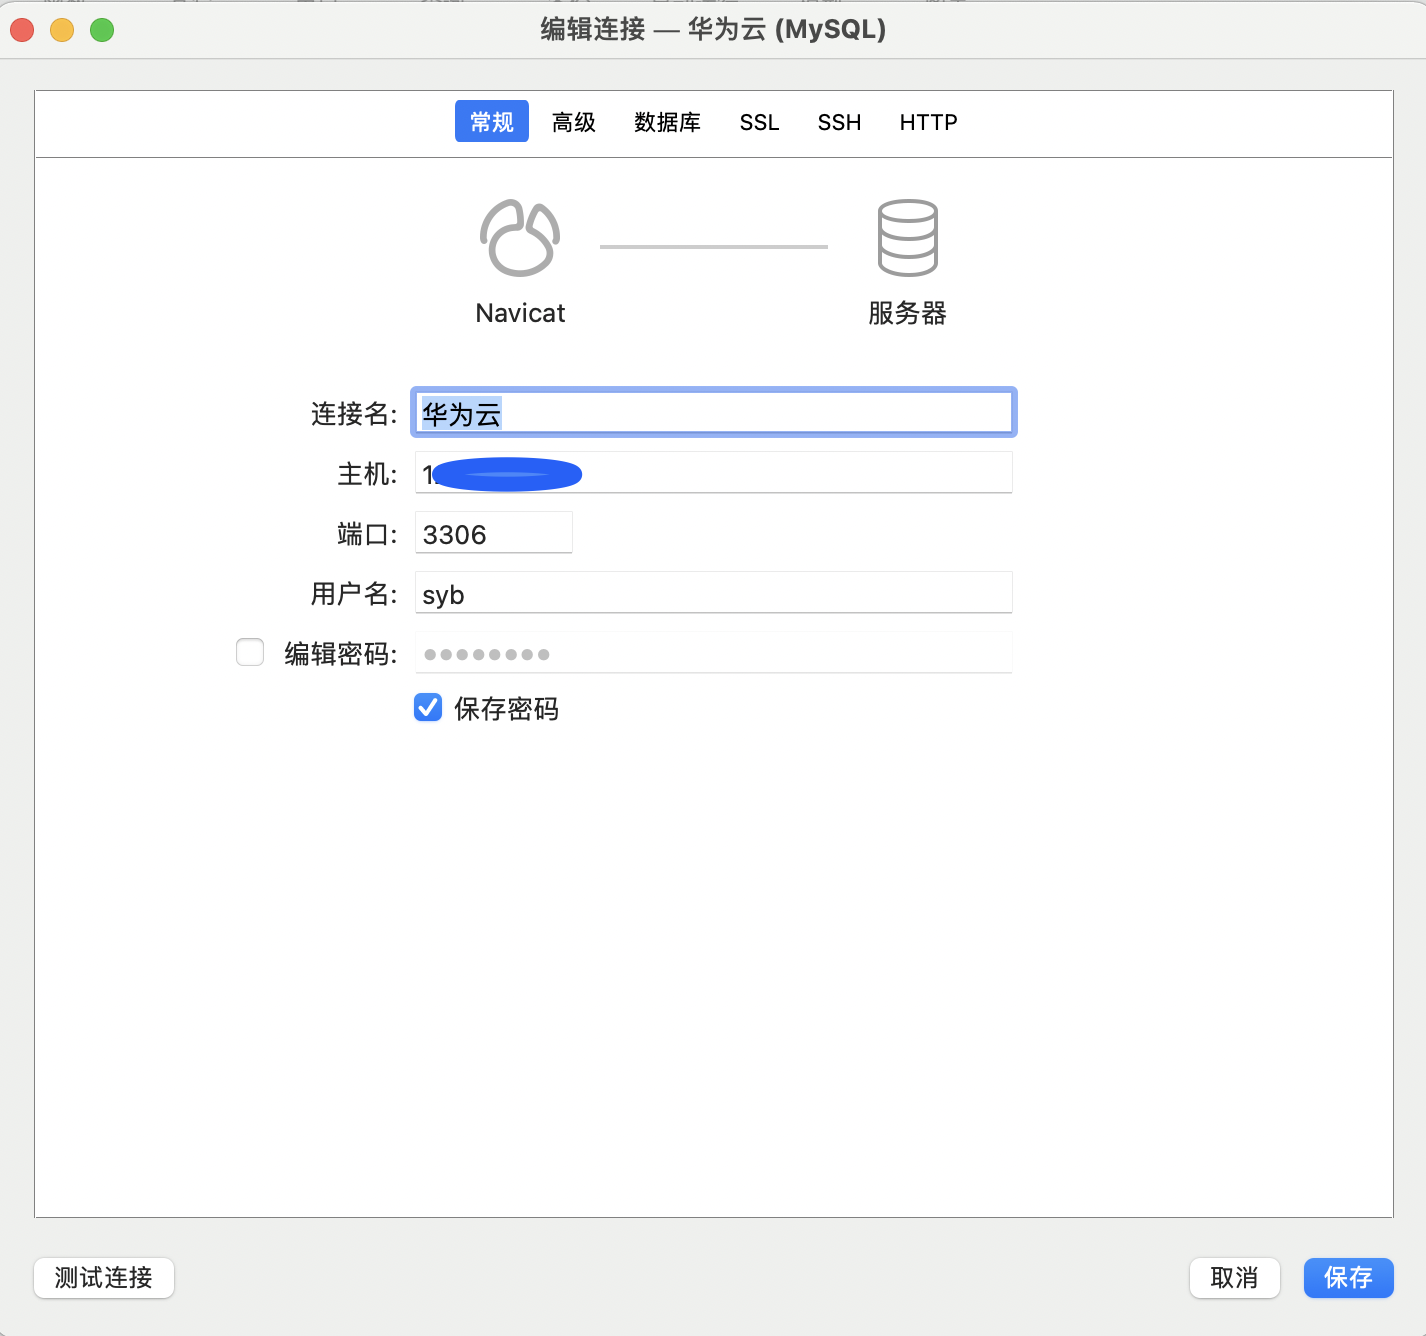
到这你就可以远程管理你的mysql数据库了!
Nginx
安装
$ apt install nginx
检查是否安装成功
$ nginx -v

配置sites-enabled
$ vim /etc/nginx/sites-enabled/default
如果你不知道sites-enabled的位置,你可以使用以下命令进行查看
$ nginx -h
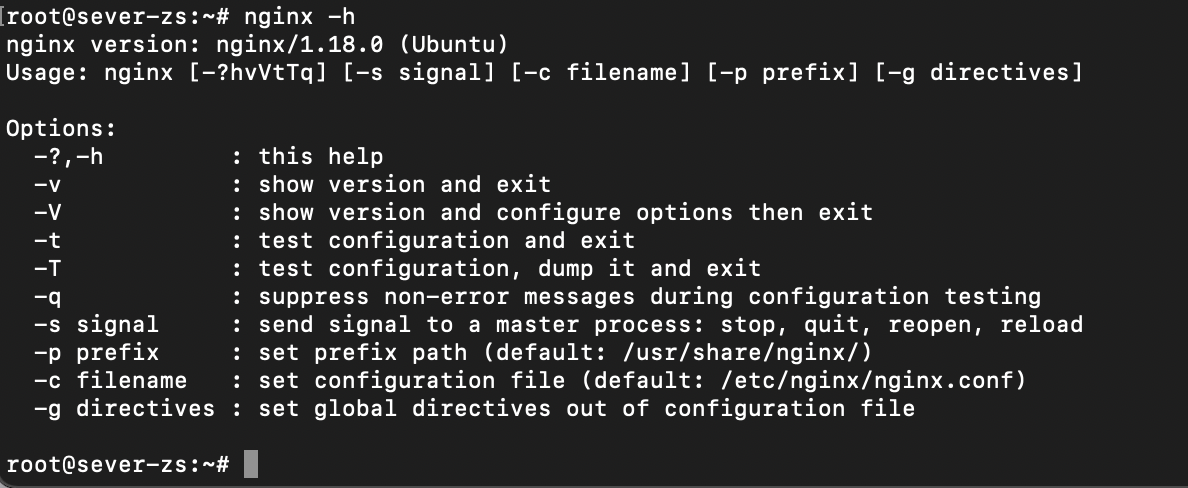
-c那一行的最后面,可以查看你的nginx.conf所在目录,sites-enabled在其同级目录下。
打开sites-enabled/default文件
nginx默认监听外部请求的80端口
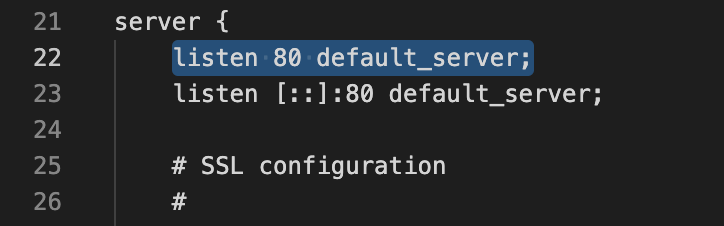
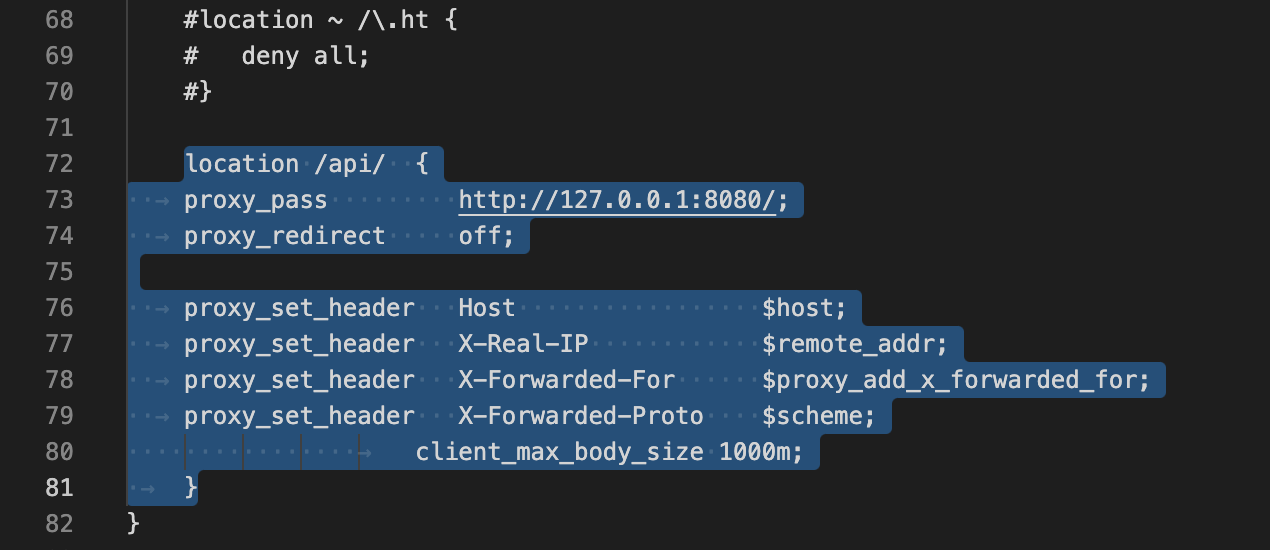
我们在server{}里最后添加以下代码,让nginx为我们做反向代理。
location /api/  {
  	proxy_pass         http://127.0.0.1:8080/;  # 转发到你服务器内部的端口号
  	proxy_redirect     off;

  	proxy_set_header   Host                 $host;
  	proxy_set_header   X-Real-IP            $remote_addr;
  	proxy_set_header   X-Forwarded-For      $proxy_add_x_forwarded_for;
  	proxy_set_header   X-Forwarded-Proto    $scheme;
                	client_max_body_size 1000m;
 	}
https证书配置暂时还没有搞。
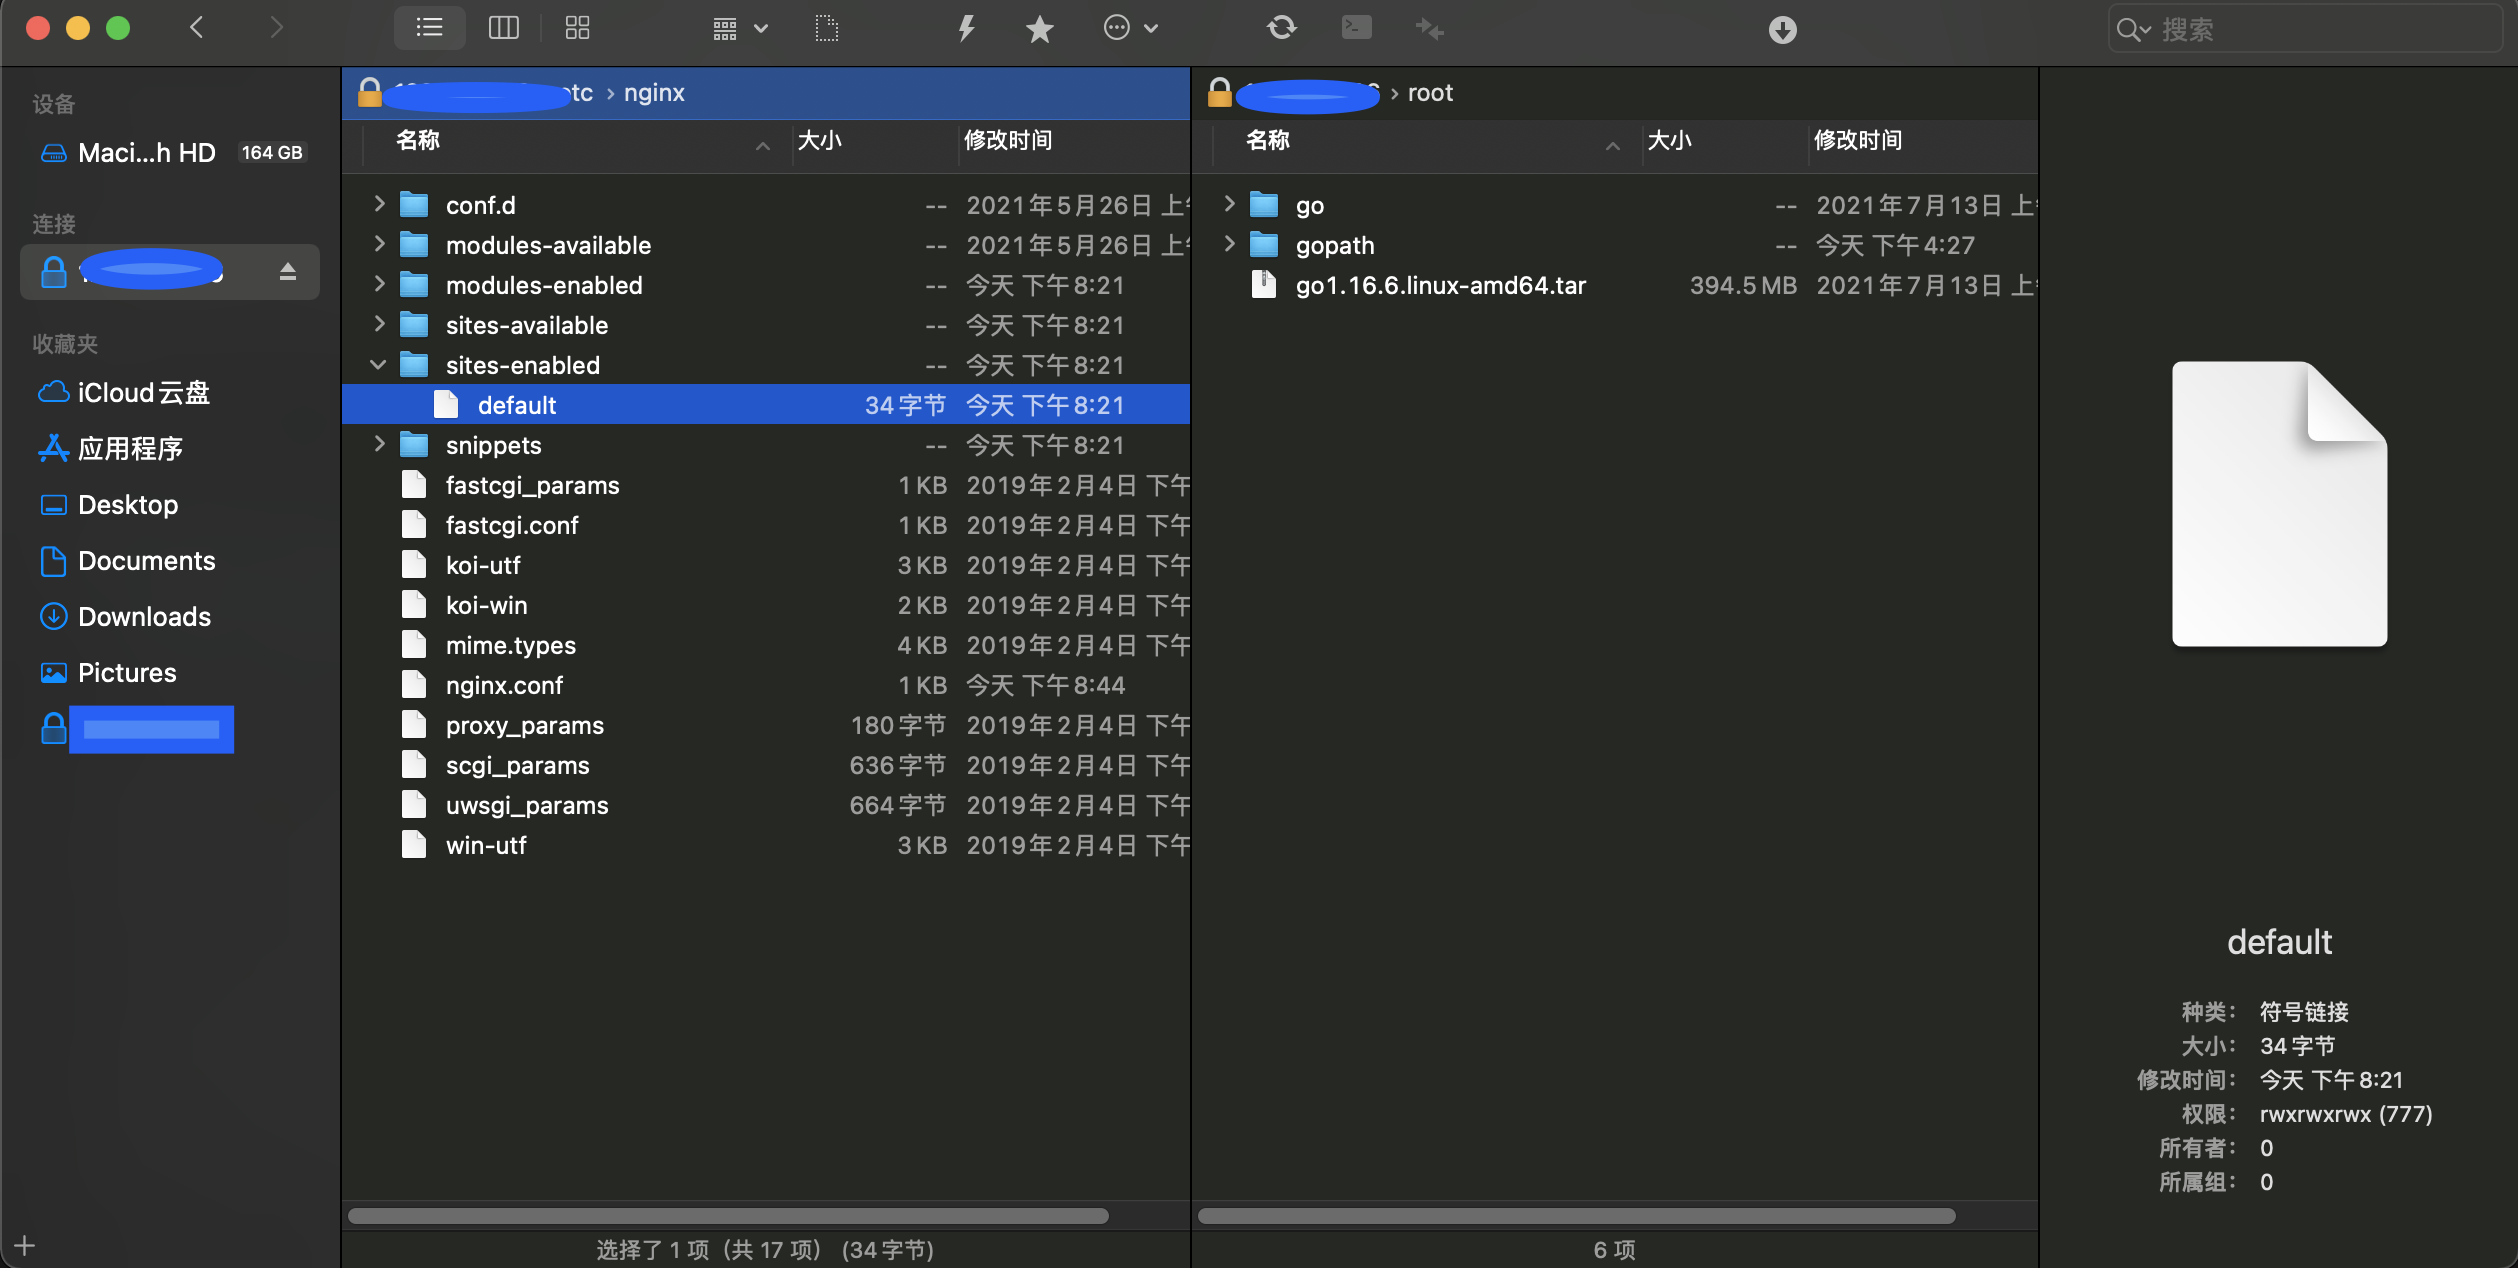
管理服务器文件
可以使用ForkLift进行服务器文件管理
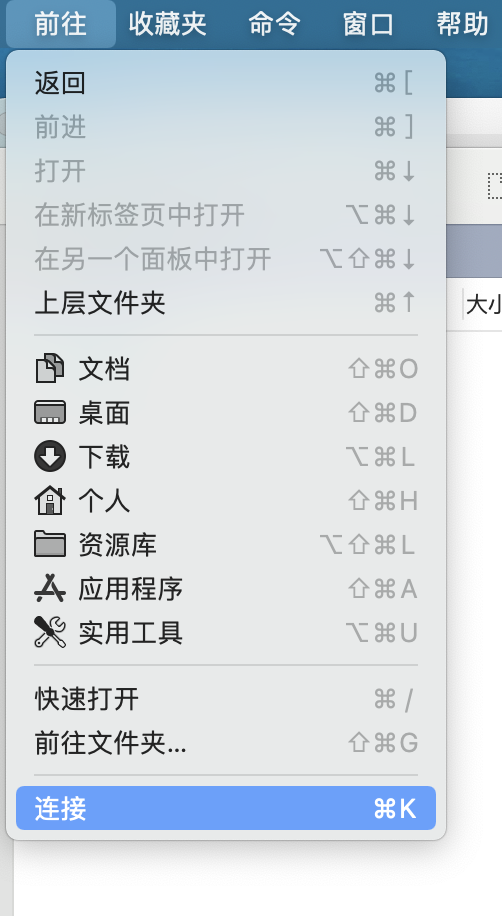
安装ForkLift并打开,点击菜单栏上的前往->连接
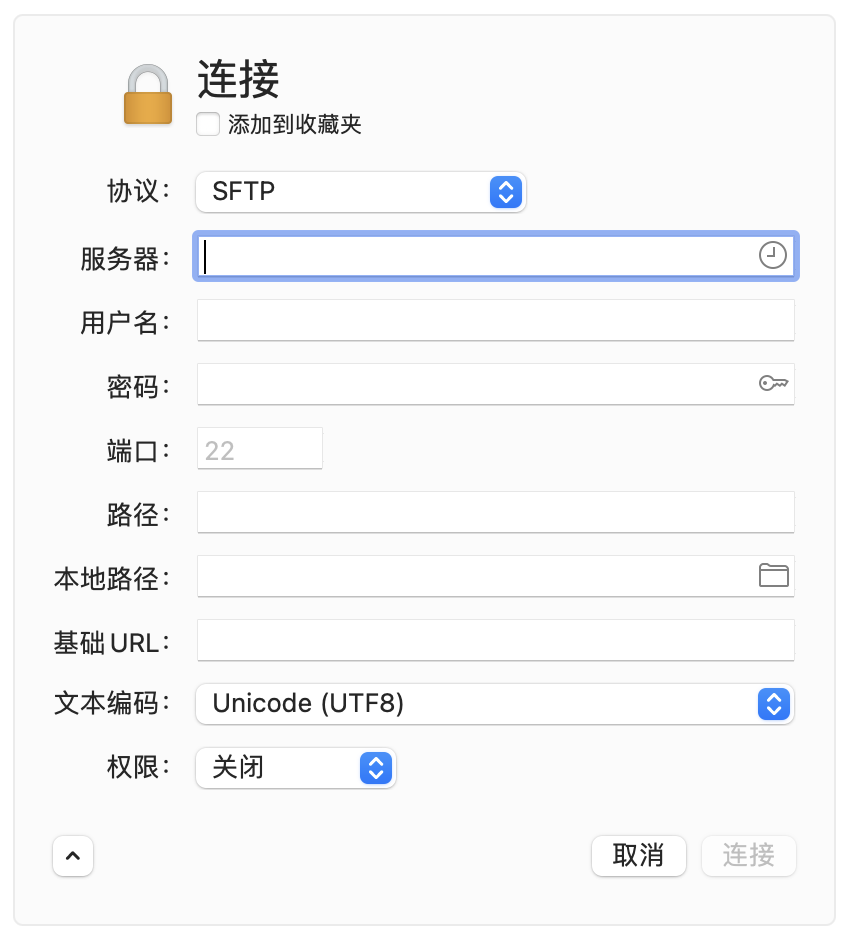
在弹出的窗口中填入相关信息即可连接到你的服务器
Git
安装Git
在Ubuntu下使用apt安装工具进行安装
$ apt-get install git
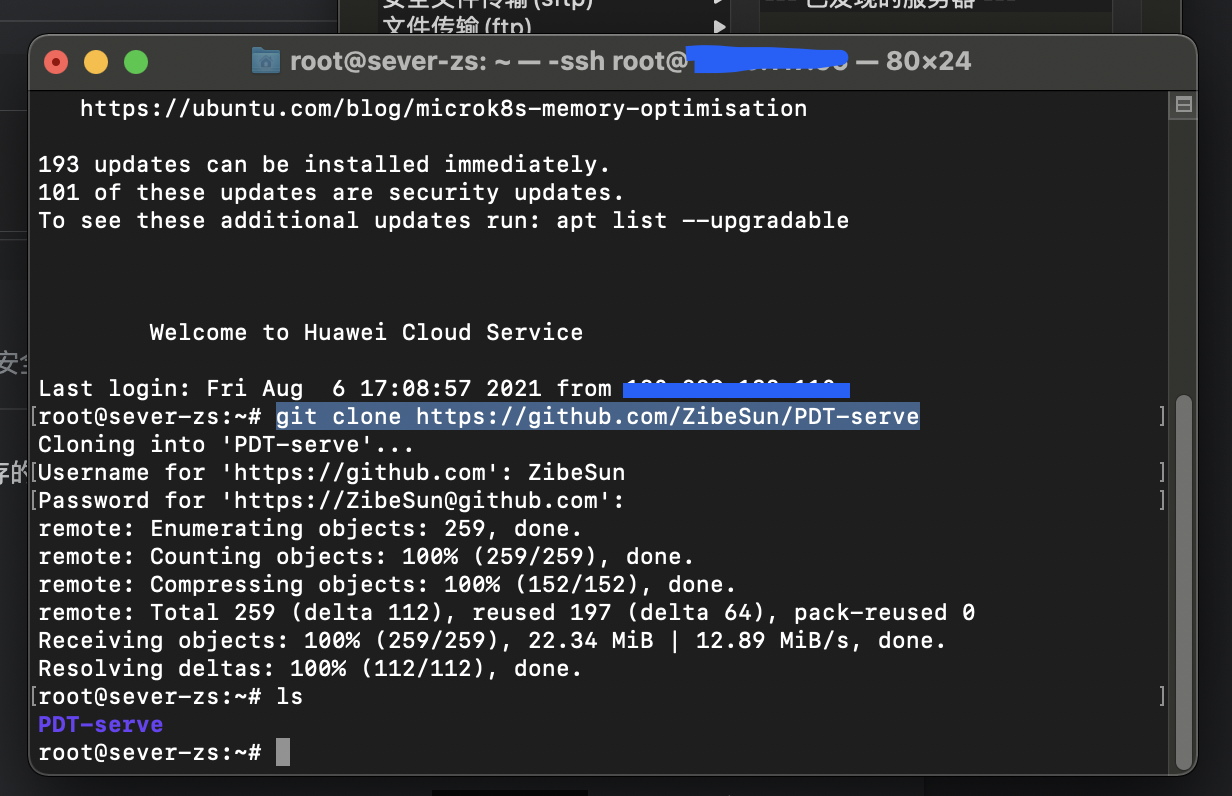
拉取你的项目
在GOPATH目录下新建src文件夹
cd到src目录下
使用git命令从github克隆你的项目到服务器GOPATH/src目录下
$ git clone https://github.com/ZibeSun/PDT-serve
如果你的项目库是私有库的话,你还需要依次输入你的github用户名和密码。
编译你的项目
cd到你的项目目录
首先开启Go Modules,设置GOPROXY
// 启用 Go Modules 功能
$ go env -w GO111MODULE=on
// 配置 GOPROXY 环境变量
$ go env -w GOPROXY=https://mirrors.aliyun.com/goproxy/
使用go build命令编译你的项目
$ go build main.go
Goland远程开发
Goland自带的远程开发Deployment可以帮助我们高效的调试修改服务器上的代码。
作用
它通过sftp与服务器进行连接,当我们在自己电脑上修改代码并按下ctrl+s保存时,他可以帮助我们自动把服务器上的代码也进行更新。十分的方便。
如何配置
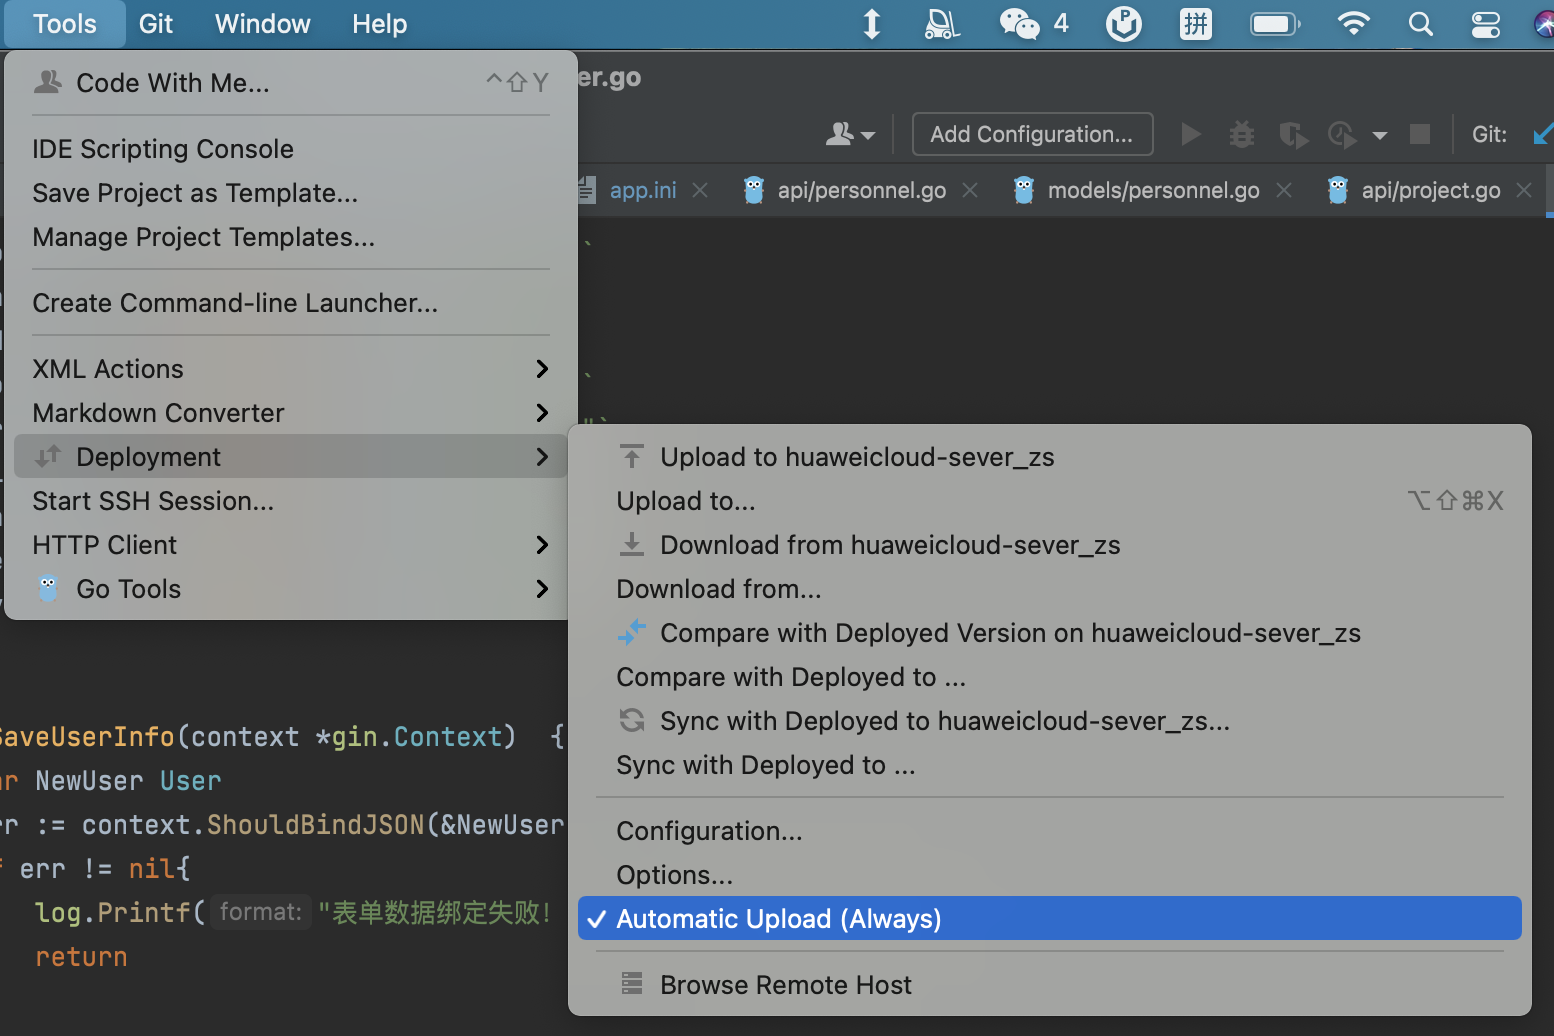
打开Goland,点击菜单栏Tools->Deployment->Configuration
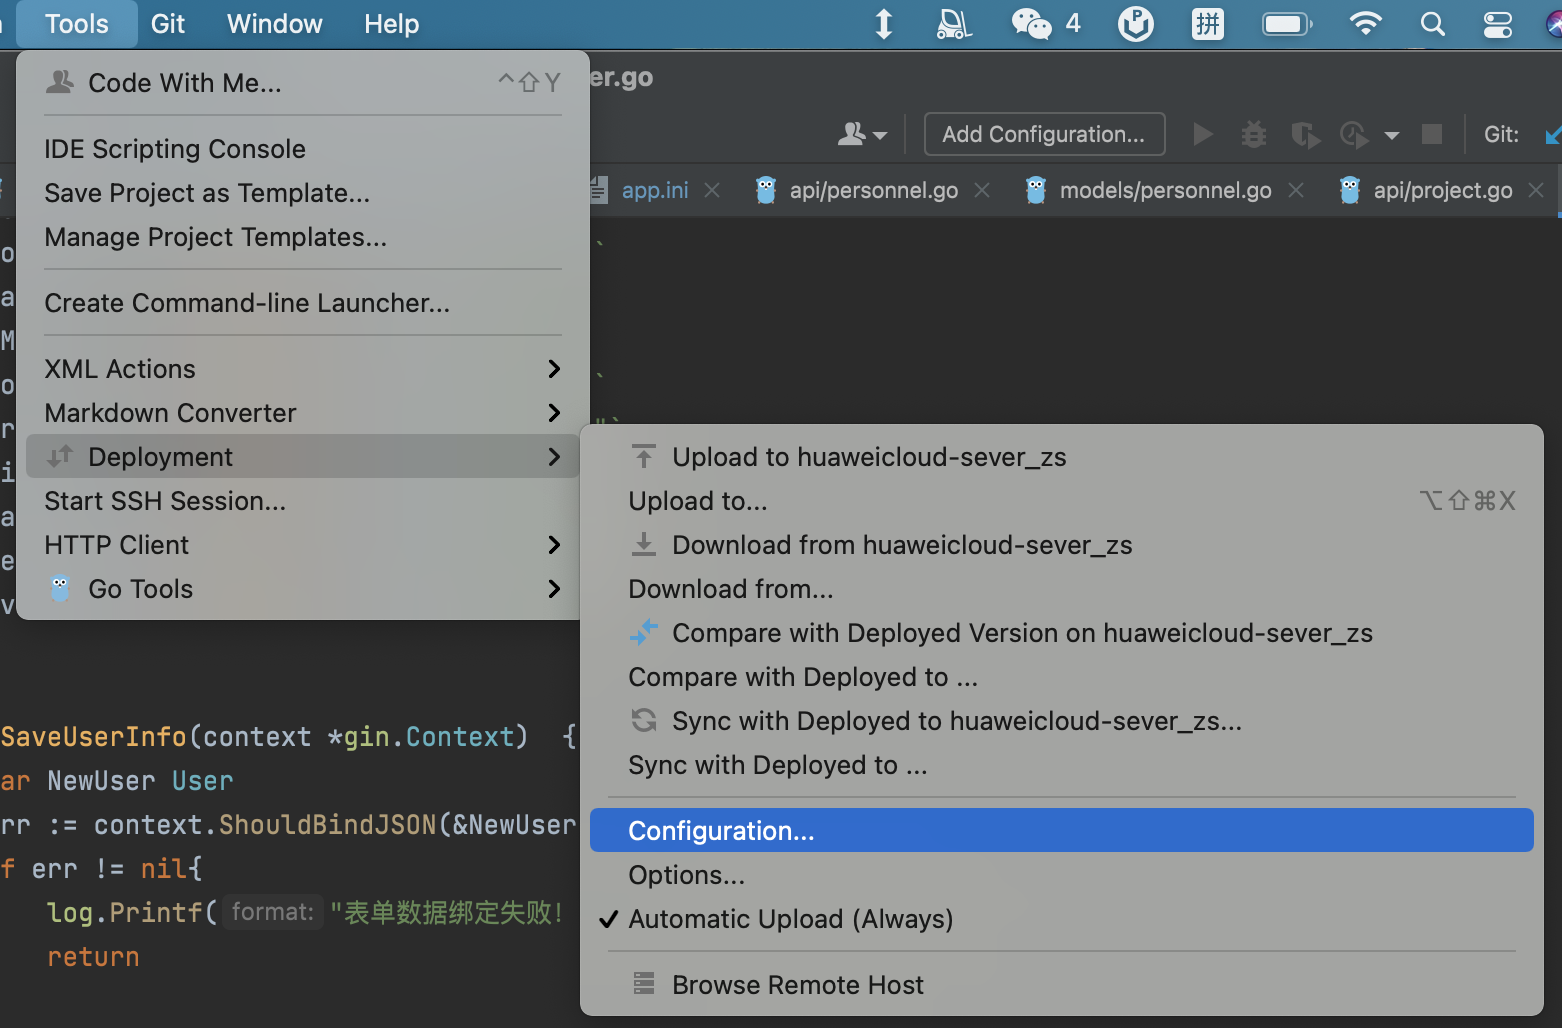
点击➕号添加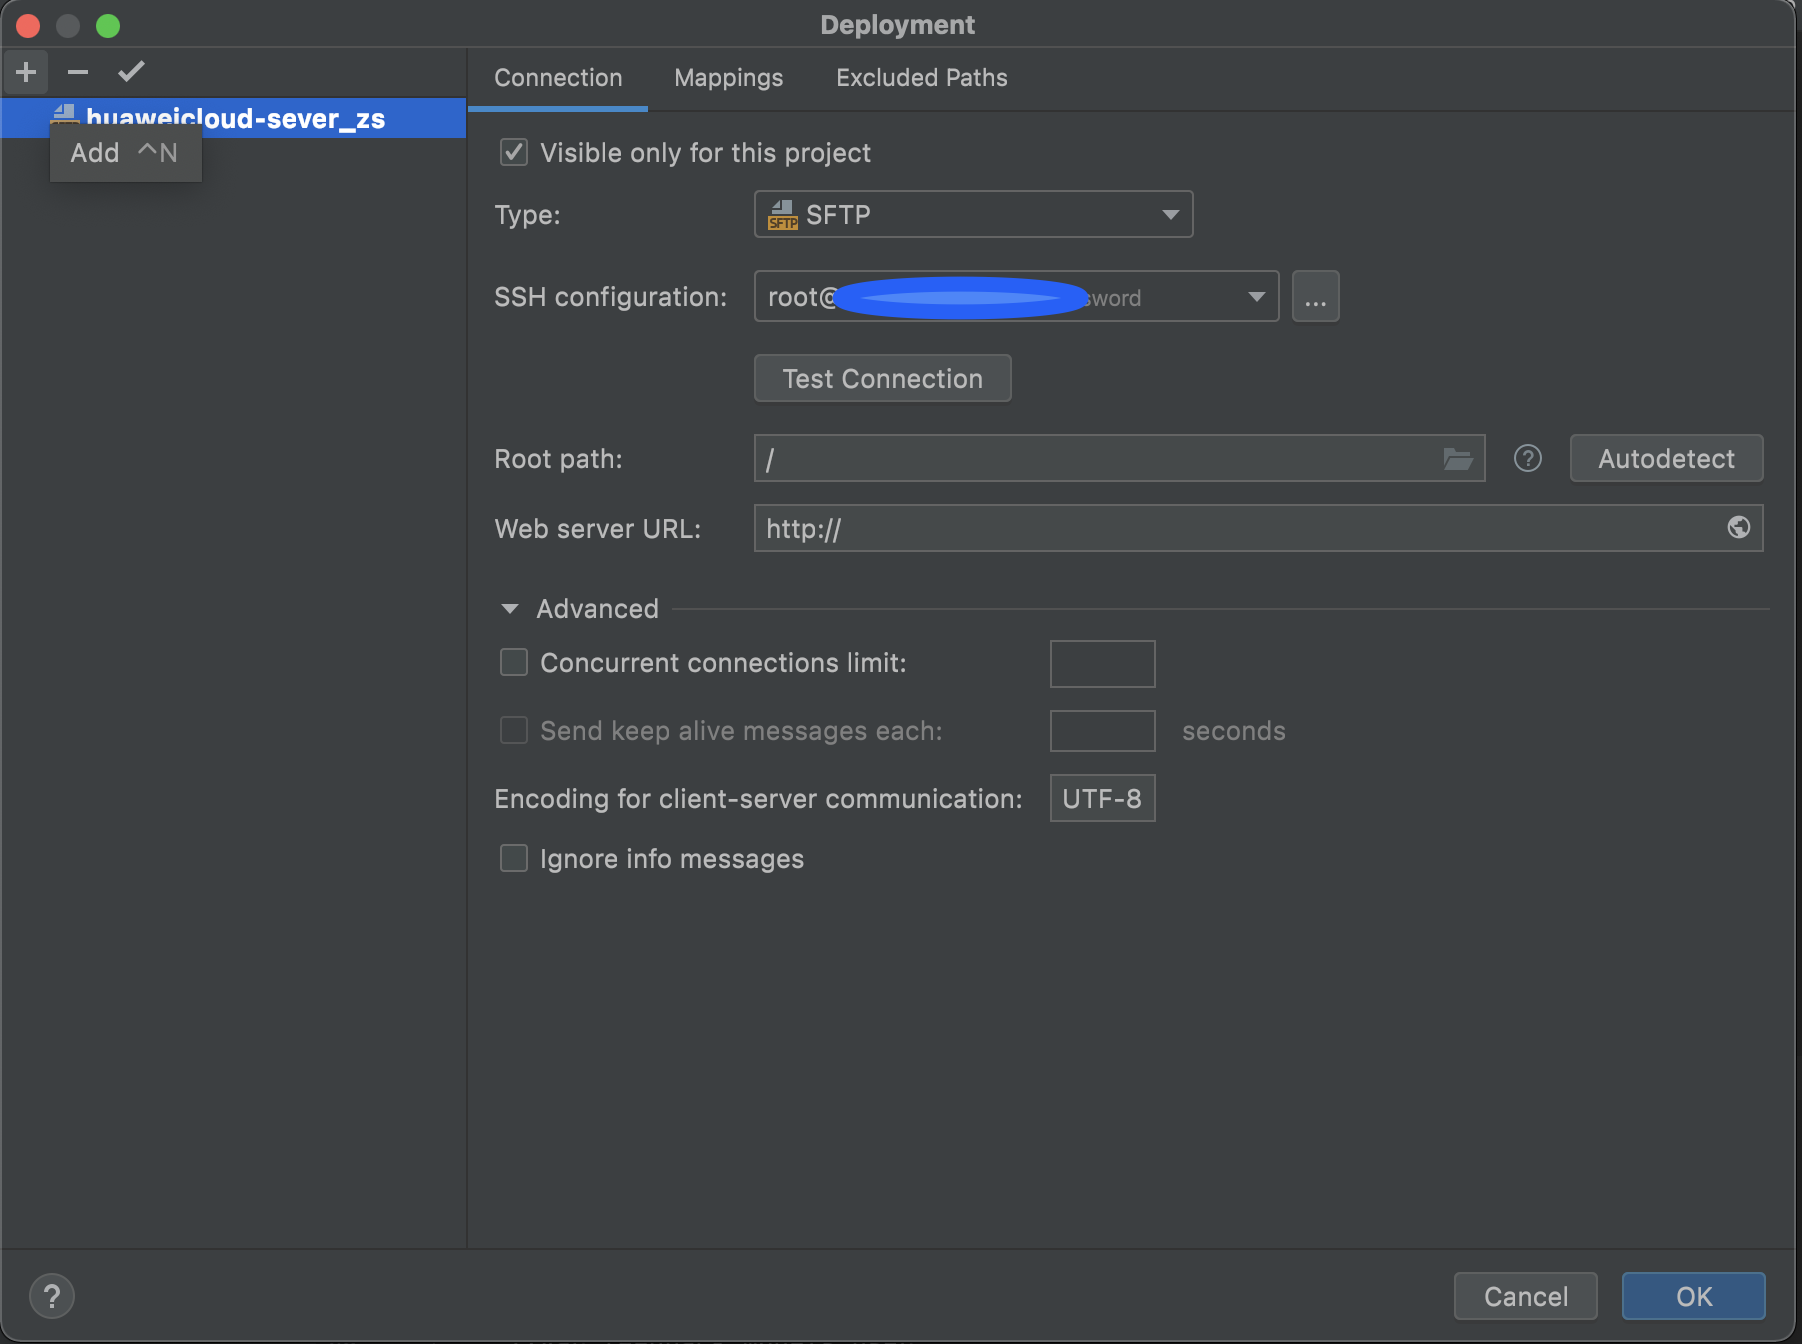
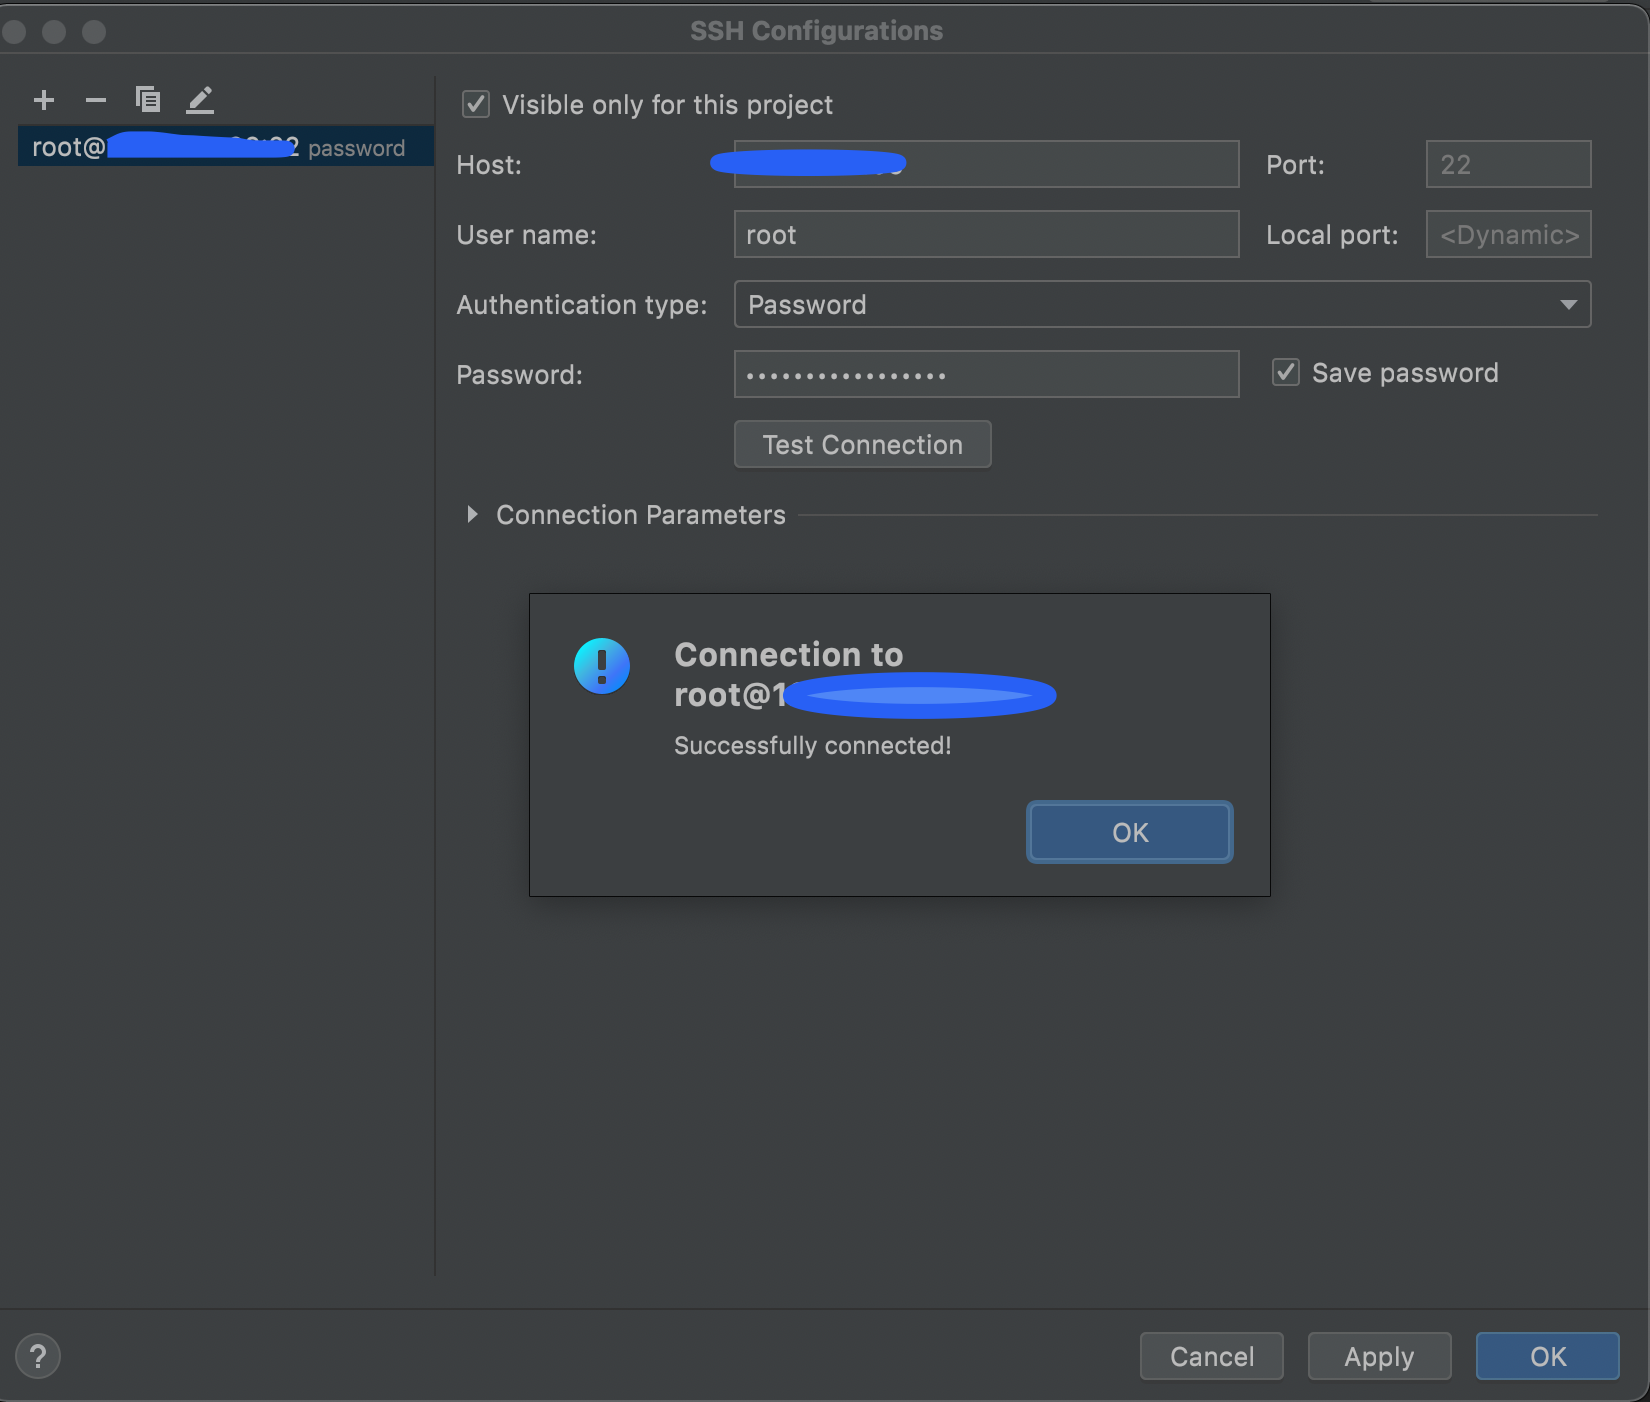
在SSH configuration栏添加你的服务器
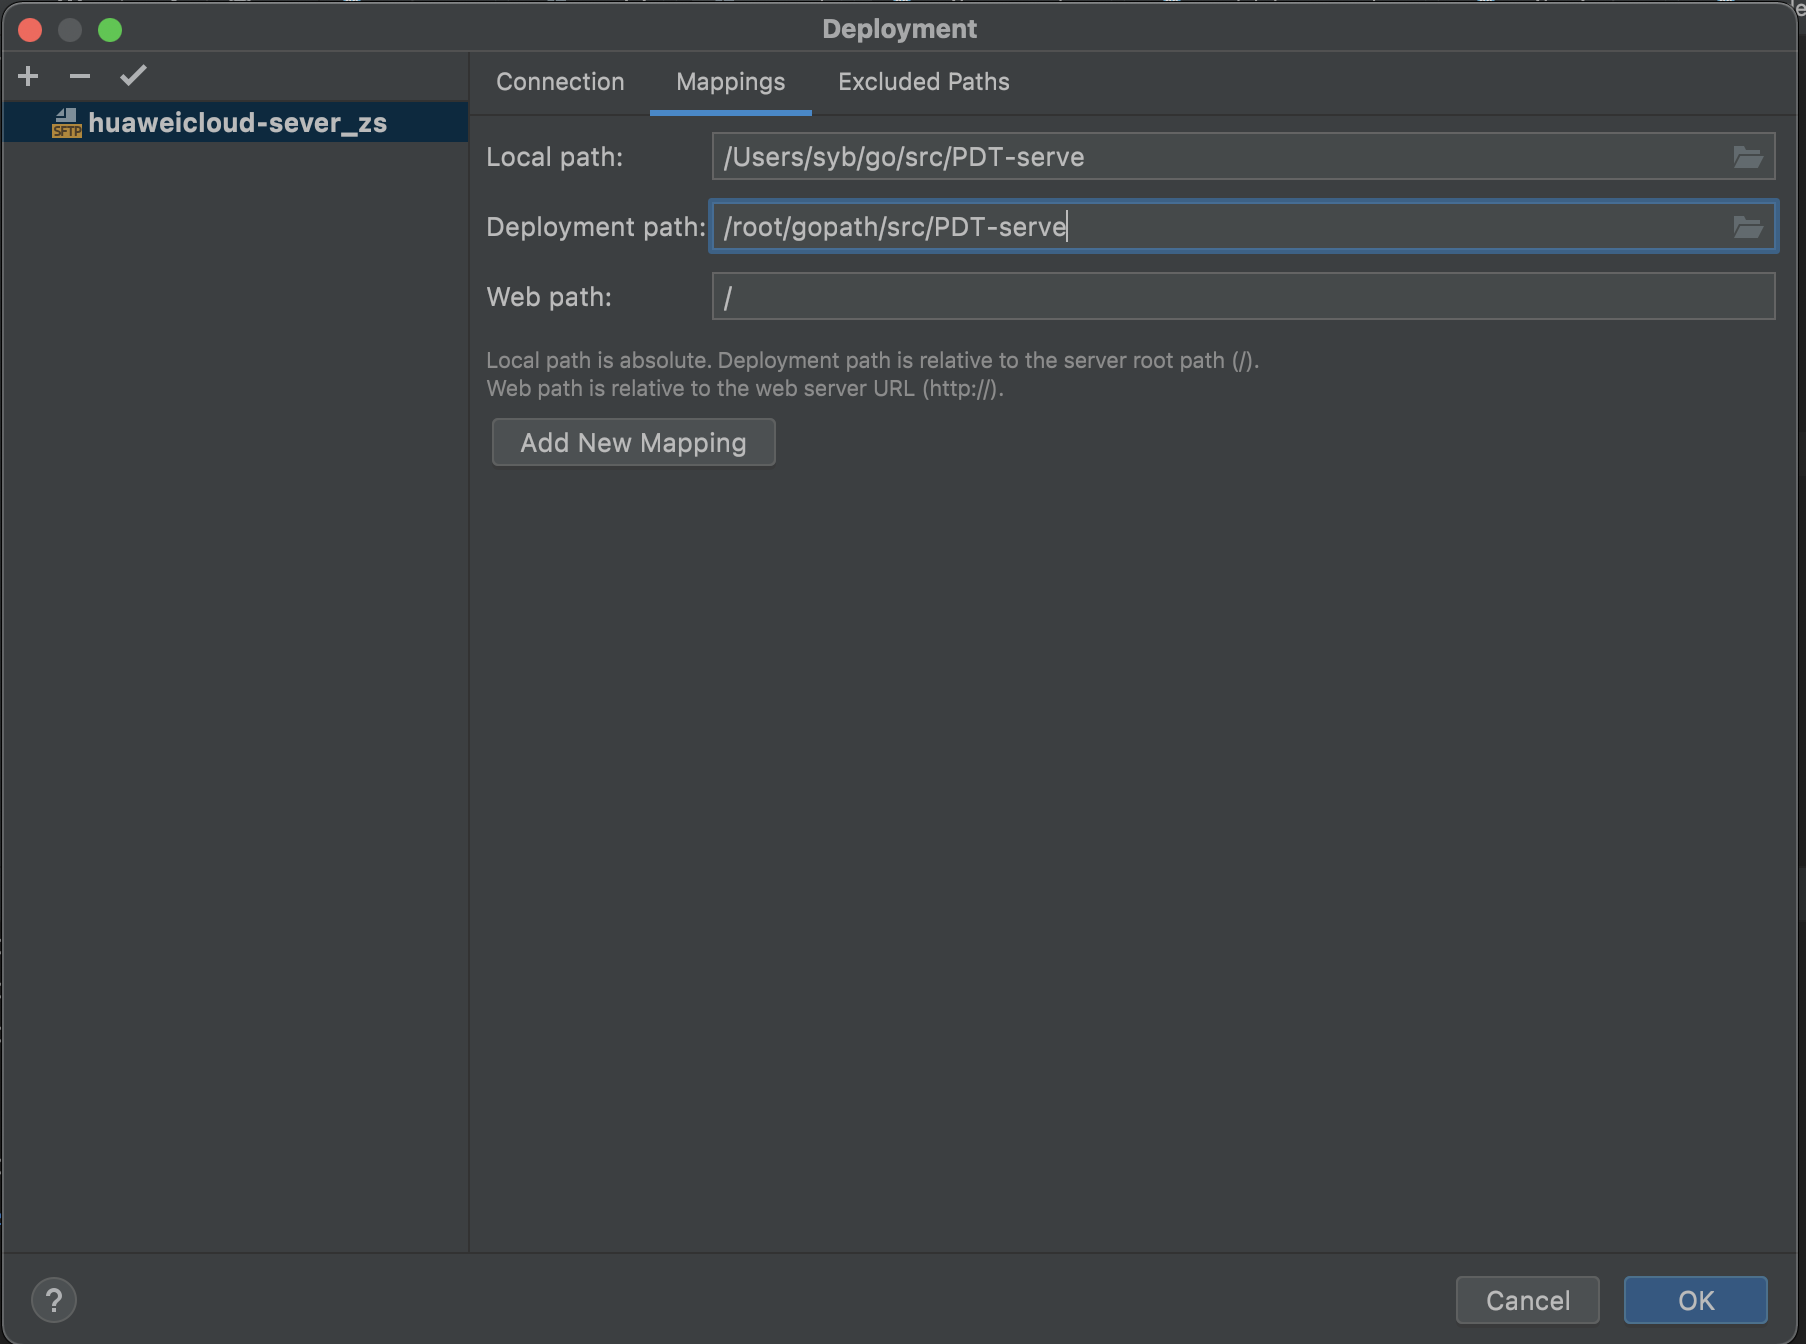
然后在次窗口上方选择Mappings设置你的本地项目路径和服务器项目路径
最后勾选菜单栏Tools->Deployment->Automatic Upload,这样你就可以在每次ctrl+s后自动更新你服务器上的代码了!
(Deployment只能更新服务器上已存在的文件,如果你的服务器没有某个文件,你可以点击“Upload to 你的Deployment名称”来将本地项目上传到你的服务器)
热更新
为了使我们在调试阶段可以方便的修改后端项目代码,我们将使用air运行我们的项目。air可以自动检测项目代码是否有改动,如果有它将自动把项目重新编译并重启项目,十分的方便。
手动安装一下air
$ go get -u github.com/cosmtrek/air
运行你的项目
先进入mysql手动创建一下你需要的数据库
$ mysql -u syb -p
mysql> create database <数据库名称>
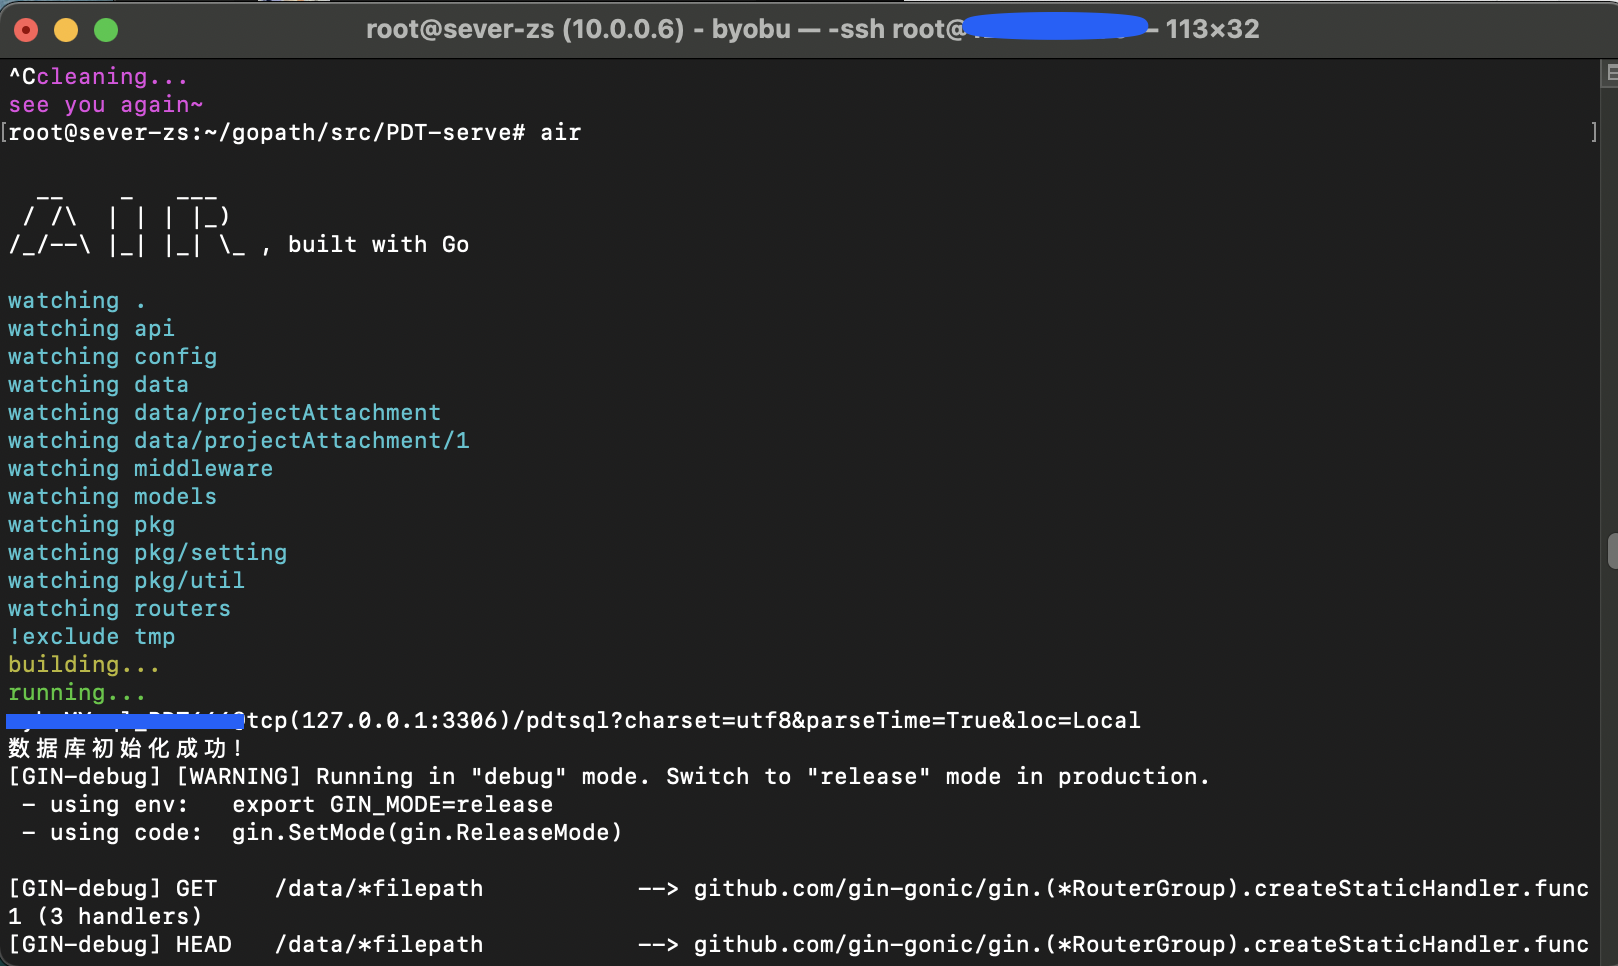
打开byobu,在byobu的窗口中运行你的项目,不然如果你直接在前台运行你的项目,一旦你与服务器断开连接,你的项目便会停止运行,而使用byobu则在你与服务器断连后会自动运行在服务器后台,你的项目也将持续运行。
$ byobu
cd到你的项目目录,使用air命令运行项目
$ air