前言
前面的文章中,分别介绍了SpringCloud进阶之路(十八):授权服务JdbcClientDetailsService 、SpringCloud进阶之路(十九):授权服务Oauth2之JdbcTokenStore 、SpringCloud进阶之路(二十):授权服务之RedisTokenStore 等实现。然而,在现如今微服务“横行”、前后端分离的大环境下,JWT已然是业内标准。Spring Cloud Oauth2针对JWT也做了一系列封装,满足业务需求。本文即对Spring Cloud Oauth2的JWT实现做一系列说明。
准备工作
复用上一篇文章SpringCloud进阶之路(二十):授权服务之RedisTokenStore 中的xmall-auth授权工程。
秘钥生成
既然是采用JWT实现,那么势必需要提供加密算法,分为对称加密和非对称加密算法。本文以非对称加密算法RSA为例,利用JDK 1.8自带工具keytool生成秘钥库,并导出相关秘钥文件。
生成秘钥库。
keytool -genkeypair -alias xmall-auth -keyalg RSA -keypass 123456 -keystore e:xmall-auth.jks -storepass 123456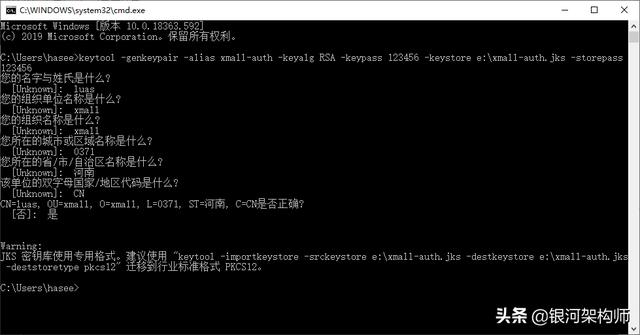
导出证书。
keytool -export -alias xmall-auth -keystore e:xmall-auth.jks -file e:pubkey.cer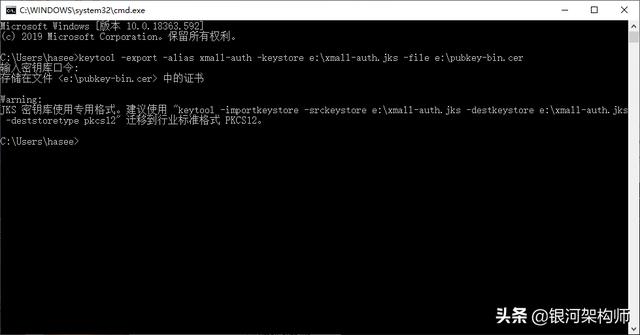
打印证书。
keytool -printcert -file e:pubkey-bin.cer
因为该导出方式导出的为二进制格式证书,所以也看不出来什么。所以,我们继续以BASE64格式再导出证书。
keytool -export -rfc -alias xmall-auth -keystore e:xmall-auth.jks -file e:pubkey-rfc.cer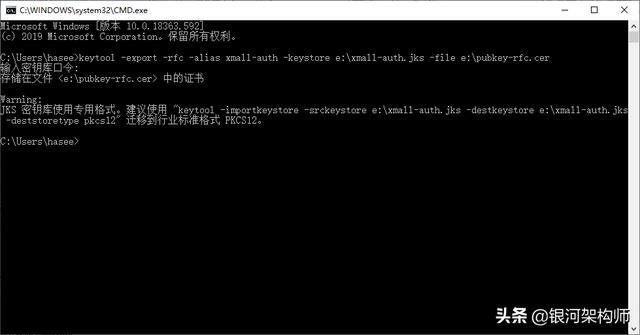
打印证书。
keytool -printcert -file e:pubkey-bin.cer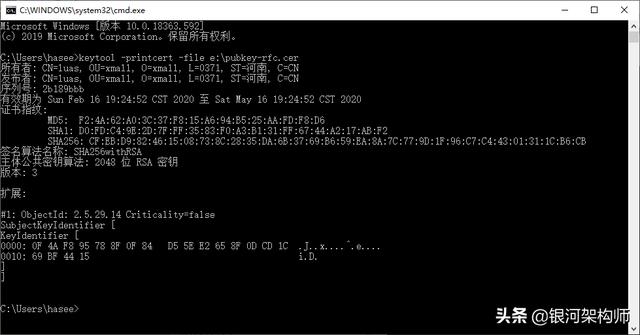
用相关软件如EditPlus、NotePad++等打开该证书,如下图所示。
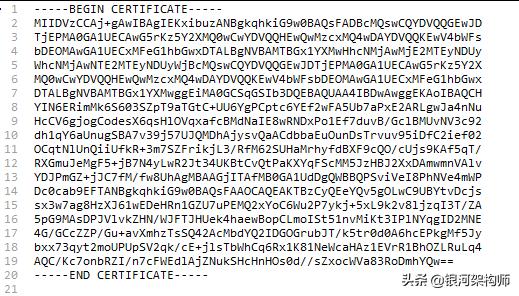
注意,我们导出的是证书,而不是公钥,不要搞混。需要公钥信息,还需要对证书做进一步的处理,例如使用openssl命令导出、Java程序导出等等,本文不再赘述。
JWT实现改造
加载密钥对
将前面keytool工具生成的xmall-auth.jks复制到src/main/resources下,并配置加载到程序中。
private KeyPair keyPair() { return new KeyStoreKeyFactory(new ClassPathResource("xmall-auth.jks"), "123456".toCharArray()).getKeyPair("xmall-auth", "123456".toCharArray());}AccessTokenConverter
创建JwtAccessTokenConverter用以配置到JwtTokenStore中。
private JwtAccessTokenConverter jwtAccessTokenConverter() { JwtAccessTokenConverter jwtAccessTokenConverter = new JwtAccessTokenConverter(); jwtAccessTokenConverter.setKeyPair(keyPair()); return jwtAccessTokenConverter;}JwtTokenStore
授权服务器配置TokenStore为JwtTokenStore。
@Overridepublic void configure(AuthorizationServerEndpointsConfigurer endpoints) throws Exception { endpoints.authenticationManager(authenticationManager) .userDetailsService(userDetailsService) .allowedTokenEndpointRequestMethods(HttpMethod.GET, HttpMethod.POST) .accessTokenConverter(jwtAccessTokenConverter()) .tokenStore(new JwtTokenStore(jwtAccessTokenConverter())); ;}公钥(token key)端点
此处最容易踩坑。前面均配置完毕,发现token key节点访问404。一头雾水,明明已配置好了呀。其实,还少了一项配置,即TokenKey端点。文章Spring Cloud Oauth2 token_key端点404中已详细说明。具体配置代码如下。
@Beanpublic TokenKeyEndpoint tokenKeyEndpoint() { return new TokenKeyEndpoint(jwtAccessTokenConverter());}最终配置
package com.luas.xmall.auth.configuration;import org.springframework.beans.factory.annotation.Autowired;import org.springframework.context.annotation.Bean;import org.springframework.context.annotation.Configuration;import org.springframework.core.io.ClassPathResource;import org.springframework.http.HttpMethod;import org.springframework.security.authentication.AuthenticationManager;import org.springframework.security.core.userdetails.UserDetailsService;import org.springframework.security.crypto.password.PasswordEncoder;import org.springframework.security.oauth2.config.annotation.builders.JdbcClientDetailsServiceBuilder;import org.springframework.security.oauth2.config.annotation.configurers.ClientDetailsServiceConfigurer;import org.springframework.security.oauth2.config.annotation.web.configuration.AuthorizationServerConfigurerAdapter;import org.springframework.security.oauth2.config.annotation.web.configuration.EnableAuthorizationServer;import org.springframework.security.oauth2.config.annotation.web.configurers.AuthorizationServerEndpointsConfigurer;import org.springframework.security.oauth2.config.annotation.web.configurers.AuthorizationServerSecurityConfigurer;import org.springframework.security.oauth2.provider.ClientDetails;import org.springframework.security.oauth2.provider.ClientDetailsService;import org.springframework.security.oauth2.provider.ClientRegistrationException;import org.springframework.security.oauth2.provider.client.JdbcClientDetailsService;import org.springframework.security.oauth2.provider.endpoint.TokenKeyEndpoint;import org.springframework.security.oauth2.provider.token.TokenStore;import org.springframework.security.oauth2.provider.token.store.*;import javax.sql.DataSource;import java.security.KeyPair;@Configuration@EnableAuthorizationServerpublic class AuthorizationServerConfig extends AuthorizationServerConfigurerAdapter { @Autowired private PasswordEncoder passwordEncoder; @Autowired private UserDetailsService userDetailsService; @Autowired private AuthenticationManager authenticationManager; @Autowired private DataSource dataSource; @Override public void configure(AuthorizationServerSecurityConfigurer security) throws Exception { security. allowFormAuthenticationForClients() .tokenKeyAccess("permitAll()") .checkTokenAccess("permitAll()") ; } @Override public void configure(AuthorizationServerEndpointsConfigurer endpoints) throws Exception { endpoints.authenticationManager(authenticationManager) .userDetailsService(userDetailsService) .allowedTokenEndpointRequestMethods(HttpMethod.GET, HttpMethod.POST) .accessTokenConverter(jwtAccessTokenConverter()) .tokenStore(new JwtTokenStore(jwtAccessTokenConverter())); ; } @Override public void configure(ClientDetailsServiceConfigurer clients) throws Exception { // 配置方法1,只需配置DataSource即可,其它交给框架自动配置 clients.jdbc(dataSource).passwordEncoder(passwordEncoder); } @Bean public TokenKeyEndpoint tokenKeyEndpoint() { return new TokenKeyEndpoint(jwtAccessTokenConverter()); } private JwtAccessTokenConverter jwtAccessTokenConverter() { JwtAccessTokenConverter jwtAccessTokenConverter = new JwtAccessTokenConverter(); jwtAccessTokenConverter.setKeyPair(keyPair()); return jwtAccessTokenConverter; } private KeyPair keyPair() { return new KeyStoreKeyFactory(new ClassPathResource("xmall-auth.jks"), "123456".toCharArray()).getKeyPair("xmall-auth", "123456".toCharArray()); }}至此,授权服务器改造完成。
验证
启动xmall-auth工程,端口7777。
访问http://localhost:7777/oauth/token,输入一众参数,诸如client_id、client_secret、grant_type等,点击Send,即出现access_token、refresh_token等信息。
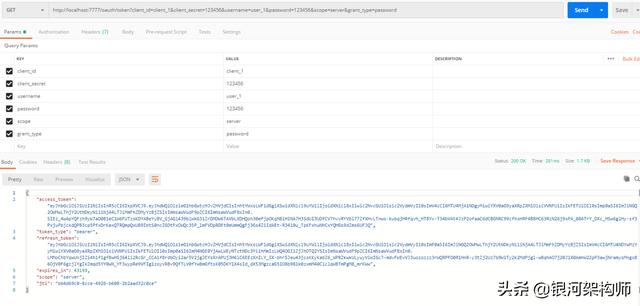
已可以正常生成JWT。
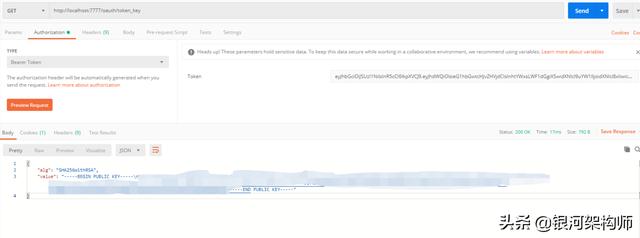
访问/oauth/token_key端点,亦可以正常获取公钥。
源码
github
https://github.com/liuminglei/SpringCloudLearning/tree/master/21/
gitee
https://gitee.com/xbd521/SpringCloudLearning/tree/master/21/