做了一个小项目,自己总结一下
1、导入需要导入的主要的包(本人自己的版本,其余的可以自己配)
- springboot,版本2.2.1.RELEASE
- springsecurity,版本用springboot自带的
- mysql-connector-java,版本8以上都行
- mybatis-plus,版本3.5.1
2、配置application.properties(这个应该都会,不解释)
spring.datasource.driver-class-name=com.mysql.cj.jdbc.Driver
spring.datasource.url=jdbc:mysql://127.0.0.1:3306/feiyi?useSSL=false&serverTimezone=UTC
spring.datasource.username=root
spring.datasource.password=123456
3、实体类书写
我这用了两个实体类(指的是与security相关的表),一个是UserConfig,还有一个是UserPojo,其中,属性看下:
UserConfig:
@NoArgsConstructor
@AllArgsConstructor
@Data
@TableName("user_config")
public class UserConfig implements Serializable {
    private static final long serialVersionUID = 1L;
    // 自增主键id
    @TableId(value = "id", type = IdType.AUTO)
    private Integer id;
    // 就是所说的username,因为我们是用邮箱注册的
    private String email;
    // 密码
    private String password;
    // 网名,项目需要
    private String webName;
    // 身份
    private String role;
}
表userconfig在数据库中的内容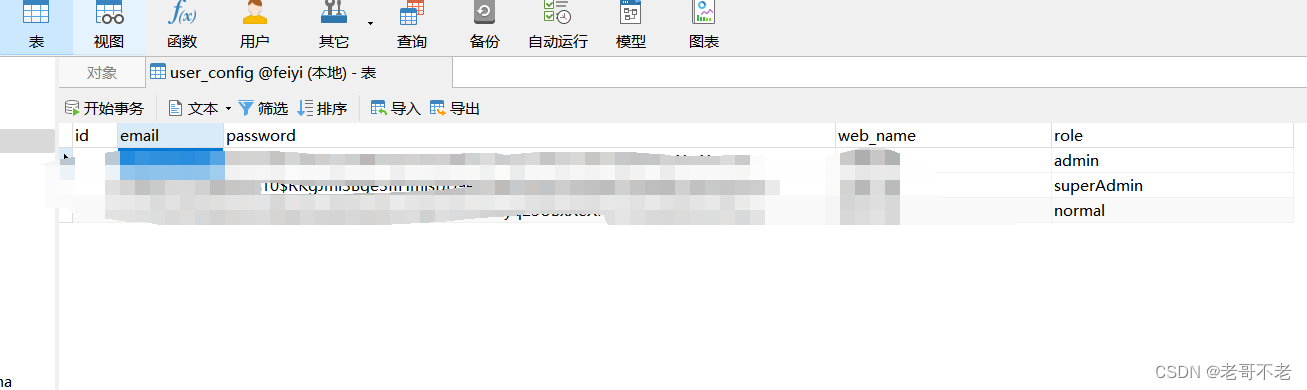
UserPojo:(用于security的需要)
这里需要实现UserDetails这个接口,因为在实现UserDetailsService的loadUserByUsername接口时需要返回一个UserDetails类,这个UserPojo就表示重写(自定义)的一个UserDetails类
@NoArgsConstructor
@Data
public class UserPojo implements UserDetails {
    private Integer id;//主键
    private String email;//与username作用相同
    private String password;//密码
    private String role;//角色
    private List<GrantedAuthority> grantedAuthorities;//认证区间(我是这么理解的)

    public UserPojo(Integer id, String email, String password, String role, List<GrantedAuthority> grantedAuthorities) {
        this.id = id;
        this.email = email;
        this.password = password;
        this.role = role;
        this.grantedAuthorities = grantedAuthorities;
    }
    @Override
    public Collection<? extends GrantedAuthority> getAuthorities() {
        return grantedAuthorities;
    }
    @Override
    public String getPassword() {
        return password;
    }
    @Override
    public String getUsername() {
        return email;
    }
    @Override
    public boolean isAccountNonExpired() {
        return true;
    }
    @Override
    public boolean isAccountNonLocked() {
        return true;
    }
    @Override
    public boolean isCredentialsNonExpired() {
        return true;
    }
    @Override
    public boolean isEnabled() {
        return true;
    }
}
4、MybatisPlusSecurityConfig(类名,随便取,注重规范就行) 实现UserDetailsService接口
这个接口用于对传入的UserName进行对照,看数据库中是否有该字段,这里的查询的过程按照规范应该是放在Service里,由于行数太少,我就直接放在了下面。
@Component
public class MybatisPlusSecurityConfig implements UserDetailsService {

    @Resource
    private IUserConfigService userConfigService;//这个是Mybatis-plus中用于下方对用户名的查询中会使用的,会Mybatis-plus的就懂,不解释
    @Override
    public UserDetails loadUserByUsername(String email) throws UsernameNotFoundException {
        QueryWrapper<UserConfig> userConfigQueryWrapper = new QueryWrapper<>();
        userConfigQueryWrapper.eq("email", email);
        UserConfig theOne = userConfigService.getOne(userConfigQueryWrapper);//这里查询出目标UserConfig对象,有则不为null

        List<GrantedAuthority> grantedAuthorities = null;//用于存储认证机制

        System.out.println("theOne"+theOne);

        if(theOne != null){
            grantedAuthorities = new ArrayList<>();
            GrantedAuthority grantedAuthority = new SimpleGrantedAuthority("ROLE_"+theOne.getRole());
            grantedAuthorities.add(grantedAuthority);//将角色放入列表中
        }else{
            throw new UsernameNotFoundException("邮箱或者密码错误!");//如果所查出来的userConfig为空,则抛出异常
        }
        return new UserPojo(
                    theOne.getId(),
                    theOne.getEmail(),
                    theOne.getPassword(),
                    theOne.getRole(),
                    grantedAuthorities);//返回一个实现了UserDetails类的UserPojo类(本质上就是一个UserDetails类)
    }
}
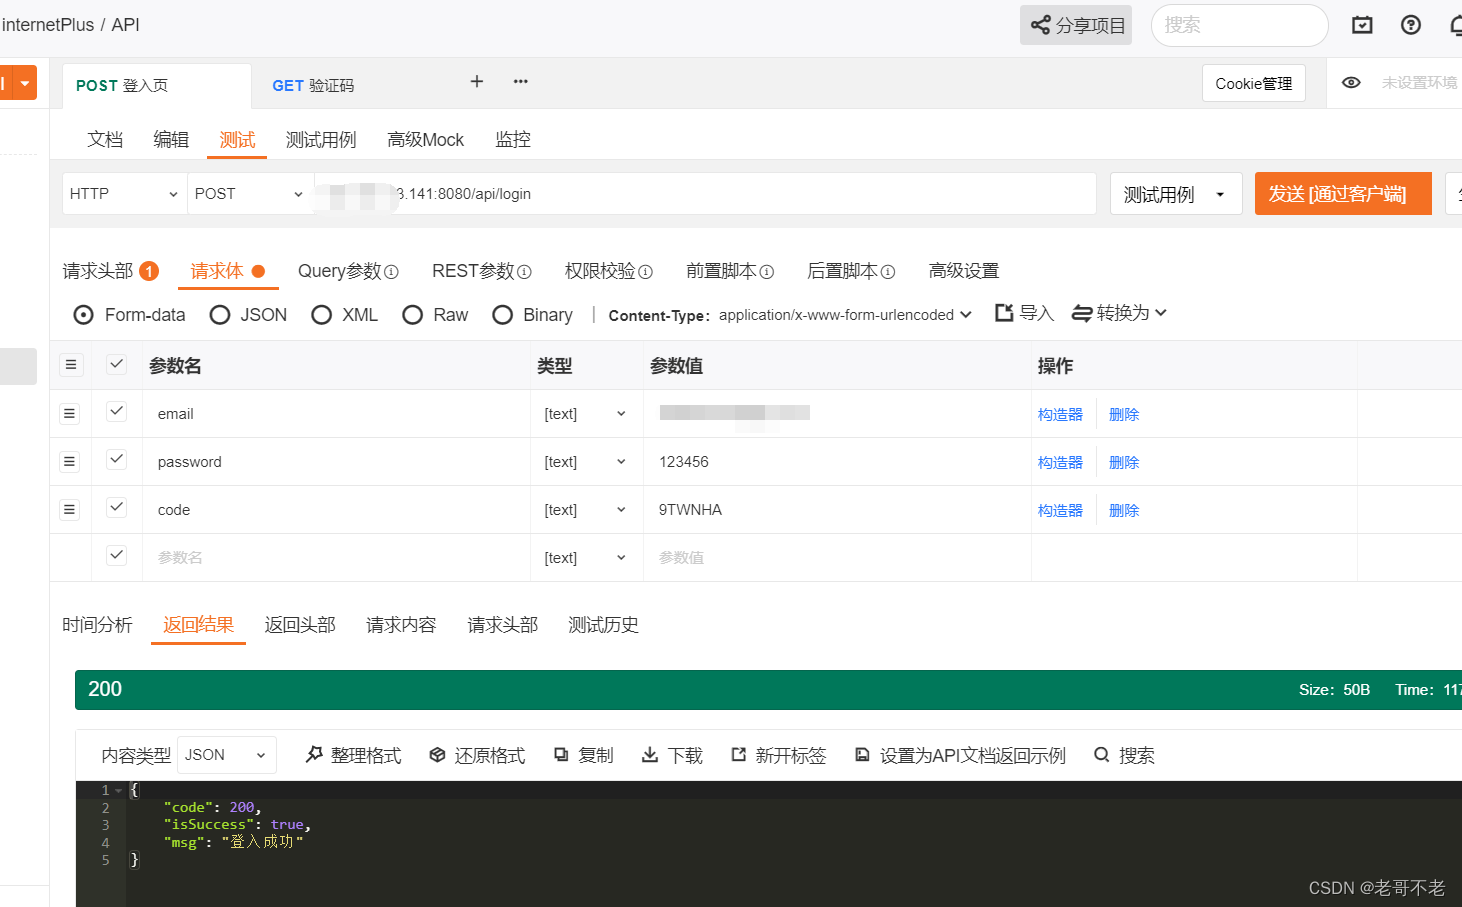
5、设计成功响应,以及失败相应
实现登入成功处理接口AuthenticationSuccessHandler
// 验证成功案例
@Component
public class SuccessAuthentication implements AuthenticationSuccessHandler {

    @Resource
    private IUserConfigService userConfigService;

    @Override
    public void onAuthenticationSuccess(HttpServletRequest request,
                                        HttpServletResponse response,
                                        Authentication authentication) throws IOException, ServletException {
        response.setContentType("text/json;charset=UTF-8");
        ServletOutputStream outputStream = response.getOutputStream();

        Result result = Result.ok(new String("登入成功"));

        outputStream.write(JSON.toJSONString(result).getBytes());//在这里设置需要返回的值,需要什么自己设定,正常会带上token,是json格式
        outputStream.flush();
        outputStream.close();
    }
}
实现登入失败处理接口AuthenticationFailureHandler
// 验证失败案例
@Component
public class FailAuthentication implements AuthenticationFailureHandler {

    private Result result;

    public void setResult(Result result){
        this.result = result;
    }

    public FailAuthentication(){
    //默认方式
        this.result = Result.error(new String("登入失败"));
    }

    /**
     *
     * @param request 请求应答
     * @param response 应答对象
     * @param e
     * @throws IOException
     * @throws ServletException
     */
    @Override
    public void onAuthenticationFailure(HttpServletRequest request,
                                        HttpServletResponse response,
                                        AuthenticationException e) throws IOException, ServletException {

        ServletOutputStream outputStream = response.getOutputStream();

        //处理编码方式,防止中文乱码的情况
        response.setContentType("application/json;charset=utf-8");

        outputStream.write(JSON.toJSONString(result).getBytes());
        outputStream.flush();
        outputStream.close();
    }
}
6、MySecurityConfig (类名,随便取,注重规范就行)实现WebSecurityConfigurerAdapter接口
这个类最主要的功能就是授权、认证(包括对接口、静态资源、其他URL的授权、认证),还有一些其他的配置,反正他就是一个配置类。
/**
 * @EnableGlobalMethodSecurity:启动方法级别的认证
 *      (prePostEnabled = true):默认是false
 *          true:表示可以启@PreAuthorise注解和 @PostAuthorise
 */
@Configuration
@EnableWebSecurity
@EnableGlobalMethodSecurity(prePostEnabled = true)
// 开启基于方法的安全认证机制,也就是说在web层的controller启用注解机制的安全确认
// 只有加了@EnableGlobalMethodSecurity(prePostEnabled=true) 那么在上面使用的 @PreAuthorize(“hasAuthority(‘admin’)”)才会生效
public class MyWebSecurityConfig extends WebSecurityConfigurerAdapter {

	// 这个接口实现了用户名的认证
    @Resource
    private MyUserConfigDetailService myUserConfigDetailService;

	// 注入成功案例
    @Resource
    private AuthenticationSuccessHandler authenticationSuccessHandler;

	// 注入失败案例
    @Resource
    private AuthenticationFailureHandler authenticationFailureHandler;

    /**
     * 用于对认证进行处理(核心)
     * <p>
     * AuthenticationManager: 用于认证的核心接口.
     * AuthenticationManagerBuilder: 用于构建AuthenticationManager接口对象的工具.
     * ProviderManager: AuthenticationManager接口的默认实现类.
     *
     * @param auth
     * @throws Exception
     */
    @Override
    protected void configure(AuthenticationManagerBuilder auth) throws Exception {
        //        内置(默认)的认证规则:
        auth.userDetailsService(myUserConfigDetailService).passwordEncoder(new BCryptPasswordEncoder());
    }

    @Override
    protected void configure(HttpSecurity http) throws Exception {

        http.cors().and().csrf().disable();//前后端分离跨域问题

        // 登录页面相关配置
        http.authorizeRequests().and().formLogin()//允许表单登录
                .loginPage("/api/login") //自定义登录页面
                .usernameParameter("email")//使用自定义的username
                .successHandler(authenticationSuccessHandler) //登录成功处理逻辑
                .failureHandler(authenticationFailureHandler); //登录失败处理逻辑

        http.authorizeRequests()
                // 对某个接口,需要该账号有什么样的角色
                .antMatchers("/api/normal/**").hasAnyRole("normal","admin","superAdmin")
                .antMatchers("/api/admin/**").hasAnyRole("admin","superAdmin")
                .antMatchers("/api/superAdmin/**").hasAnyRole("superAdmin")
                .and()
                .formLogin();
    }

    /**
     * 用于配置一些拦截的资源
     *
     * @param web
     * @throws Exception
     */
    @Override
    public void configure(WebSecurity web) throws Exception {
        //忽略resources 下的所有静态资源
        web.ignoring().antMatchers("/static/**", "/static/index.html", "/index.html","/ap1/login");
    }
}
6、测试